About this document
This document provides a step-by-step procedure to configure SSO in SAFE with Duo.
Configure SSO with Duo
- Log in to your Duo Administration Console.
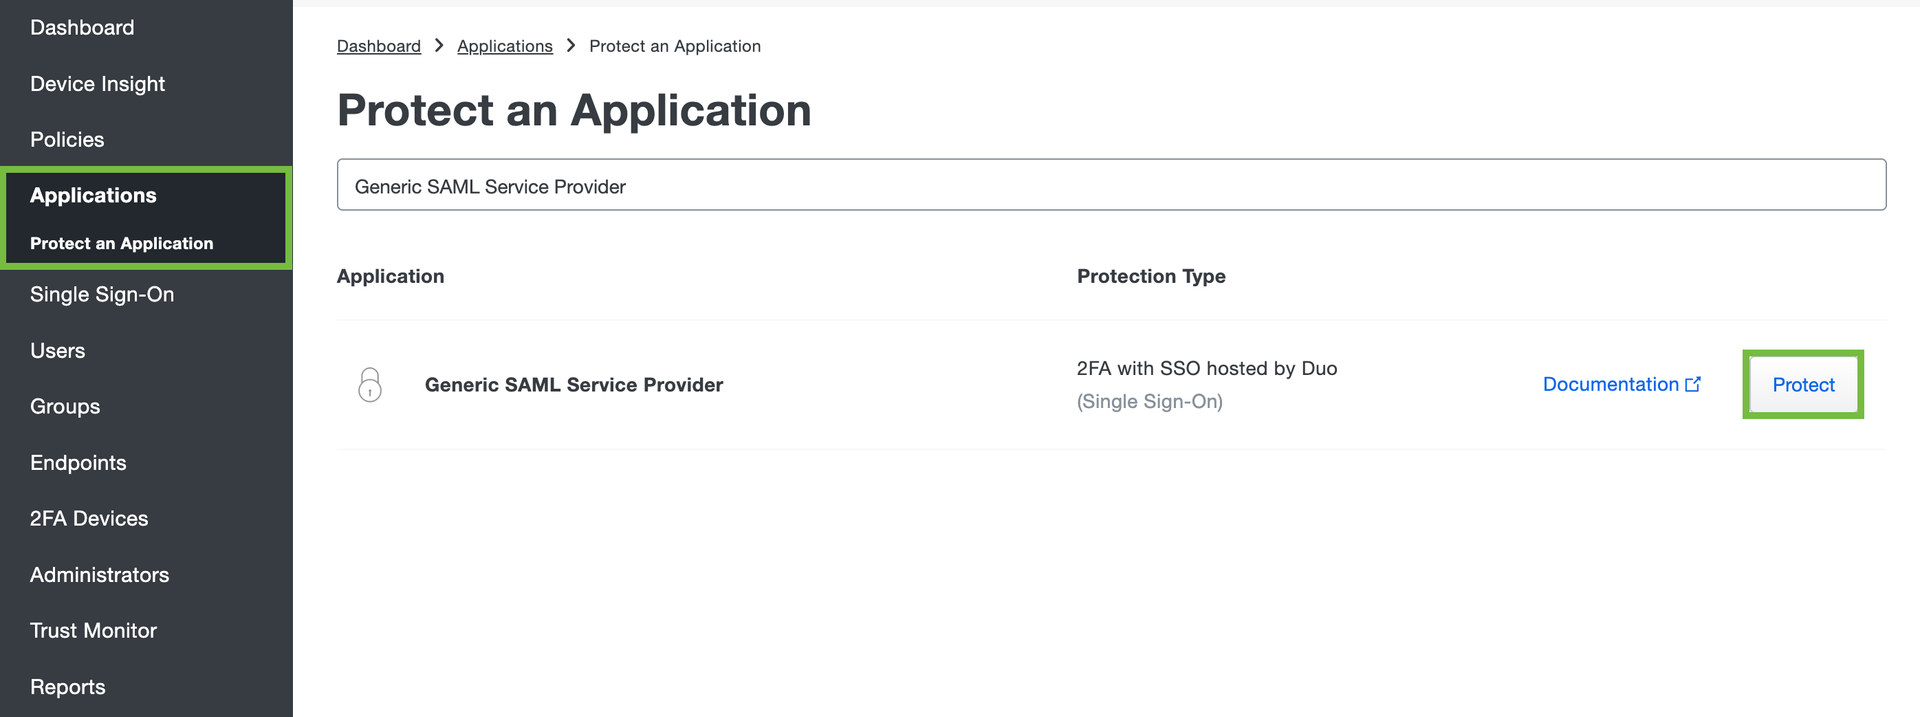
- Navigate to the Applications tab and click Protect an Application from left navigation.

- Search for Generic Service Provider. Based on the Authentication source in your Duo application, the system displays two options:
- If you see the Configure button on the right, it means that you haven’t configured an authentication source yet. Please follow the steps in the documentation to configure an authentication source.
- If you see the Protect button on the right, it means that you have already configured an authentication source and can proceed with protecting the SAFE application in Duo.
Protecting SAFE application in Duo
- Click on the Protect button on the right.
- Directly scroll down to the Service Provider section.
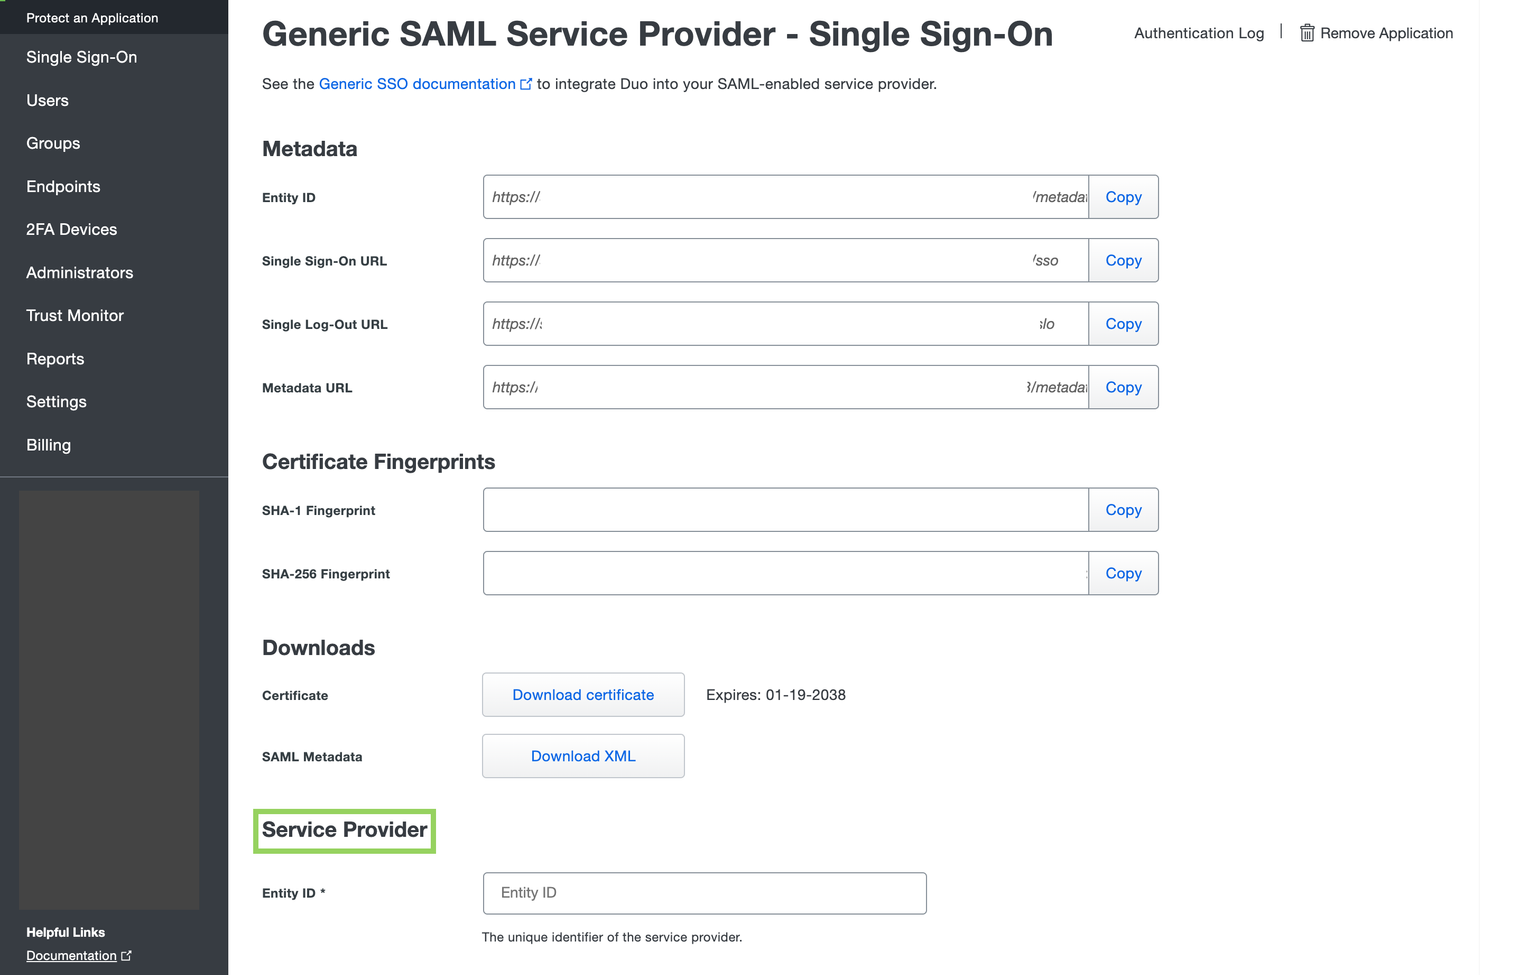
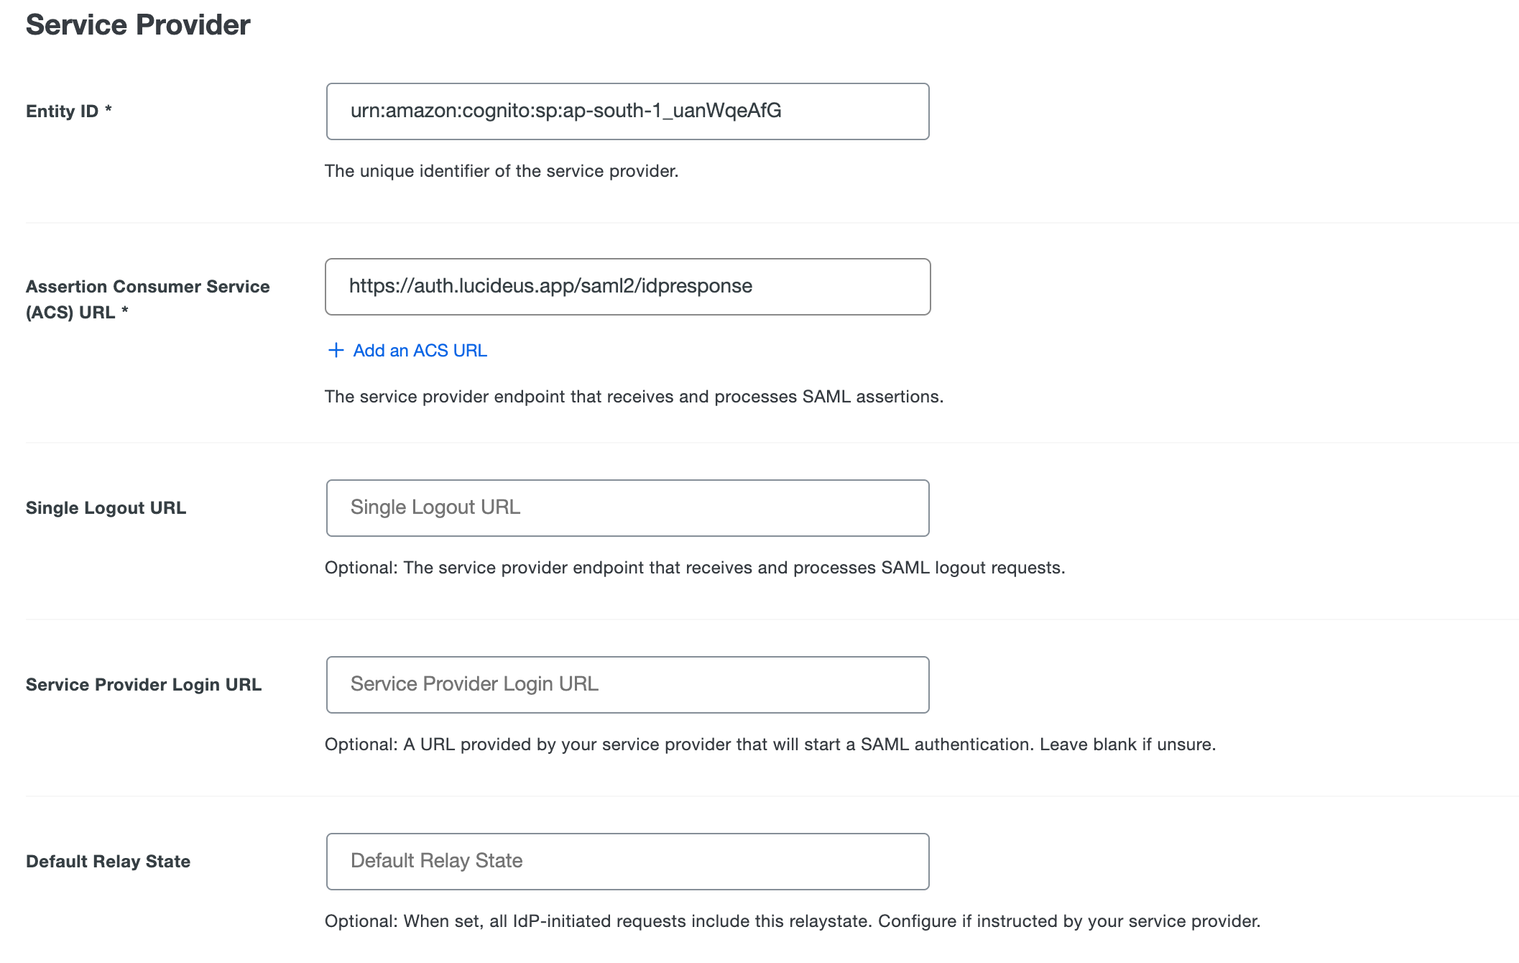
- In the Service Provider section, provide the below information:
- Entity ID: Select the correct entity id for your regional instance.
- Assertion Consumer Service (ACS) URL: Select the correct Reply URL for your regional instance.
- Single Logout URL: Leave as blank
- Service Provider Login URL: Leave as blank
- Default Relay State: Leave as blank
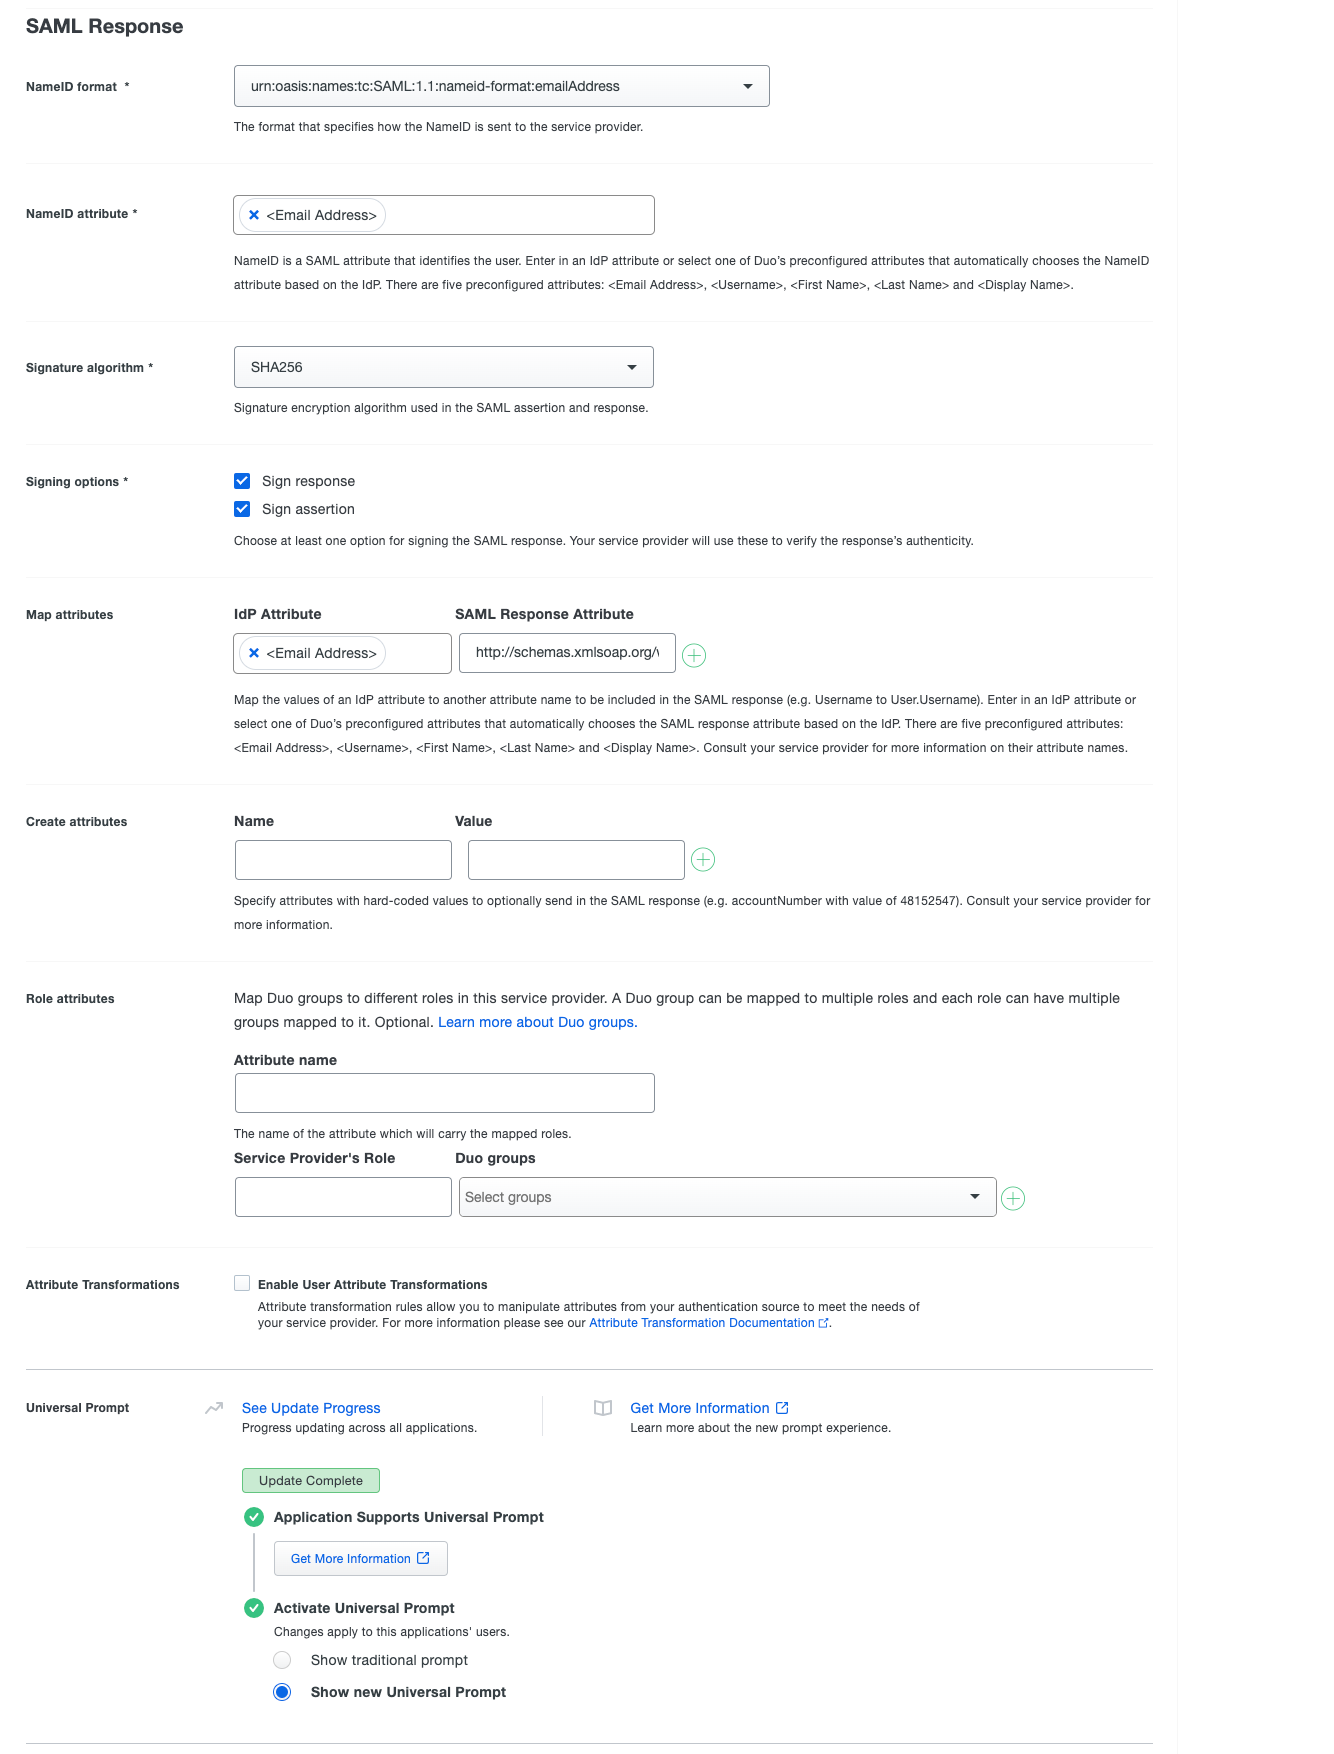
- In the SAML Response section, provide the below information:
- NameID format: urn:oasis:names:tc:SAML:1.1:nameid-format:emailAddress
- NameID attribute: Select <Email Address>.
- Signature algorithm: Select SHA256.
- Signing options: Select both the below options:
- Sign response
- Sign assertion
- Map attributes: Refer to the table for details.
- Create attributes: Leave as Blank.
- Role attributes: Leave as Blank.
- AttributeTransformations: Leave as Blank.
- Universal Prompt: No changes required.
- In the Policy section, you can leave it as default or define it as required.
- In the Settings section, you can leave it as default or make changes such as Name, etc.
- Click on the Save button at the bottom of the page.
- After saving the application successfully, go back to the Downloads section and click on the Download XML to download the XMLMetadata file.

- Now, create a service request to the SAFE support team with the SAML data (file downloaded above) to enable the SSO.
Map Attributes
| IdP Attribute | SAML Response Attribute |
|---|---|
| <Email Address> | http://schemas.xmlsoap.org/ws/2005/05/identity/claims/emailaddress |
| <First Name> | http://schemas.xmlsoap.org/ws/2005/05/identity/claims/givenname |
| <Last Name> | http://schemas.xmlsoap.org/ws/2005/05/identity/claims/surname |