Create a Custom Dashboard
SAFE allows you to create Private and Global Dashboards.
- Private Dashboard: Visibility of this dashboard is restricted to you.
- Global Dashboard: It will be visible to all SAFE users.
To create a Custom Dashboard:
- Navigate to Dashboards.
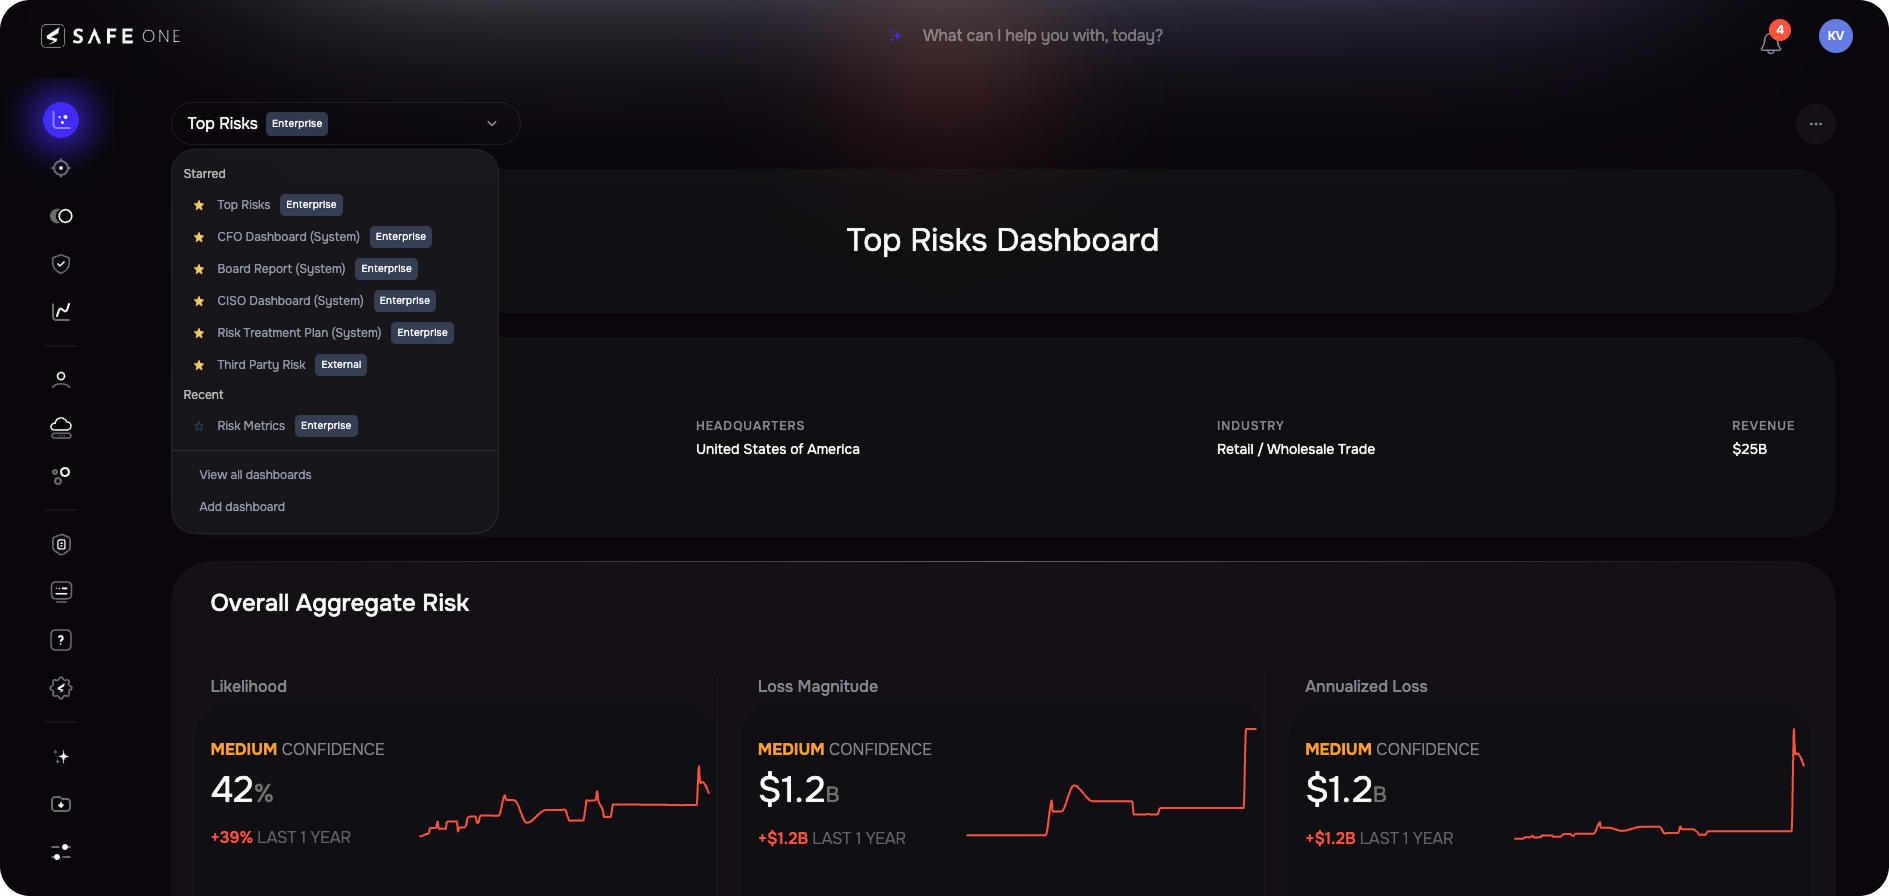
- Click the drop-down arrow adjacent to the dashboard name.
- Click the Add Dashboard option.
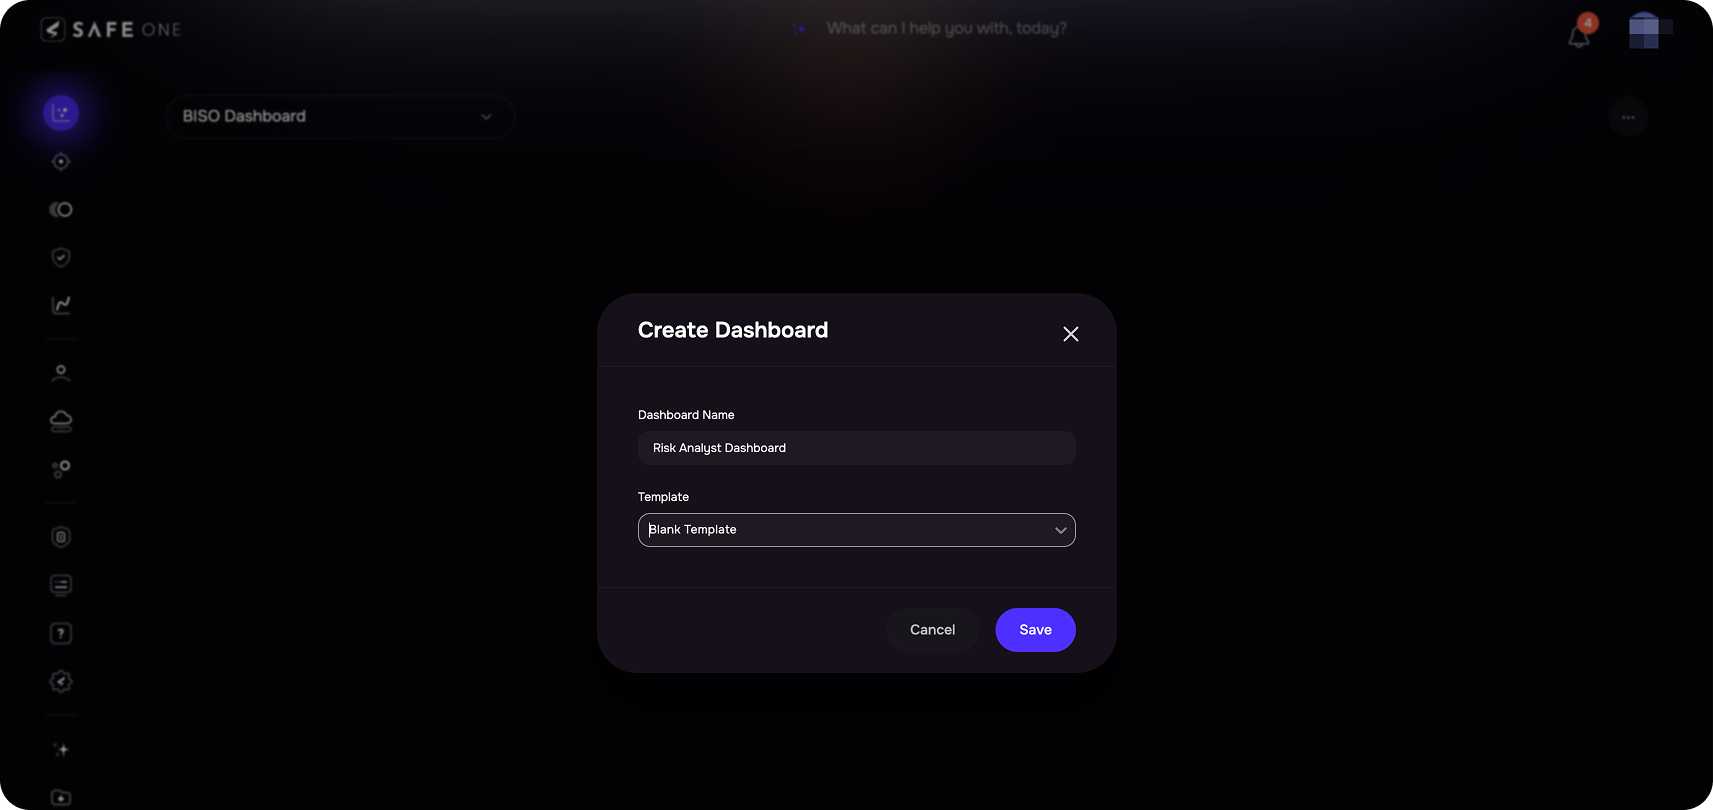
- Enter a name for your dashboard.
- Select a template from the drop-down.
- SAFE enables the creation of dashboards using predefined templates, including one specifically designed for configuring an SEC Materiality Report.
- Select the Blank Template option from the drop-down menu if you prefer to start with a blank canvas.
- Click the Save button.

- If you wish to restrict the visibility of this dashboard solely to yourself, mark the Make Private checkbox.
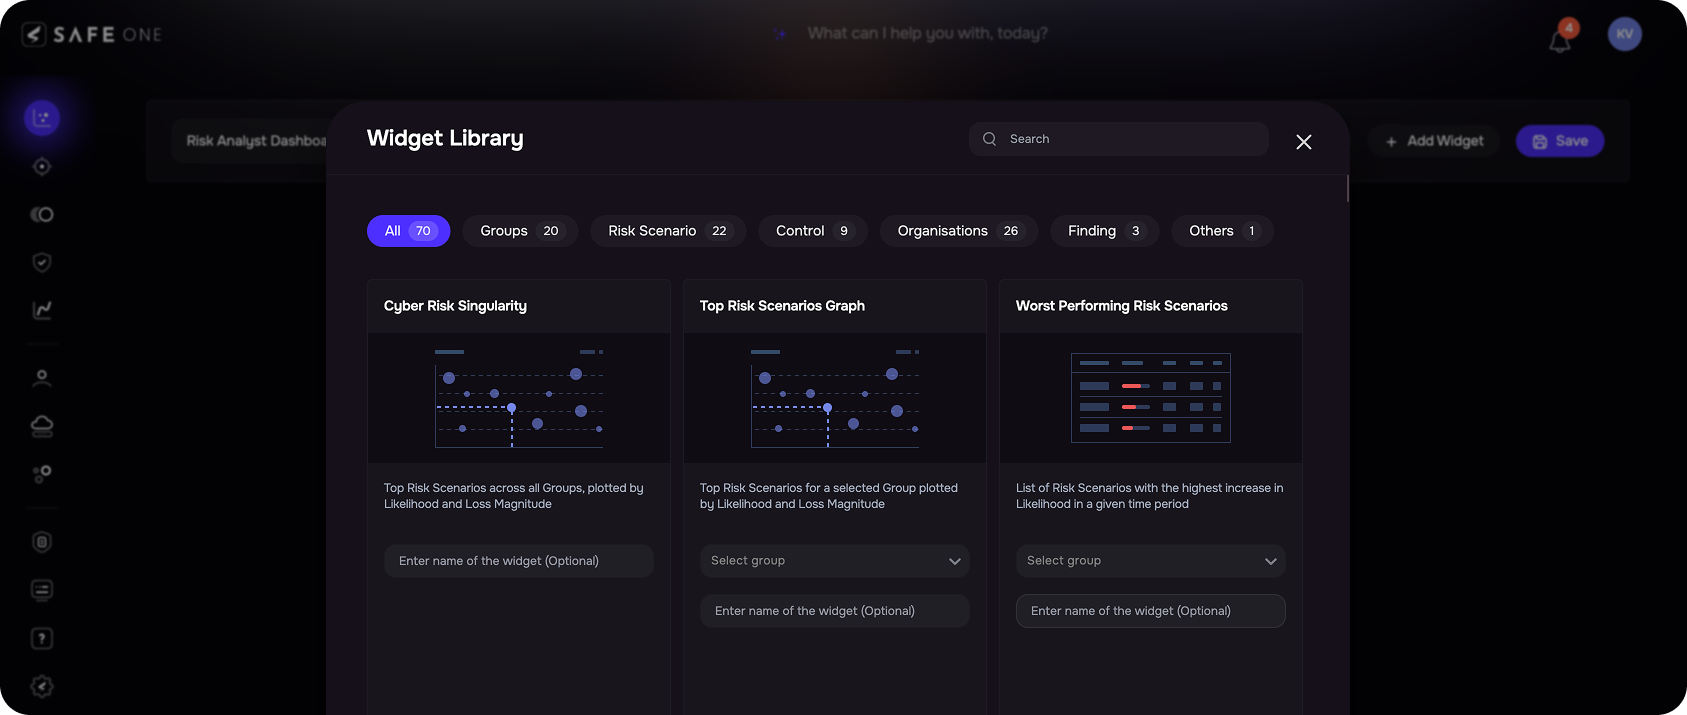
- Click the +Add Widget button to include the necessary widgets for your dashboard. The system opens the Widget Library.
- On the Widget Library page, select a Group and/or Risk Scenarios from the drop-down for a widget.
- (Optional) You may name the widget or edit its existing name. The widget name can be up to 200 characters.
- Click the Add button. The system notifies you of the successful addition of the widget.
- Add multiple widgets based on your business requirements.
- Click the Close button available on the bottom-left of the Widget Library page.Add Widget
- Rearrange the widgets by dragging them to the desired positions.
- Click the Save button. The system redirects you to the new dashboard you created.

View All Dashboard
- Navigate to the Dashboards.
- Click the drop-down arrow adjacent to the dashboard name.
- Click the All Dashboard option. The system opens up the dashboard list page.
- The system displays a list of all the dashboards. You can create a new dashboard and manage the existing dashboards from this page.

Star a Dashboard
To enhance your dashboard experience, you can mark certain dashboards as stars for quick access.
To Star a dashboard:
- Go to the All Dashboard page.
- Select the star icon next to the dashboard name.
- The system will automatically mark it as a Starred Dashboard.
Manage Dashboard
Edit a Dashboard
To edit a dashboard:
- Navigate to the Dashboard you want to edit.
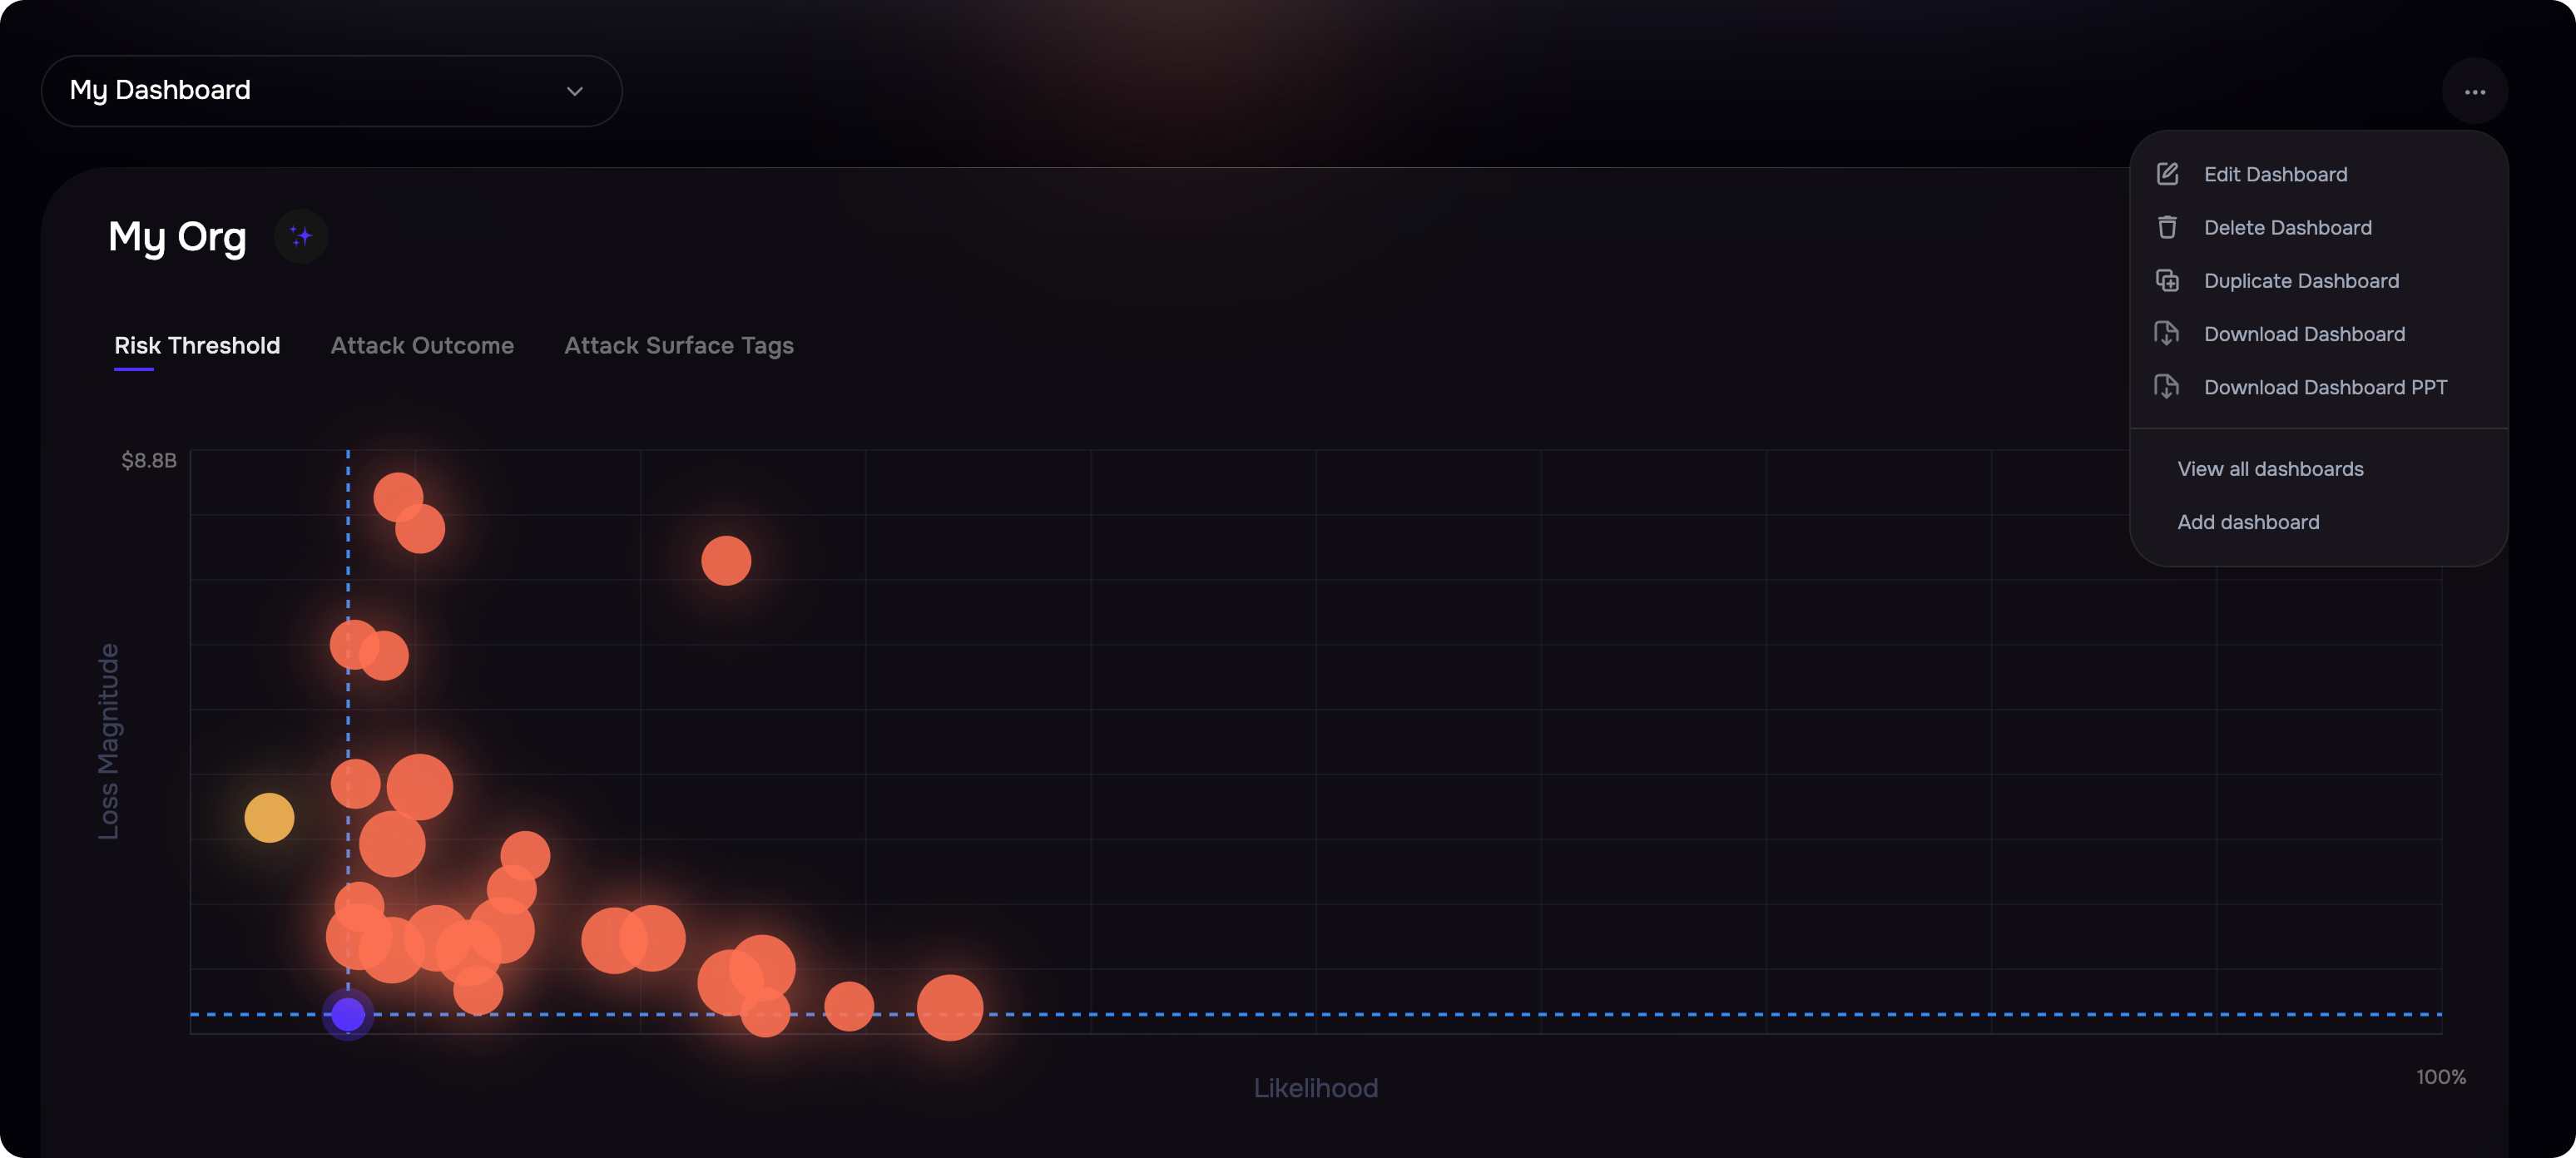
- Click the Settings icon available at the top-right of the dashboard and click the Edit option.
- Make the necessary changes to your dashboard.
- Click the Save button. The system redirects you to the dashboard.

Delete a Dashboard
To delete a dashboard:
- Navigate to the Dashboard you want to delete.
- Click the Settings icon available at the top-right of the dashboard and click the Delete option.
- On the confirmation screen, click the OK button.
Duplicate a Dashboard
To duplicate a dashboard:
- Navigate to the Dashboard you want to duplicate.
- Click the Settings icon available at the top-right of the dashboard and click the Duplicate option.
- Enter a name for the dashboard and click the Duplicate button.
Download a Dashboard to PDF
- Navigate to the dashboard you want to download.
- Click the three-dot option available at the top-right of the dashboard and click the Download PDF option.
- The system automatically downloads the dashboard in PDF format.
Download a Dashboard to PPT
- Navigate to the dashboard you want to download.
- Click the three-dot option available at the top-right of the dashboard and click the Download PPT option.
- The system automatically downloads the dashboard in PDF format.