About this document
This document describes the step-by-step procedure to configure Single Sign-On (SSO) for SAFE via Azure AD.
Introduction
Single Sign-On (SSO) enables organizations to use the SAML 2.0 authentication provider for authenticating login into SAFE. SAFE Admin can onboard and manage users right from their Azure AD SSO platforms, eliminating the need to maintain a separate user authentication mechanism for SAFE.
Configure SSO on Azure AD
To configure:
- Go to your Microsoft Azure AD Account.
- Create an ‘Enterprise Application’ in Azure Active Directory as follows:
- Click the "Enterprise Application" from the left menu. The system opens the Enterprise Application page.
.png)
- Click the "New application" button.
.png)
- Click the "Create your own application" button.
.png)
- Assign a name for your application. Your application will be created.NoteMake sure that your Enterprise Application is not restricted by any access policies, as it will cause the SSO to fail.
- Select the created application from the list.
.png)
- Click the "Enterprise Application" from the left menu. The system opens the Enterprise Application page.
- Add Users/Groups to your app in Azure AD as follows:
- Click the "Assign Users and Groups" button
.png)
- Click the Add user/group button.
.png)
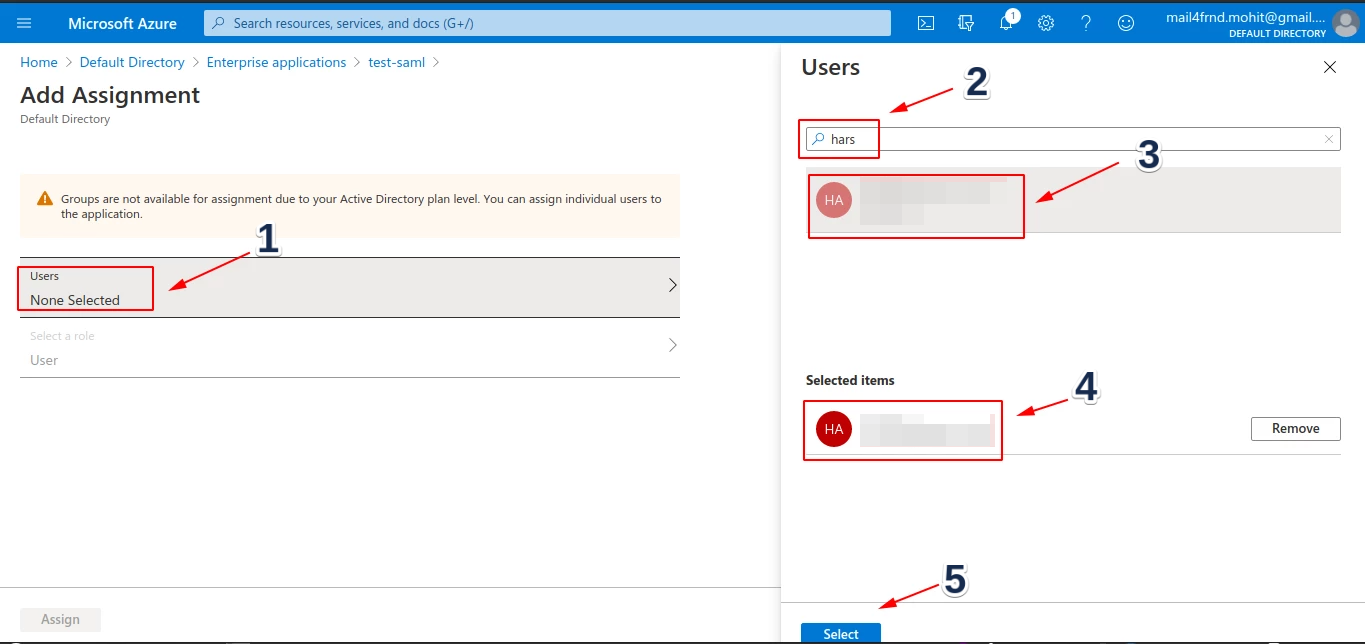
- Search and select the users.

- Once all the users are selected, click the Assign button.
.png)
- Click the "Assign Users and Groups" button
- Now, set up the Single Sign-On (SSO) as follows:
- Click the "Set up single sign-on" button.
.png)
- Select the SAML as a Single Sign-on method. The system opens a SAML configuration page. On this page:
.png)
- Enter the Identifier (Entity ID) for your region - details here.
- Enter the Reply URL (Assertion Consumer Service URL) for your region - details here.
.png)
- Click the "Set up single sign-on" button.
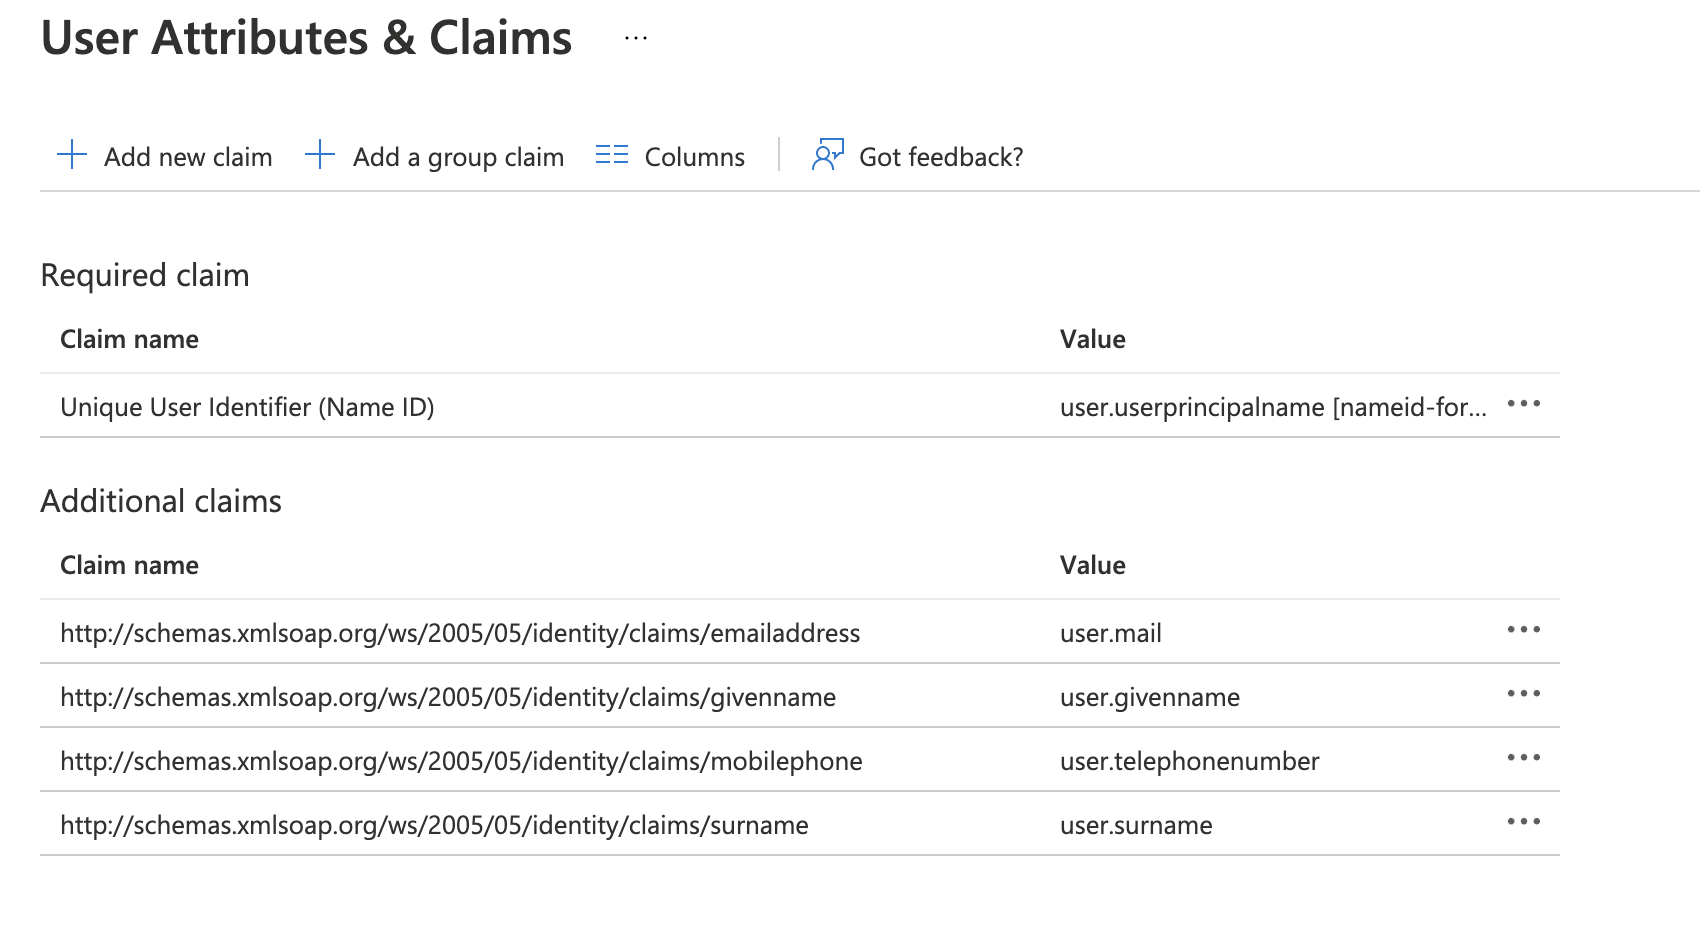
- To configure attribute mapping “Edit” the “User Attributes & Claims”.

- Add the attribute claims to synchronize these with the SAFE users as per the below screenshot.

- Download the SAML Metadata files (Federation Metadata XML) file.
.png)
- Share the Metadata file with the Safe Security service desk along with the domain/domains you wish to enable for SSO (e.g. @exampledomain.com).
Info
SAFE will use the email address for the purpose of SSO, usually mapped to the SAML attribute http://schemas.xmlsoap.org/ws/2005/05/identity/claims/emailaddressservice desk