About this document
This document provides the step-by-step procedure for configuring GitLab in SAFE.
Introduction
SAFE integrates with GitLab and fetches the security misconfiguration of the GitLab account in SAFE.
Prerequisites
GitLab Admin Access
Required User Inputs:
API URL
Access Token
Asset Name in SAFE (optional)
Required Scope:
read_api
Generate Connection Details
Generate Access Token
Log in to your GitLab account as Admin.
.png "1(21).png")
From the left sidebar, click on your Avatar.
Click on the Edit profile option.
.png "2(19).png")
Click on Access Tokens from the left navigation.
.png "3(18).png")
Click on the Add new token button.
Enter a Token name.
Select the read_api permissions from the Select Scopes section.
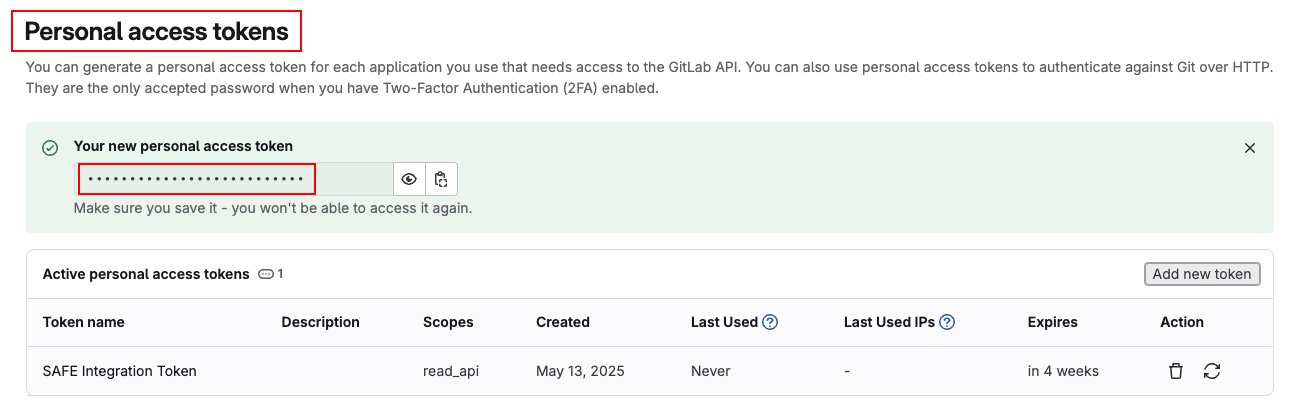
Click on the Create personal access token button.
Select the expiry date for the token. It's important to regularly update the API Token in SAFE according to its expiration date.
.png "4(16).png")
The system displays the access token. Copy and save the token to use while configuring GitLab in SAFE.
Get the API URL
Access the GitLab API documentation by clicking on the provided link.
Upon reaching the GitLab API documentation page, locate the section titled as "How to use the API".
In the exhibit provided, find the base URL highlighted as 3. Copy and save the value and add “https://” to form the API Base URL. Use it while configuring GitLab in SAFE.
.png "6(18).png")
Configure GitLab in SAFE
Log in to your SAFE account as Admin.
Click on the Integrations option from the left navigation.
Scroll to find the GitLab integration card or search for GitLab in the search bar.
.png "7(16).png")
Hover over the GitLab integration card and click on the Configure button.
Enter the following:
API URL
Access Token
Asset Name in SAFE (optional) - Provide a unique identifier that can uniquely identify the asset
Enter the Auto Sync Frequency.
Click on the Test Connection button.
Once the connection is successful, click on the Save button.
.png "8(18).png")
Once the configuration is saved successfully, click on the Sync Now button to trigger an on-demand sync.
.png "9(18).png")
Upon a successful sync, the system pulls the GitLab assets and their findings in SAFE. You can track the status of the sync in the History table.
View Results
Go to the integration homepage.
Scroll to find the GitLab integration card or search for GitLab in the search bar.
Click on the GitLab integration card for Finding View and Asset View.
Finding View: This tab displays all the findings details fetched from GitLab.
.png "10(16).png")
Asset View: This tab displays all the assets pulled from GitLab.
.png "11(13).png")
History
Learn More about Integration History here.
SAFE's Outgoing IP Addresses
Click here to find the outgoing IP addresses of SAFE. All traffic to any integrations in SAFE will see one IP address as the source IP of the incoming connection.