About this document
This document outlines a detailed process for setting up integrations in SAFE using APIs. Unlike the user interface method, which only permits onboarding a single account per integration, this advanced approach allows you to onboard multiple accounts in SAFE. Following these steps, you can seamlessly connect with other tools and streamline your integration process.
Prerequisite
- SAFE API Credentials (Refer to Accessing SAFE REST APIs)
- Connection details for establishing a particular integration. Mostly it is the API URL, username, and password. Suppose you want to integrate with Qualys SCA; then you need the Qualys SCA API URL, Username, and Password.
SAFE APIs to be used
The following SAFE REST APIs will be used to establish an integration via APIs.
- GET /api/v3/integrations/products: This provides the integration meta details of all the product integrations supported in SAFE
- GET /api/v3/integrations/products/{id}: This return all the metadata of a specific product integration.
- POST /api/v3/integrations/test: This is used to test the connection. It takes type, subtype, and config in the request payload.
- POST /api/v3/integrations: It saves the integration details.
- POST /api/v3/integrations/{id}?action={action}: This starts sync between the SAFE and another tool.
- PATCH /api/v3/integrations/{id}; used to update the integration details.
- DELETE /api/v3/integrations/{id} : is used to delete an integration.
- GET /api/v3/integrations/{id}/history: is used to track the integration history.
Configure an Integration
Step 1: Get integration details
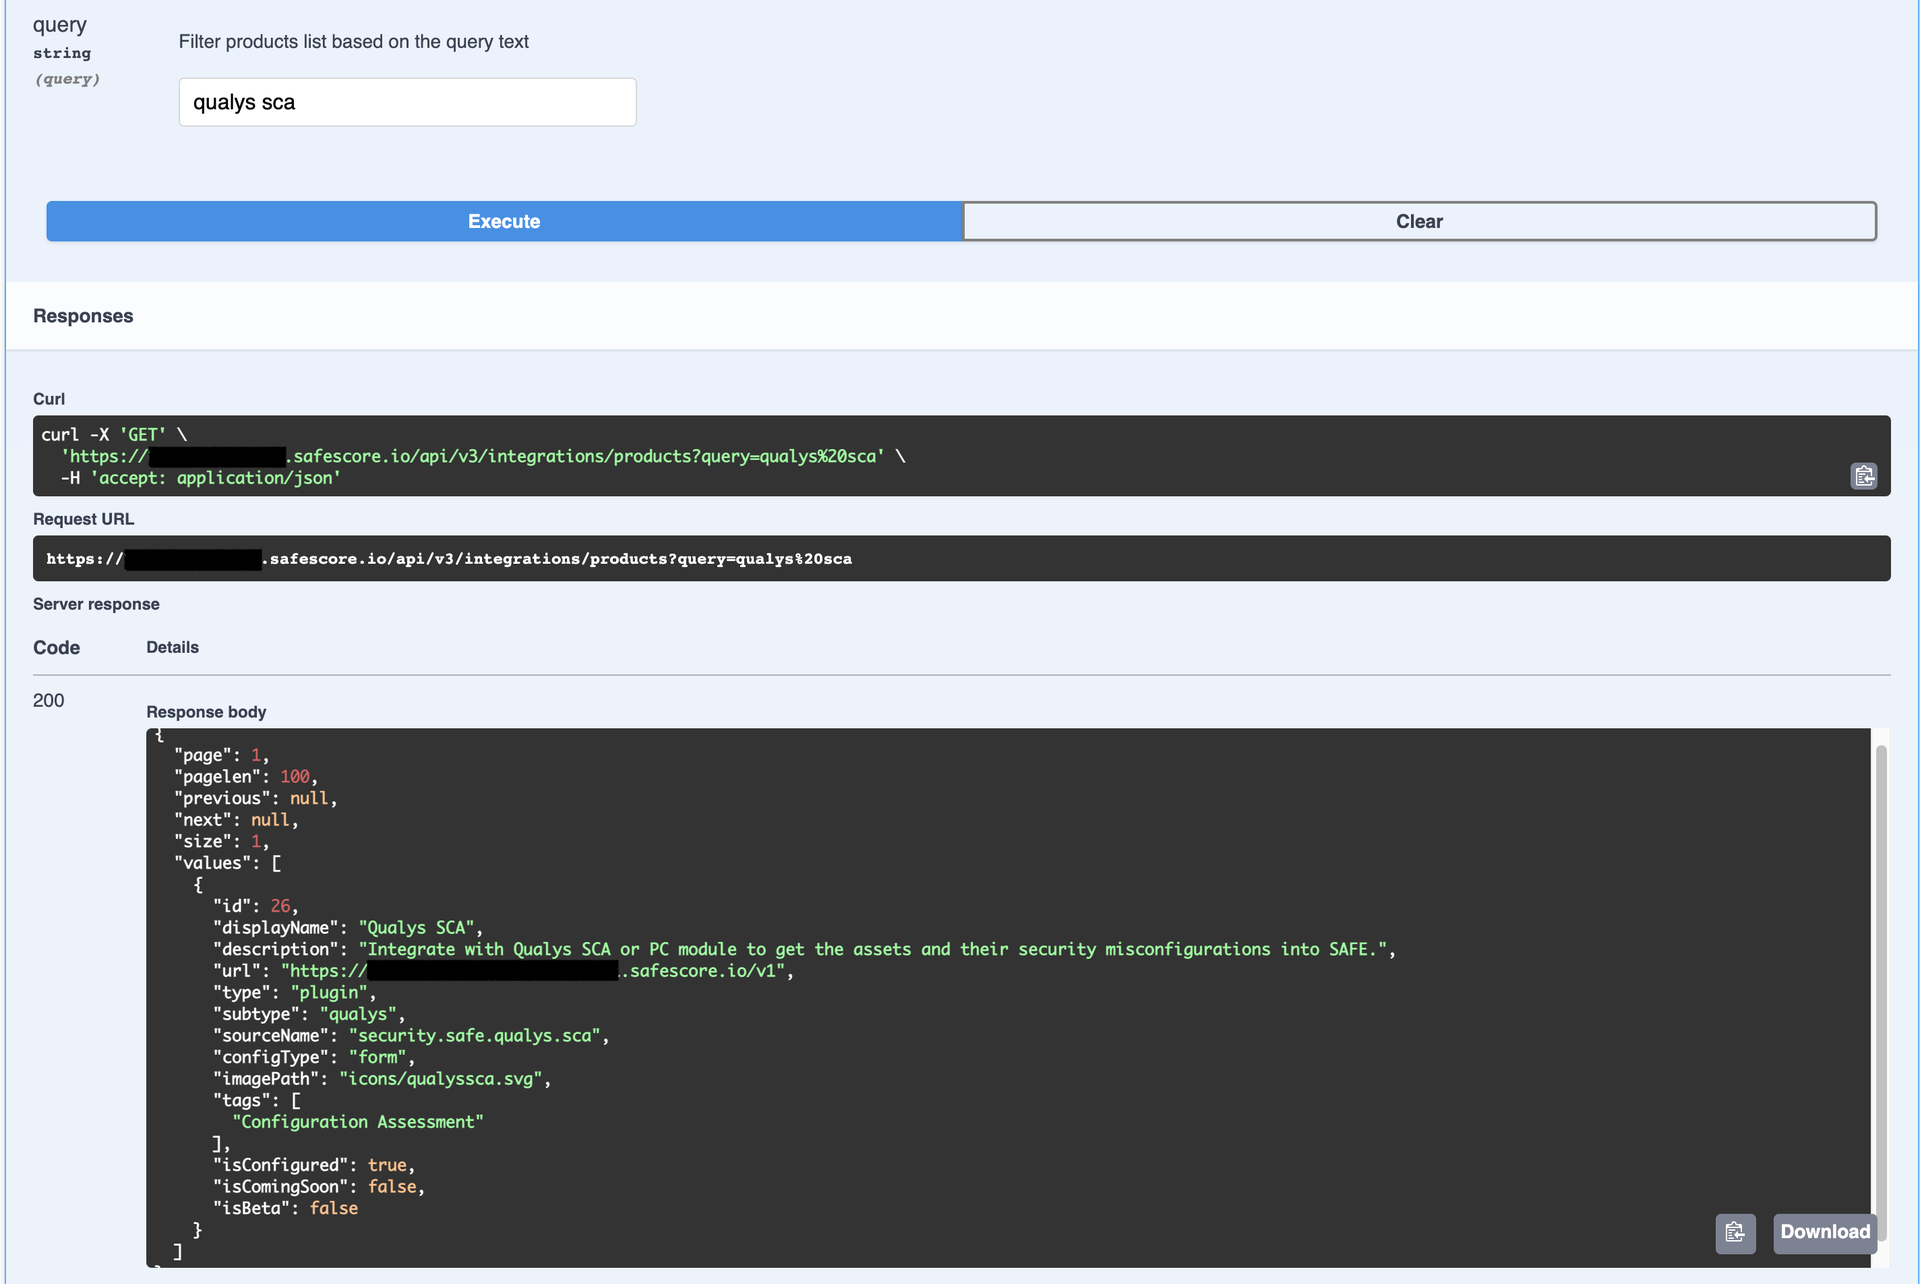
First, run the API GET /api/v3/integrations/products. This API returns the integration meta details of all the product integrations supported in SAFE. Search and get the meta details for the integration you are looking for. You will get the ID for the integration product in the result.
For example, if you want to integrate with Qualys SCA, you can search for the Qualys SCA. You can see the details that display the type as "plugin" and the subtype as "qualys". Note the ID of this supported product integration, which is 26 in this case, and use it to get the configSchema to set the configuration details. While using the above API, you can also narrow down the result by adding a query string as "qualys sca".
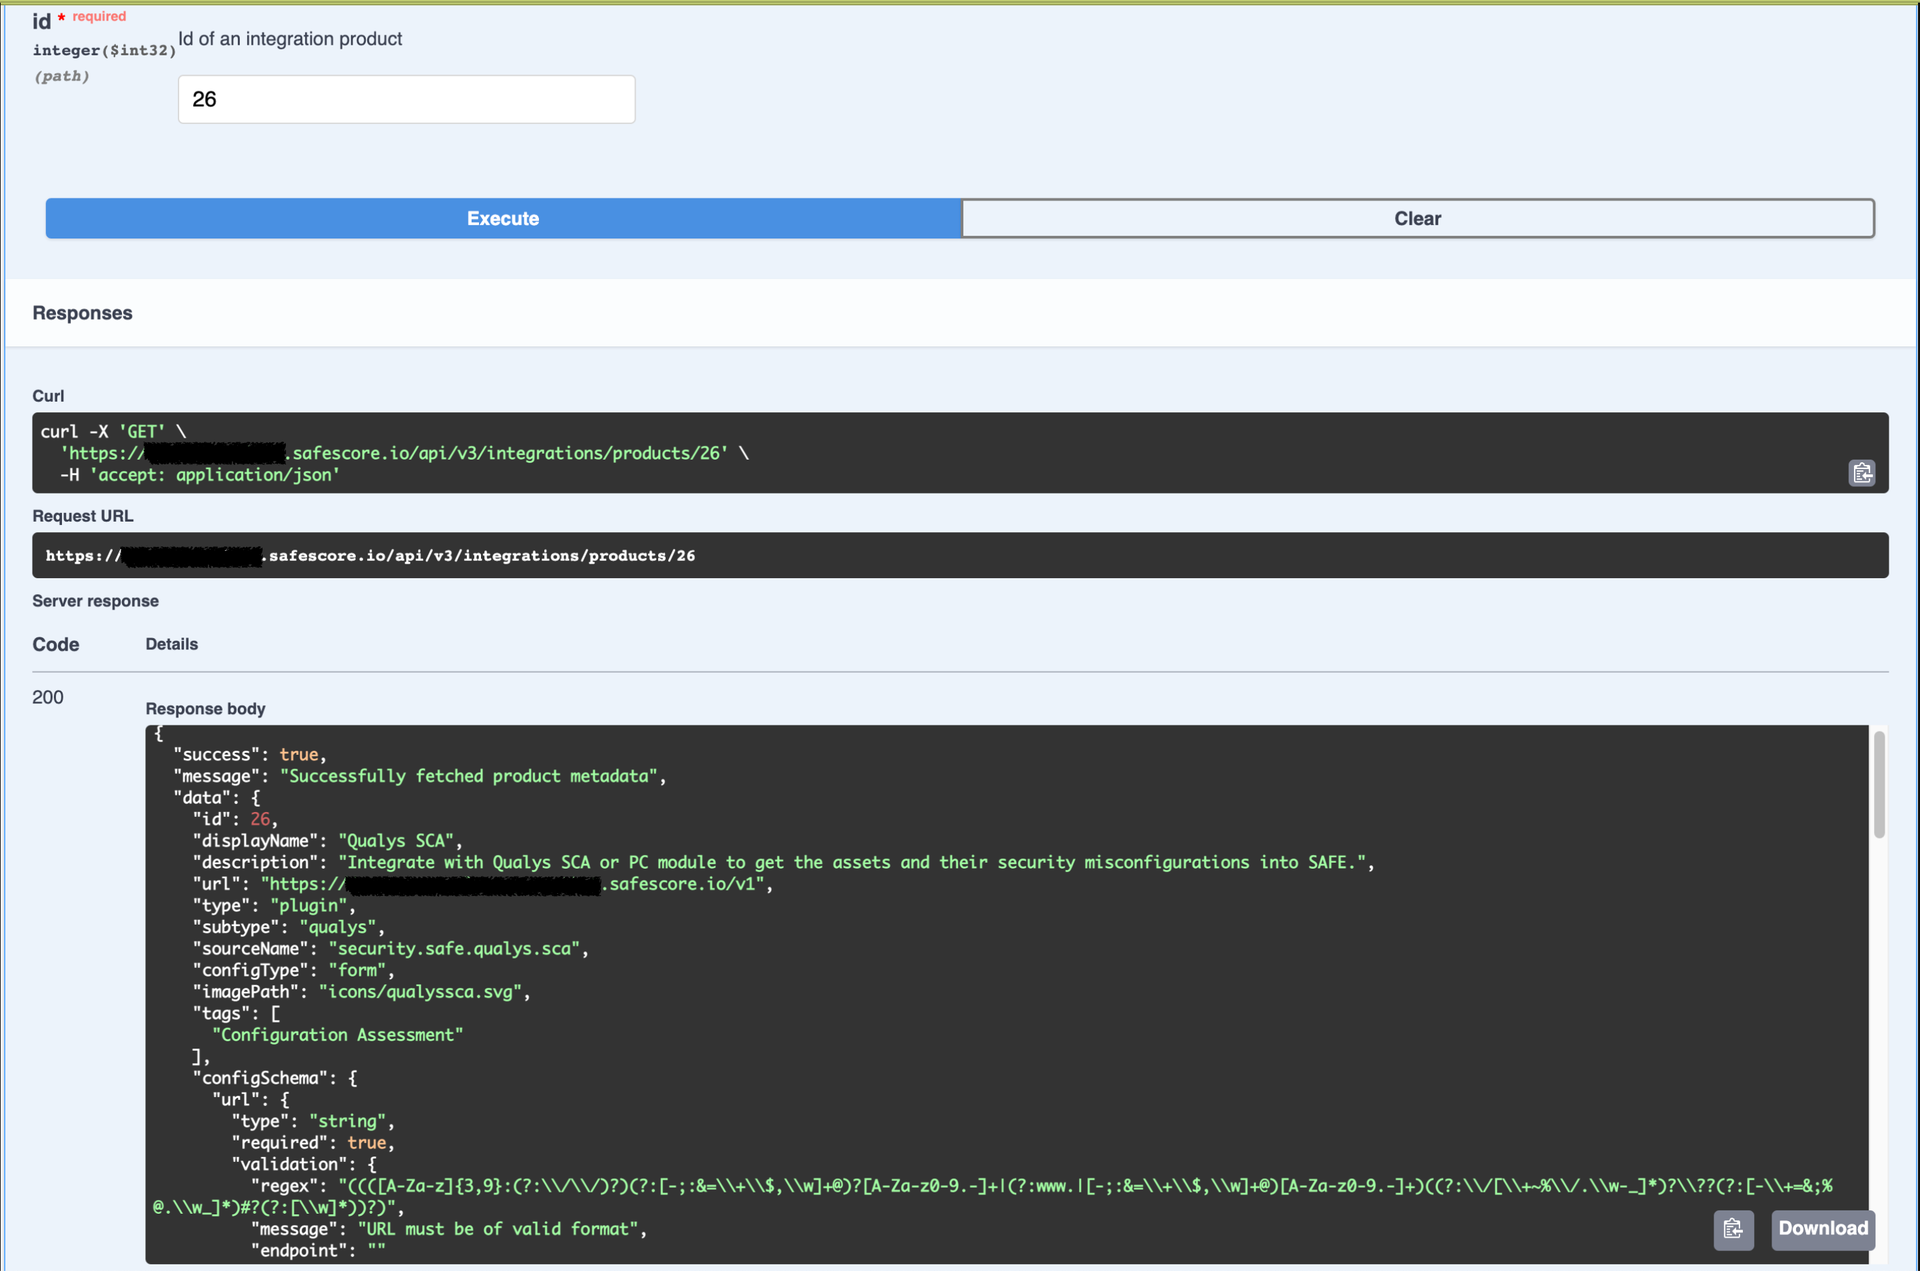
For the noted ID, request API GET /api/v3/integrations/products/{id}, which will return all the metadata of that product integration. This comprises of configSchema, which includes the list of all supported fields in the config object and the corresponding metadata of each field. These fields must be set in the config object of the request payload to create/update the integration account. The most common fields would be URL, username, and password.
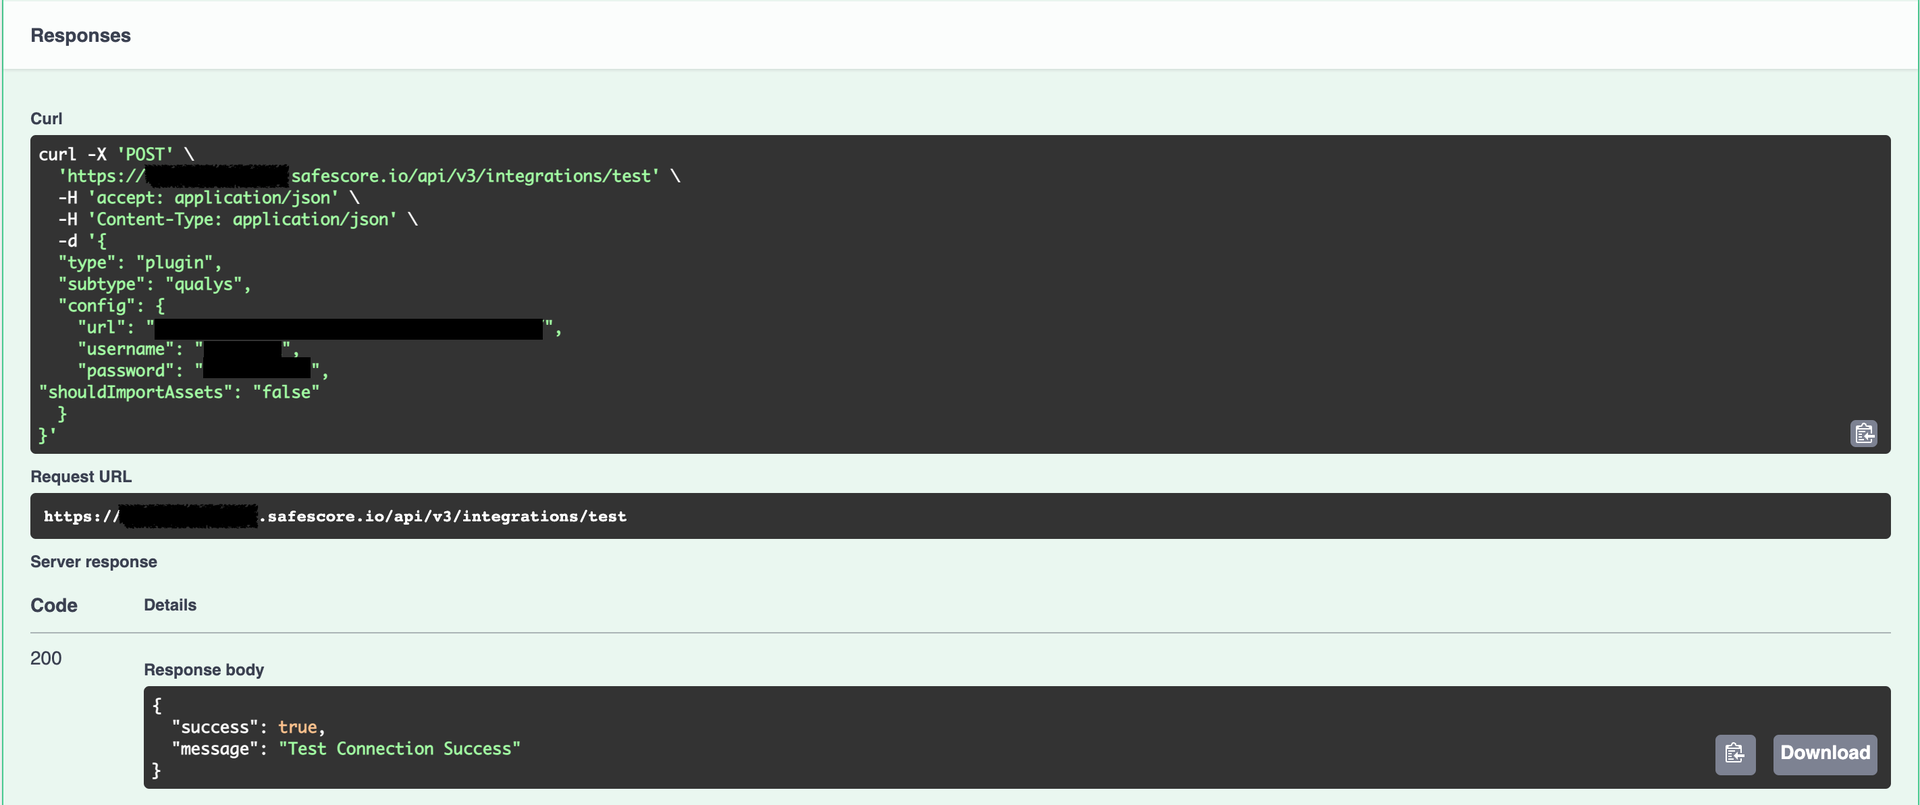
Step 2: Testing the Connection
This step tests the integration account details to ensure that SAFE can connect to the integration's endpoint with the provided configuration. To do this, use the API POST /api/v3/integrations/test, which takes the type, subtype, and config (URL, username, and password) in the request payload. Once the test connection succeeds, the status of the test connection response is as shown below.
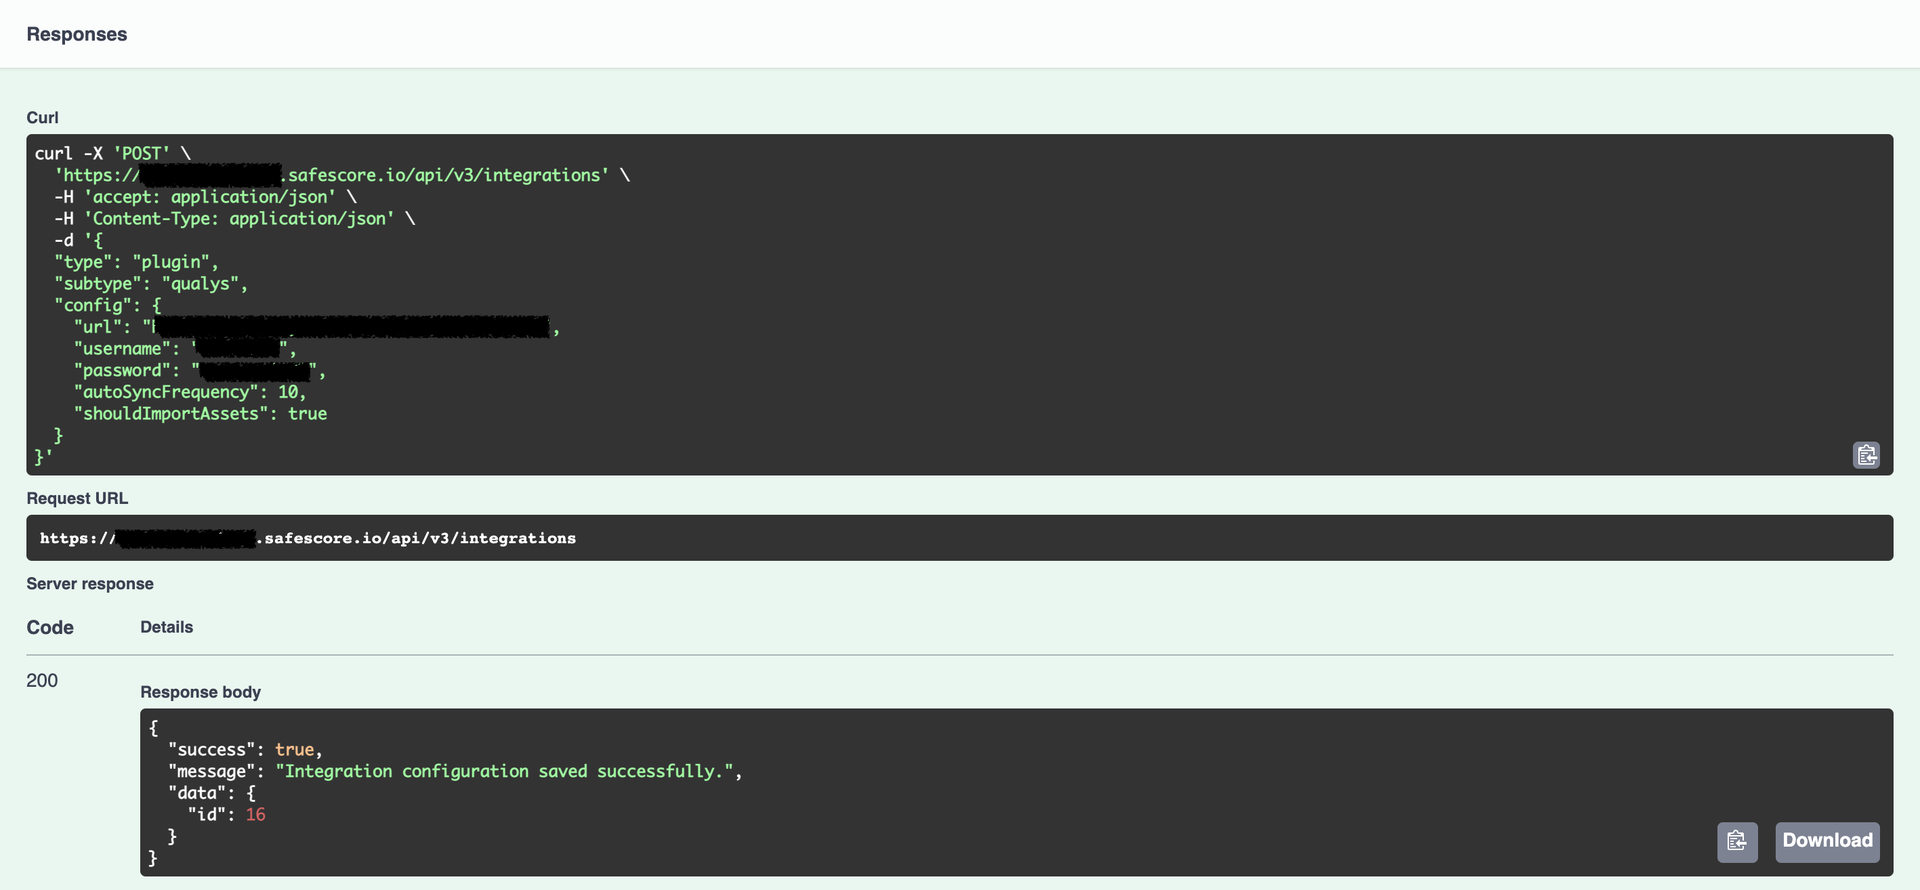
Step 3: Saving the Integration Details
Use the API POST /api/v3/integrations to save the integration information. The request payload should be the same as the test connection API. You can also include additional fields like assetMatchingCriteria and shouldImportAssets in the config object, whose significance is well-documented in the API Documentation. This API supports all the input fields accessible through the integration UI. Once you have successfully submitted a POST request to the above API, you will receive an ID in response. You can use this ID to update, delete or perform additional actions on the added integration account.
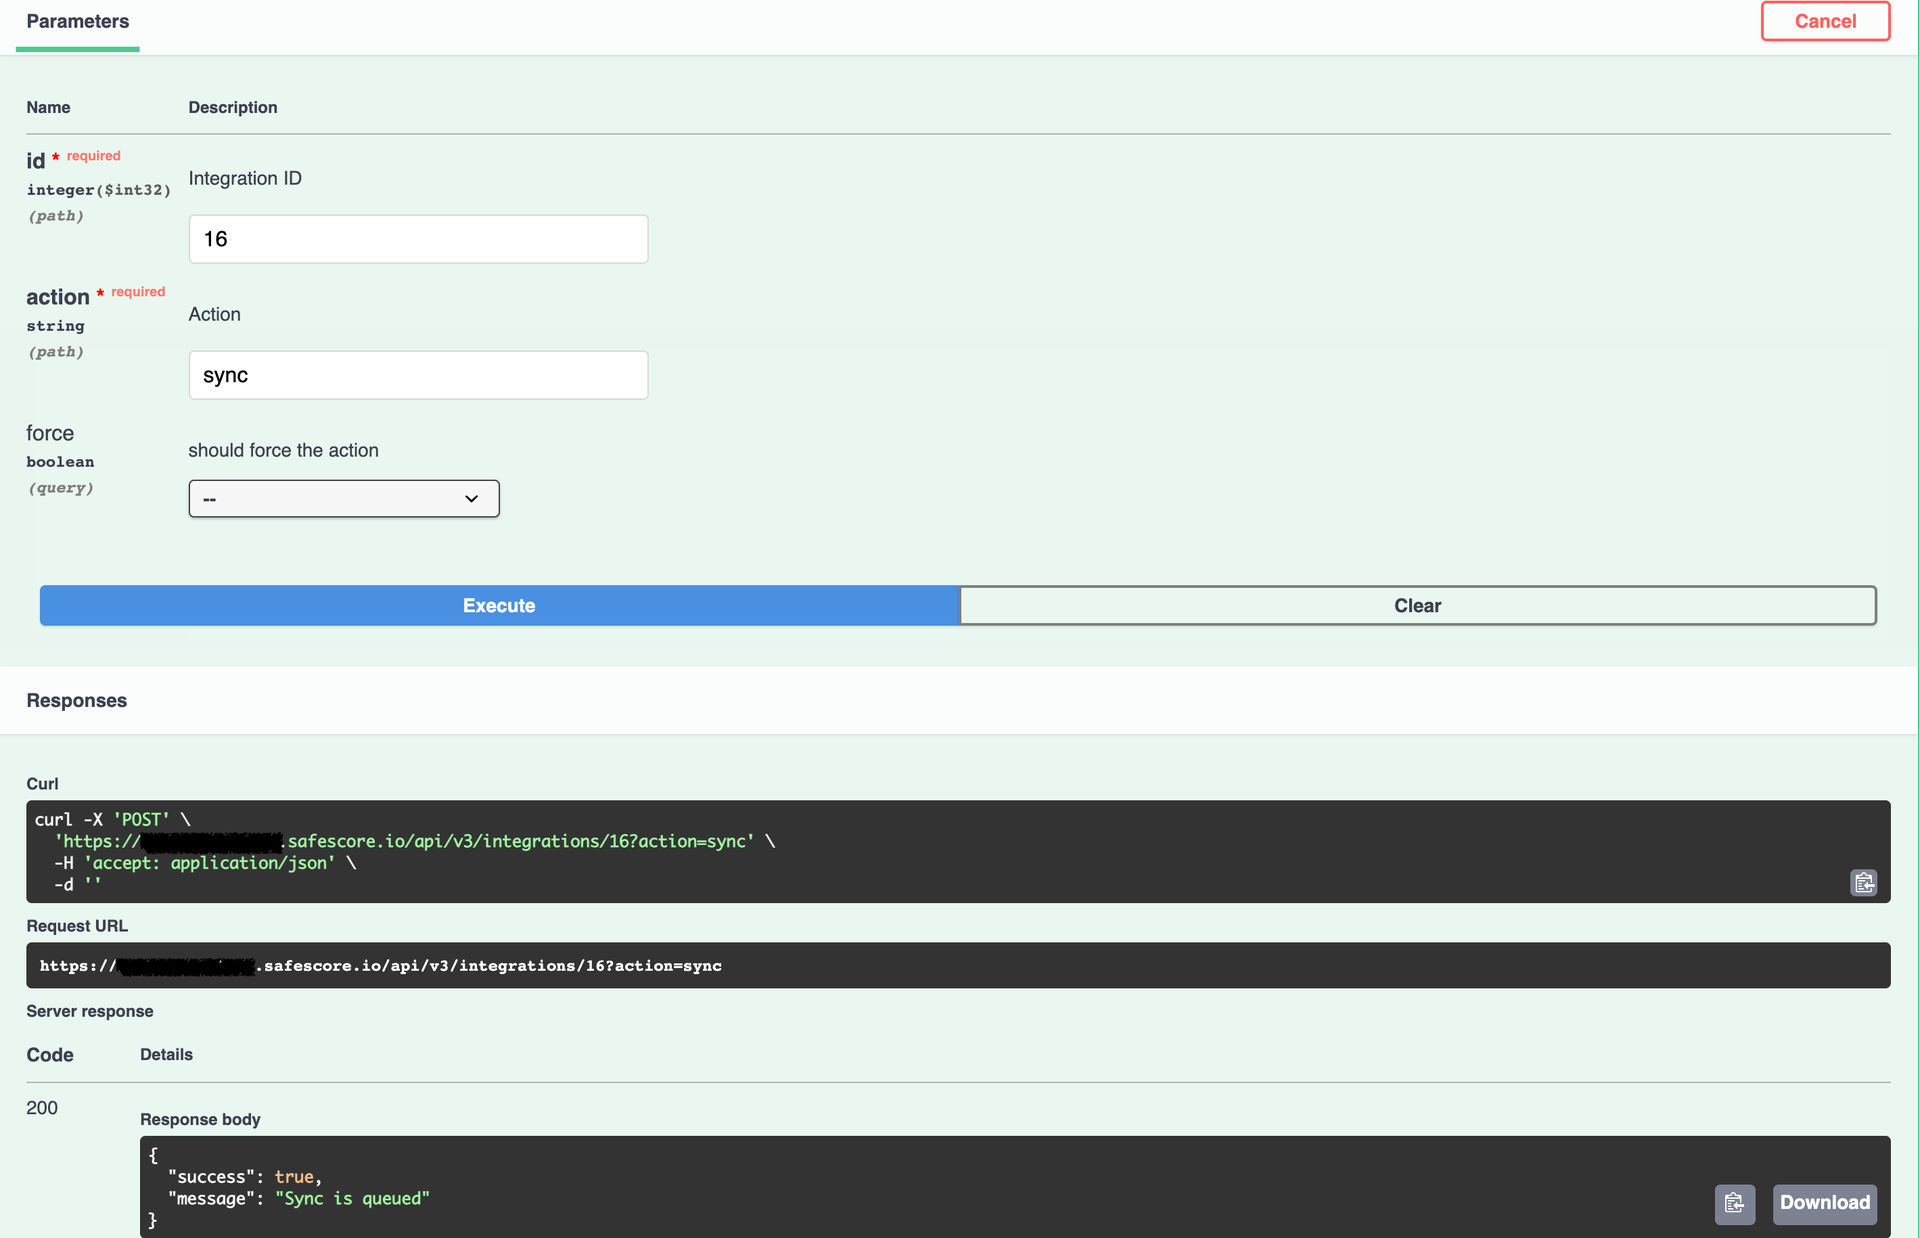
Step 4: Sync Integration
To trigger an on-demand sync for the integration, use the API POST /api/v3/integrations/{id}?action={action}. Replace {id} with the ID you get in step 3 and {action} with the "sync". You can find the list of all supported actions for a specific integration in the response of the GET /api/v3/integrations/products/{id} API mentioned above.
Add ?action=sync to the query parameter in the above API to initiate a synchronisation. Once the request is successful, the response will say, "Sync is queued".
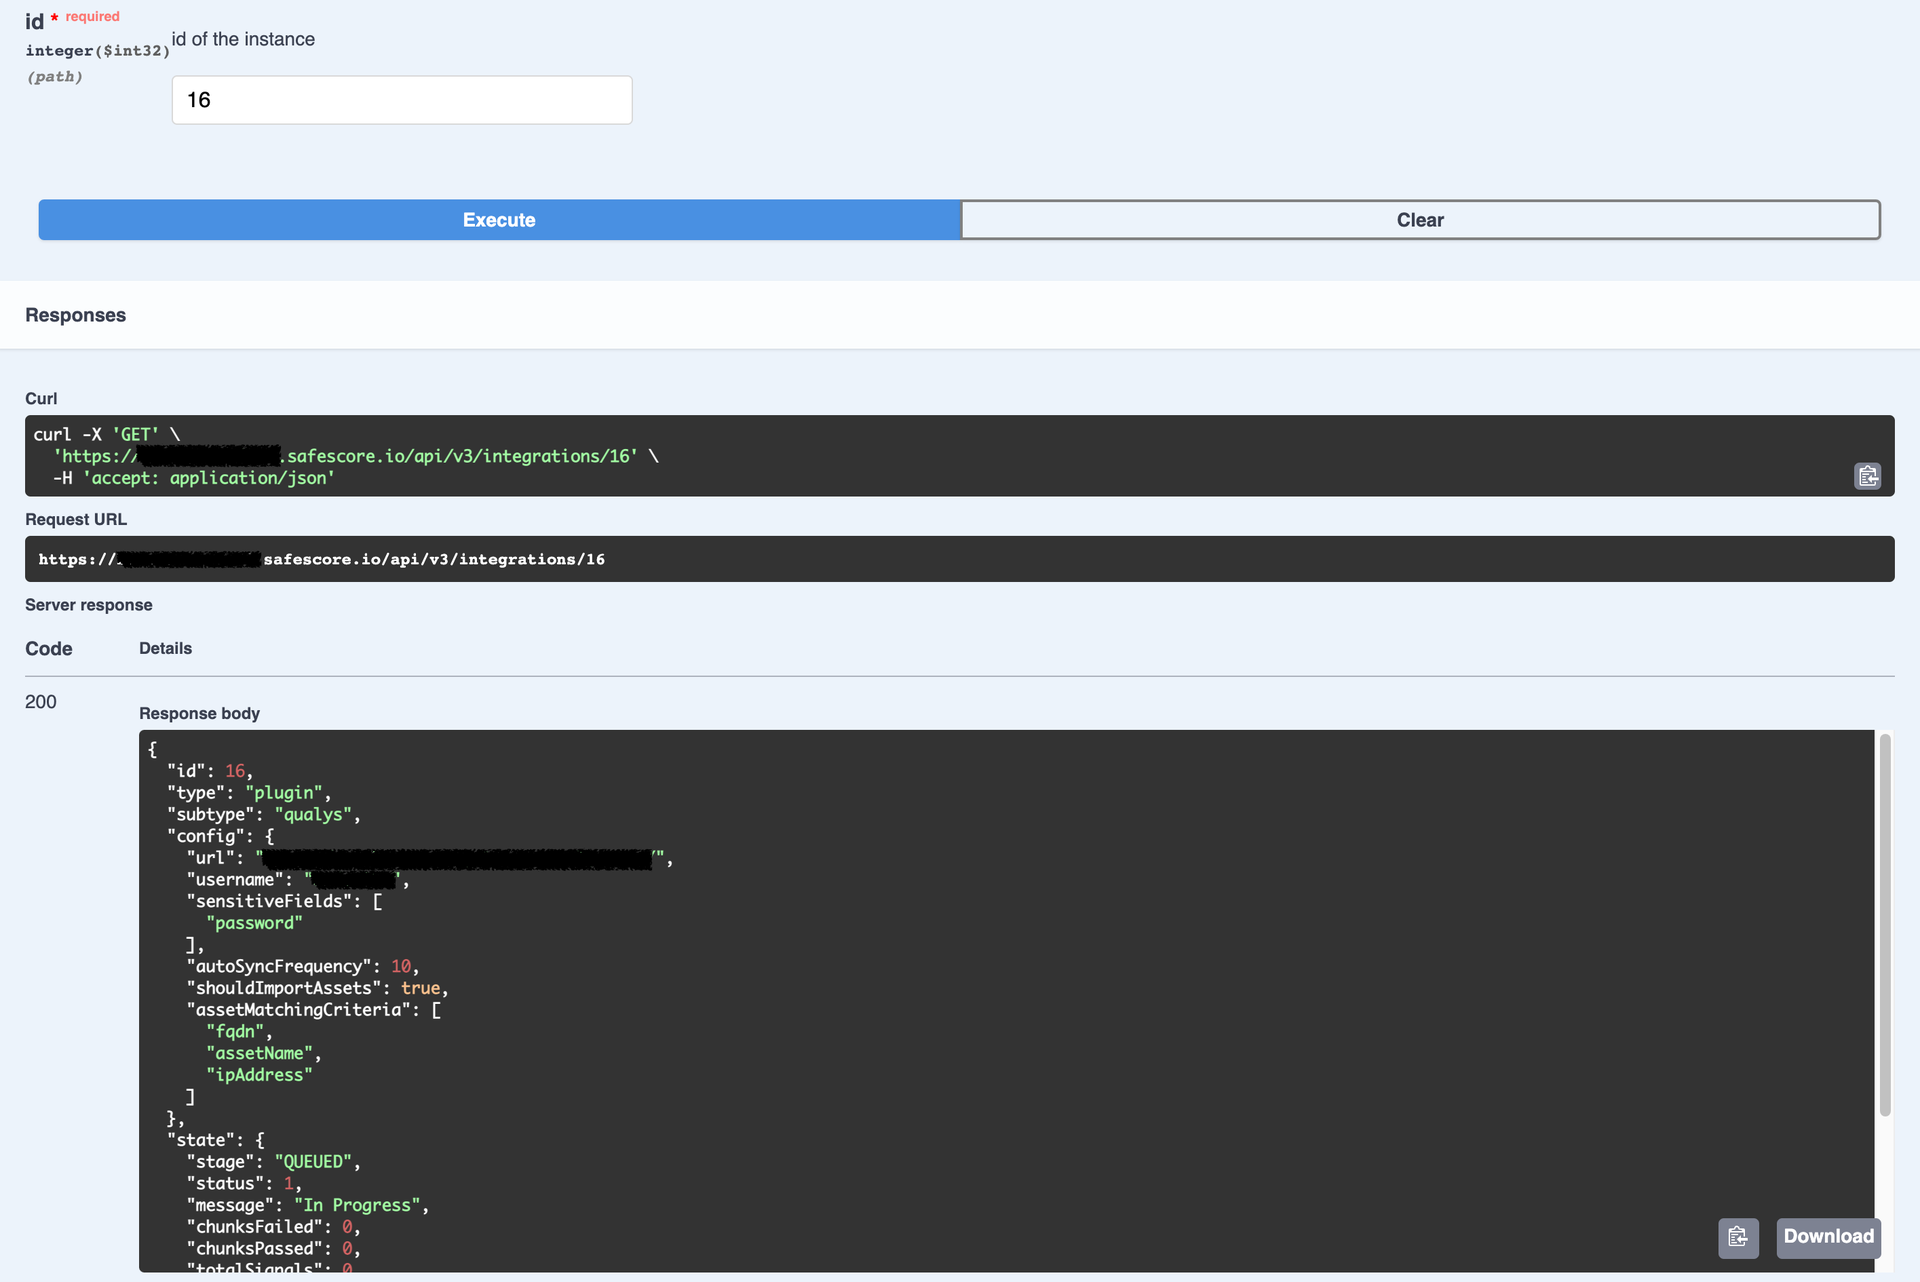
The sync status can be checked with the API GET /api/v3/integrations/{id}, which returns the current state and metadata of the integration at any point in time, as shown below screenshot.
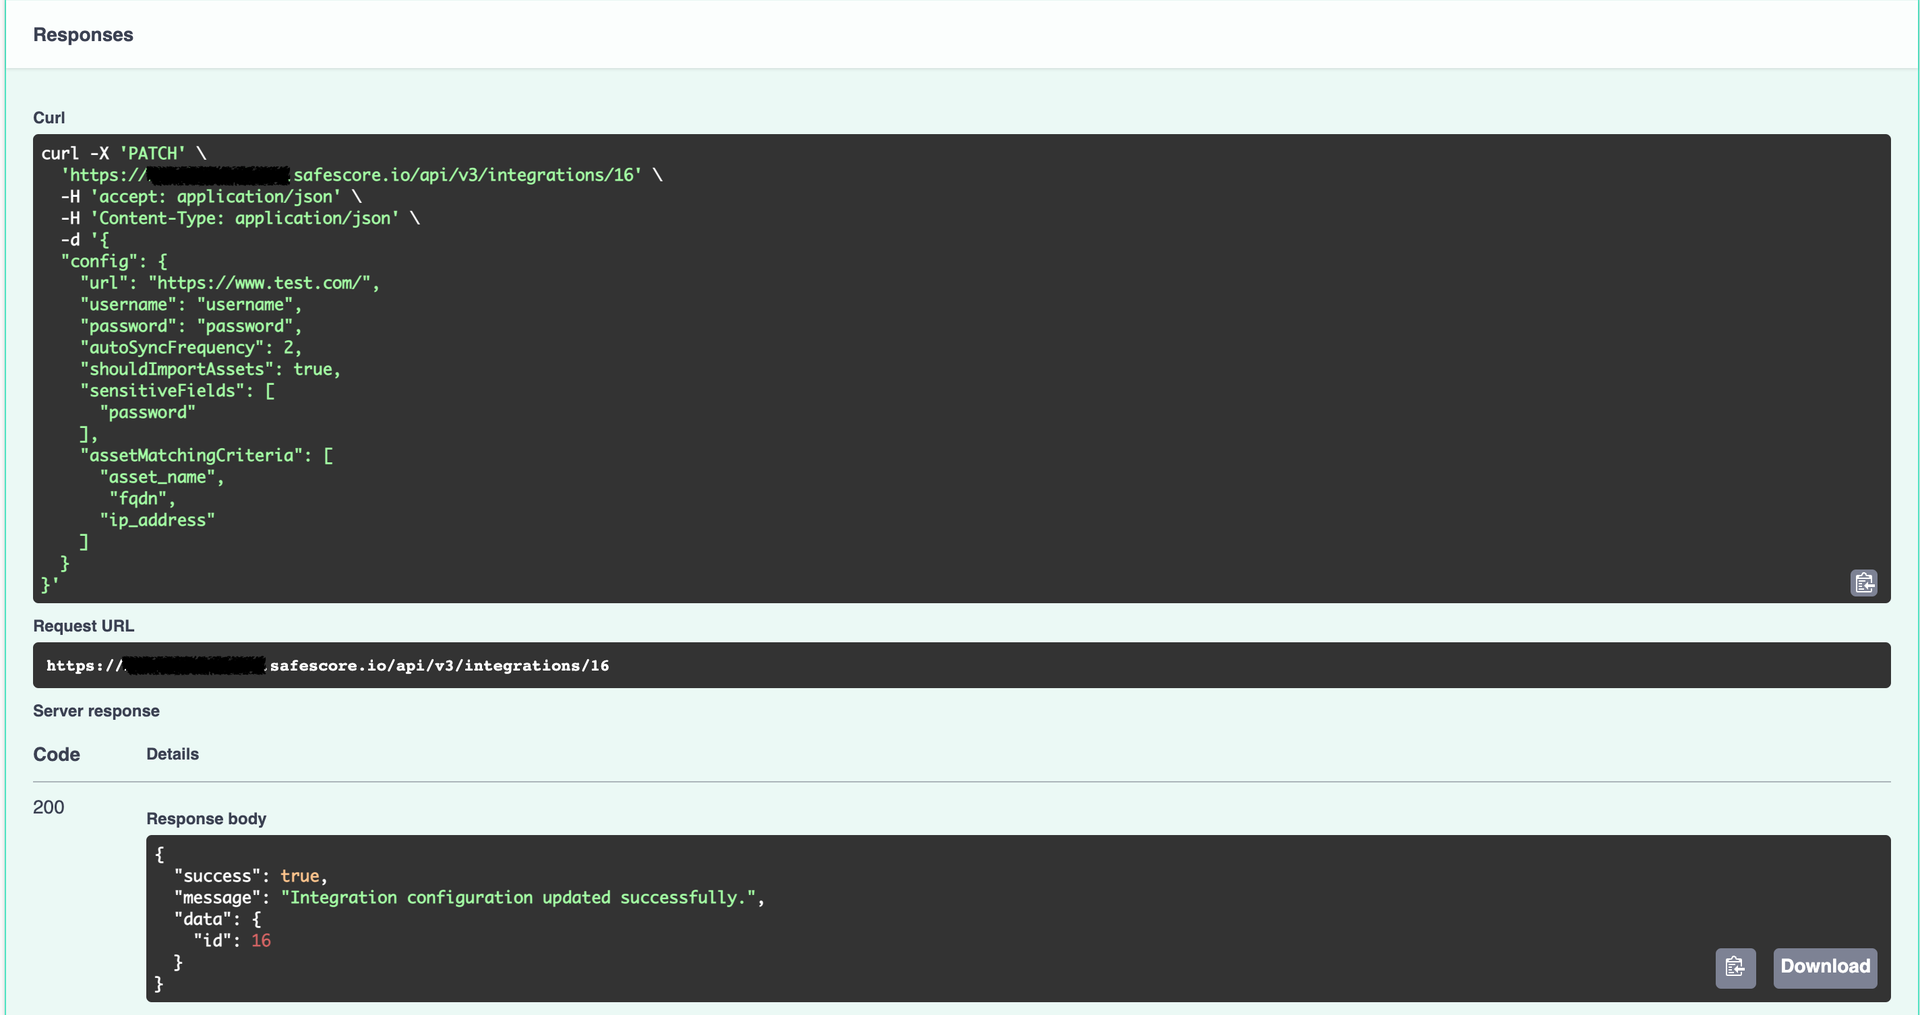
Update Integration details
To update the integration information, use the API PATCH /api/v3/integrations/{id}. Replace {id} with the ID generated in Step 3. The request payload should be similar to the one used for the API POST /api/v3/integrations, which is used to store the integration.
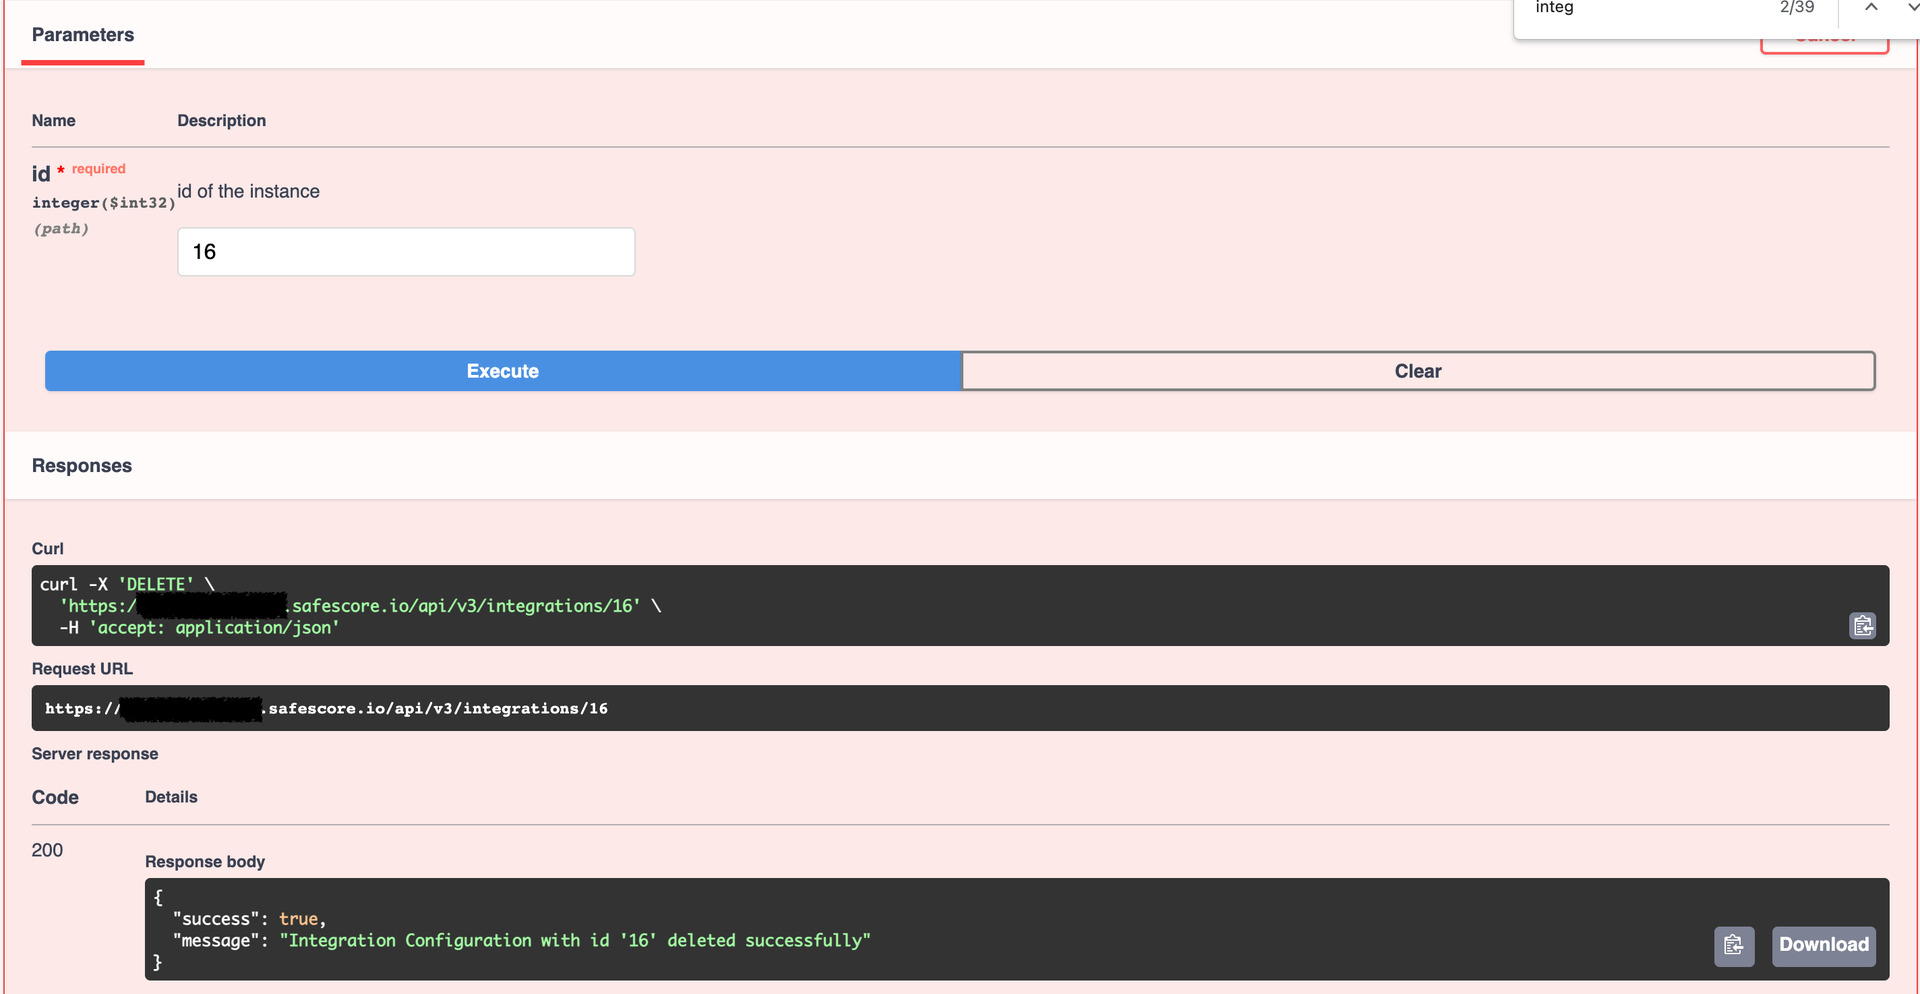
Delete Integration details
To delete an integration account, use the API DELETE /api/v3/integrations/{id}. Replace {id} with the integration ID.
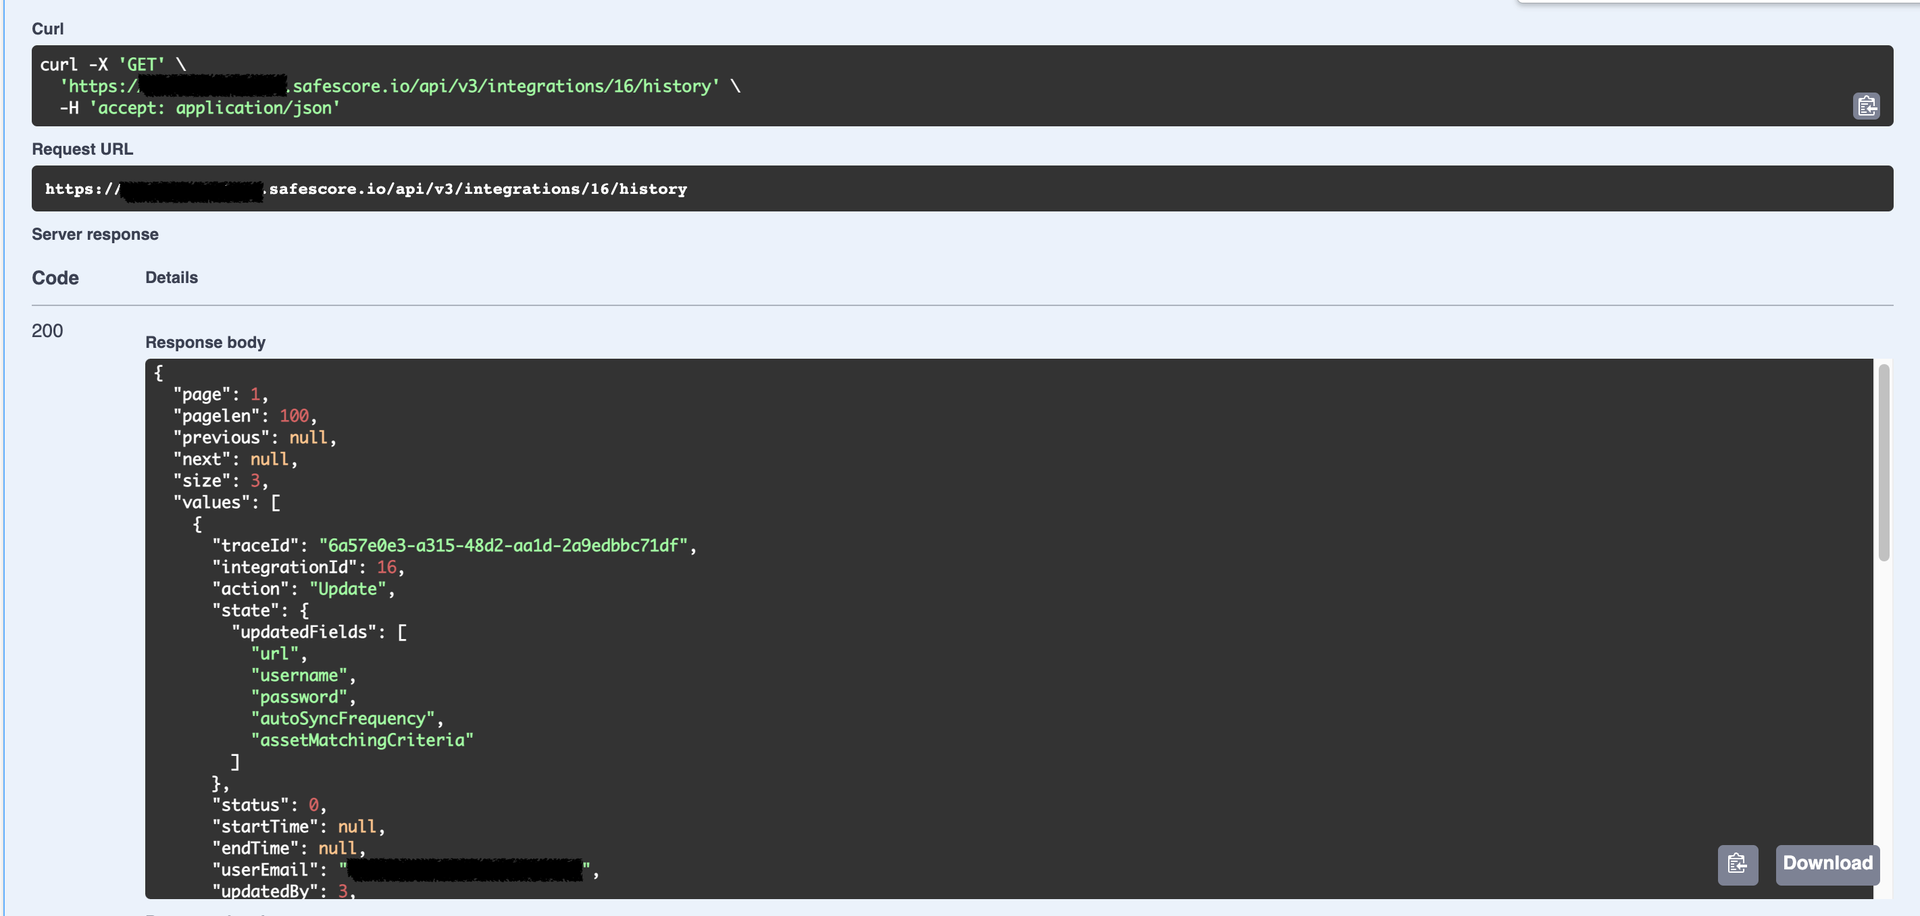
See Integration History
Use the API GET /api/v3/integrations/{id}/history to see the integration history. The response will show all the actions taken, starting from the latest ones, along with details such as who, what, and when. This response is similar to what is available in the History table in the SAFE Hooks card.