About this document
This document provides the step-by-step procedure to onboard a Mulesoft asset in SAFE.
Important
Some steps while adding a Mulesoft asset in SAFE are needed to be performed using SSH credentials of the SAFE server. These steps need to be performed in sync with the SAFE support team member. Raise a service request by logging a ticket to the SAFE support team.
Prerequisite
To onboard a Mulesoft asset in SAFE you need the following privileges:
- Users must have the SAFE Admin Role.
- User must have the Admin Role in the Mulesoft console.
Onboard Mulesoft Asset in SAFE
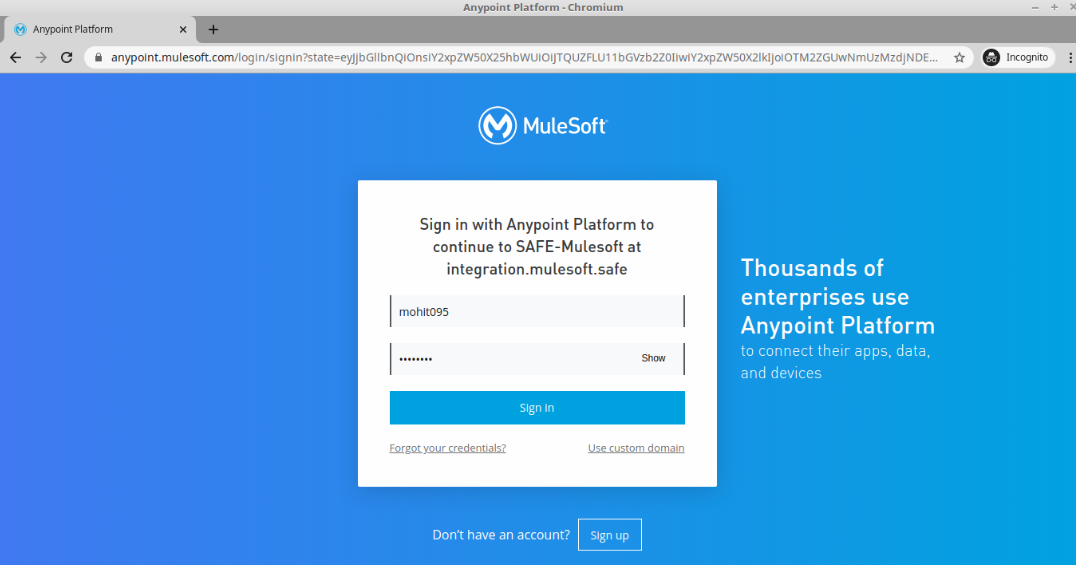
1. Create an app SAFE-Mulesoft in your Master Organization in Mulesoft
- Login to Mulesoft as Admin and navigate to the Access Management > Connected Apps.
- Click the Create App button.
- Enter the name as SAFE-Mulesoft.
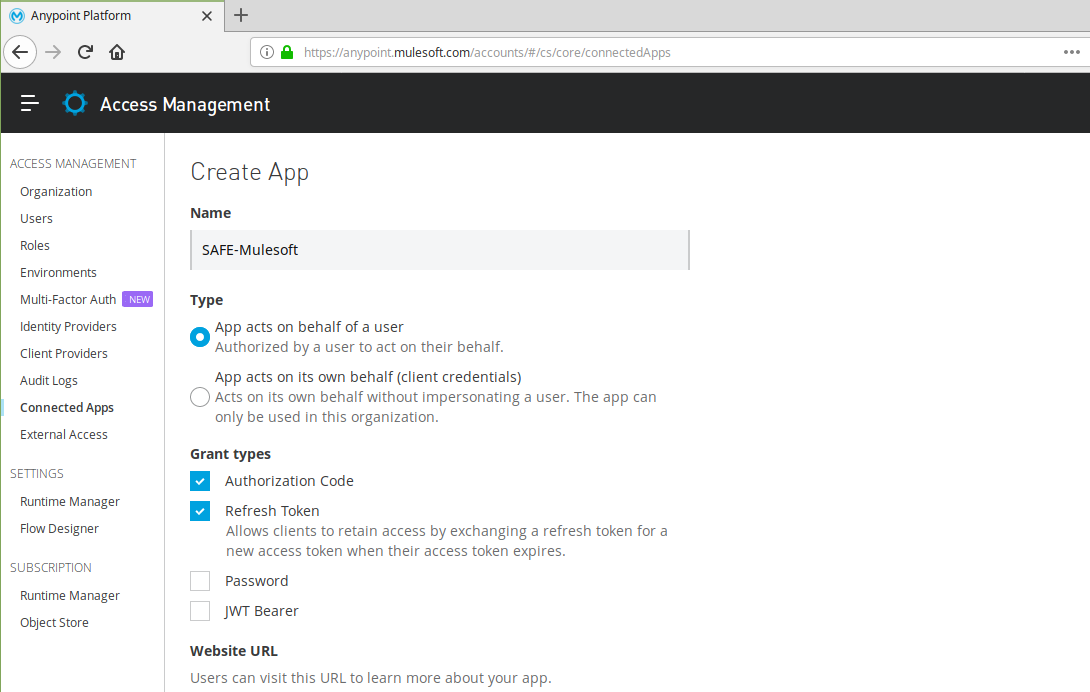
- Select Type - App acts on behalf of a user.
- Select Grant Types - Authorization Code and Refresh Token.
- Enter the Website URL - https://safe.security.
- Enter the Redirect URL - http://integration.mulesoft.safe.security and click the Add button. This URL contains the authorization code as the query parameter.
Note: The system displays a blank page when user go to this URL. Users only need the URL.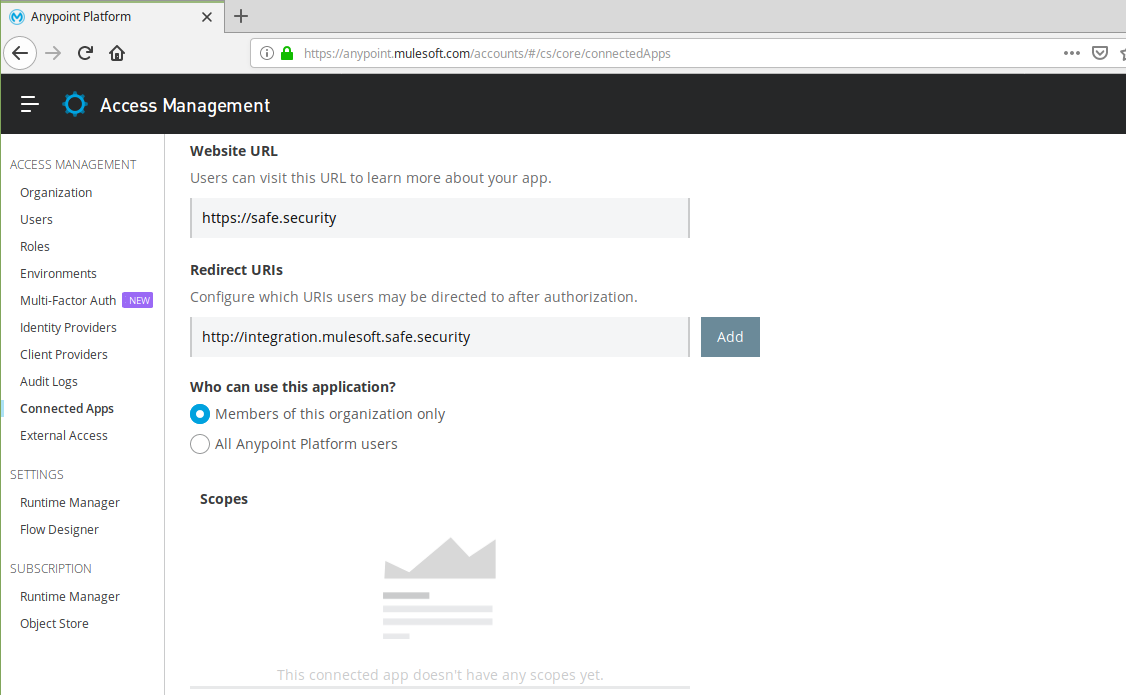
- Select Members of this organization only option for Who can use this application? field.
- Add the scope for the App as Read-only Access and Background Access.
- Click the Save button.

2. Get the Client ID and Client Secret
- Login to Mulesoft as Admin and navigate to the Access Management > Connected Apps.
- Go to the connected app created in Step 1 "SAFE-Mulesoft".
- Get the Client ID and Client Secret by clicking the Copy Id and Copy Secret icon. You need these details while adding a Mulesoft asset in SAFE.
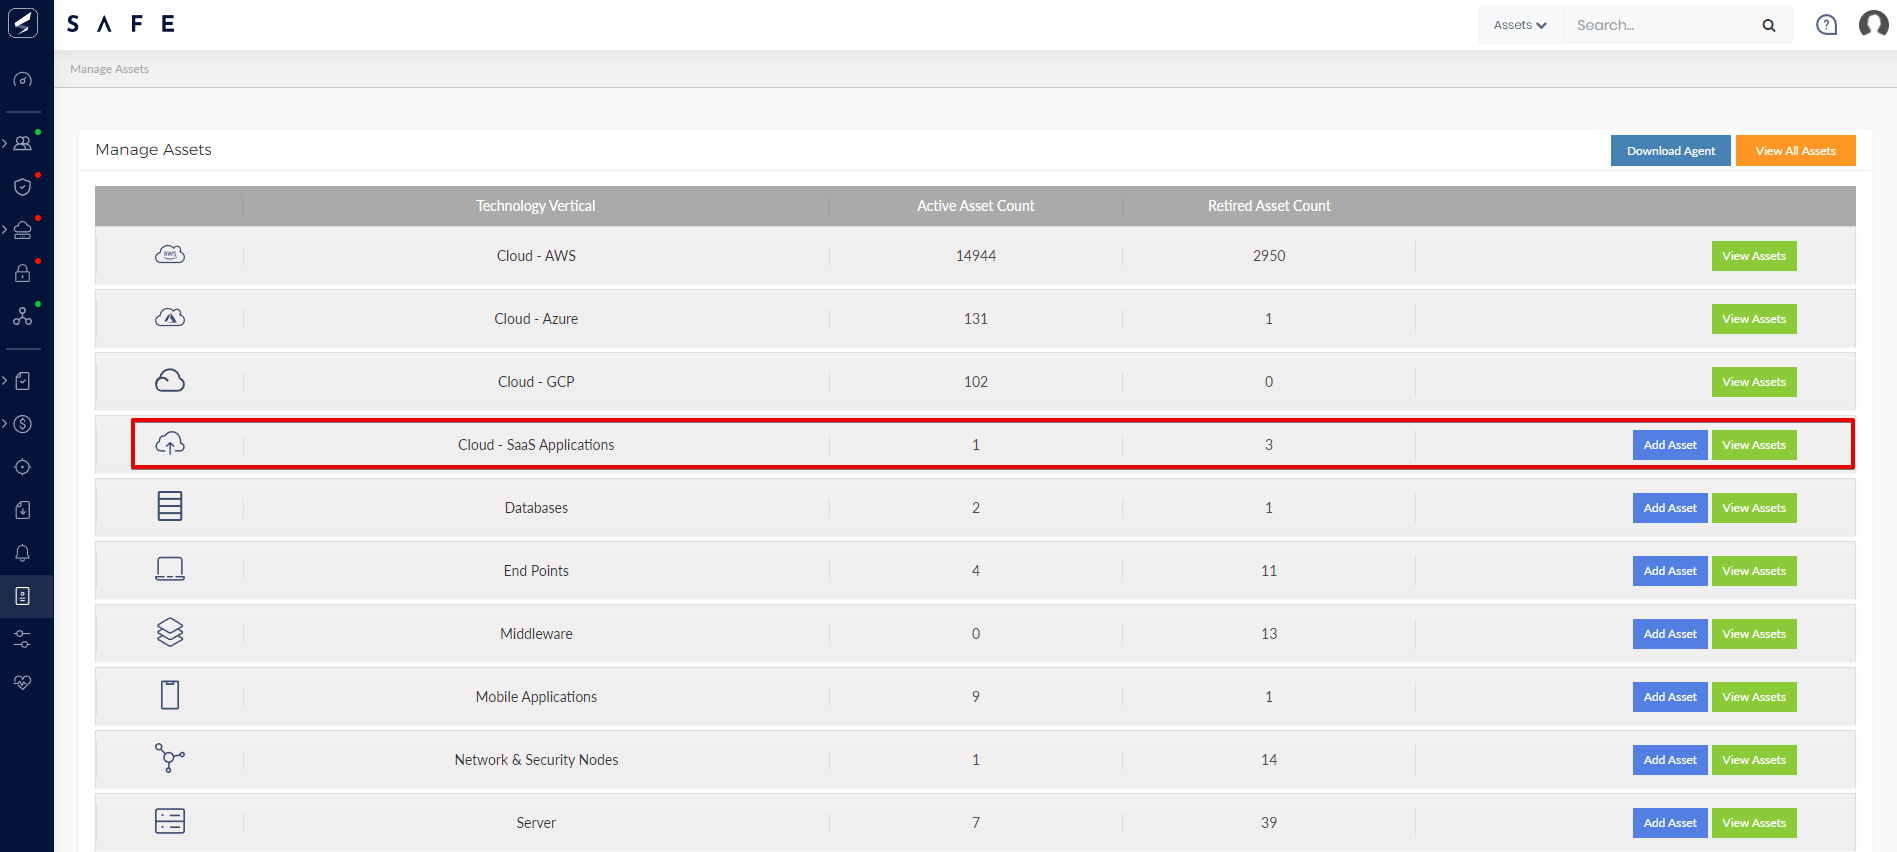
3. Add a Mulesoft asset in SAFE
- Log in to SAFE as Admin and navigate to Manage Assets.
- Click the Add Asset button available against the Cloud-SaaS Applications vertical.
- Enter the Asset name as SAFE-Mulesoft and other details.
- Enter the IP address or Hostname.
Example: anypoint.mulesoft.com.
Note: https:// or http:// before the host name are not allowed. - Enter the Client ID and Client Secret you get in step2.
- Enter the Username and Password.
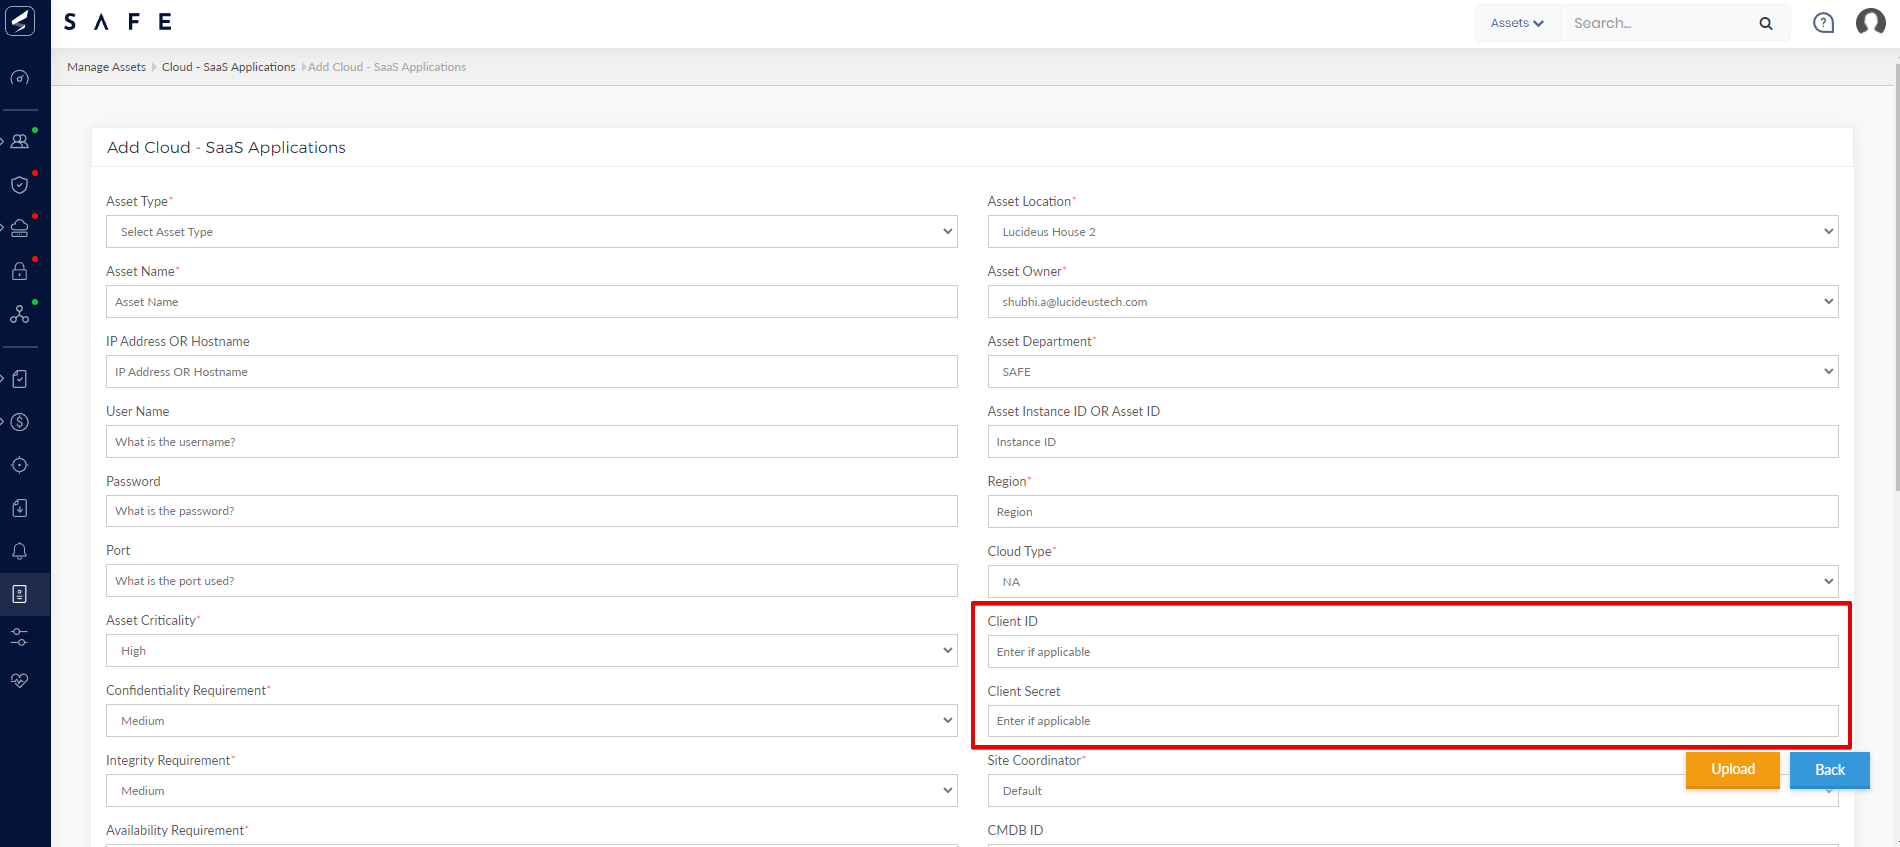
- Set the Region - NA.
Note: Other fields are not required to be filled for this asset type and can be left with their default value. - Click the Submit button.
Important
Further steps are needed to be performed using SSH credentials of the SAFE server. These steps need to be performed in sync with the SAFE support team member. Raise a service request to onboard mulesoft by logging a ticket to the SAFE support team.
Further steps are needed to be performed using SSH credentials of the SAFE server. These steps need to be performed in sync with the SAFE support team member. Raise a service request to onboard mulesoft by logging a ticket to the SAFE support team.
4. Authorize App
- In response to the service request you have raised, the SAFE team will SAFE Support team will send a URL to you.
- Copy and paste the URL received by the SAFE support team and login with the Mulesoft organization admin account.
- Grant read-only and background access permissions to the app for the SAFE.
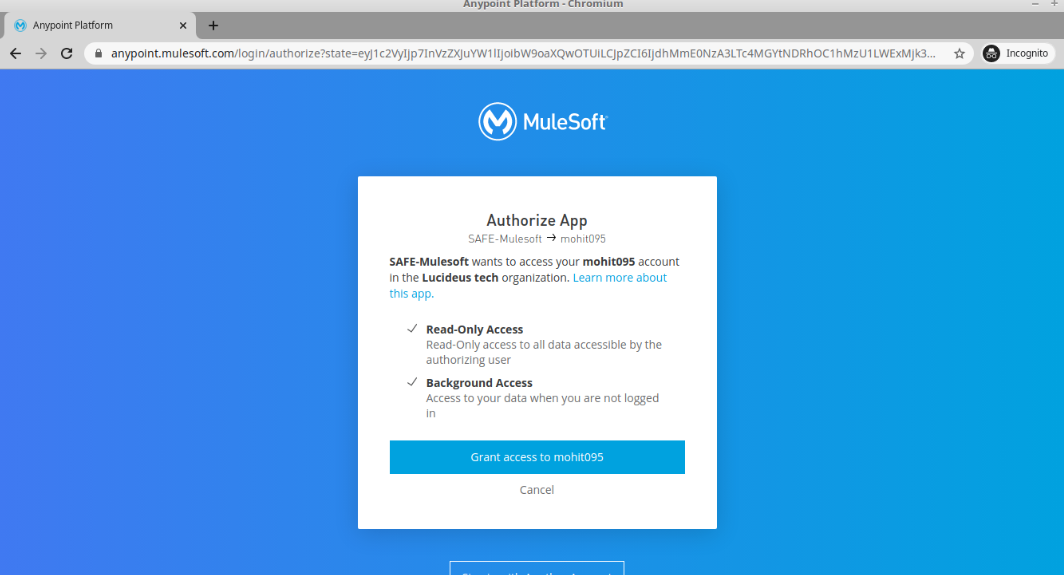
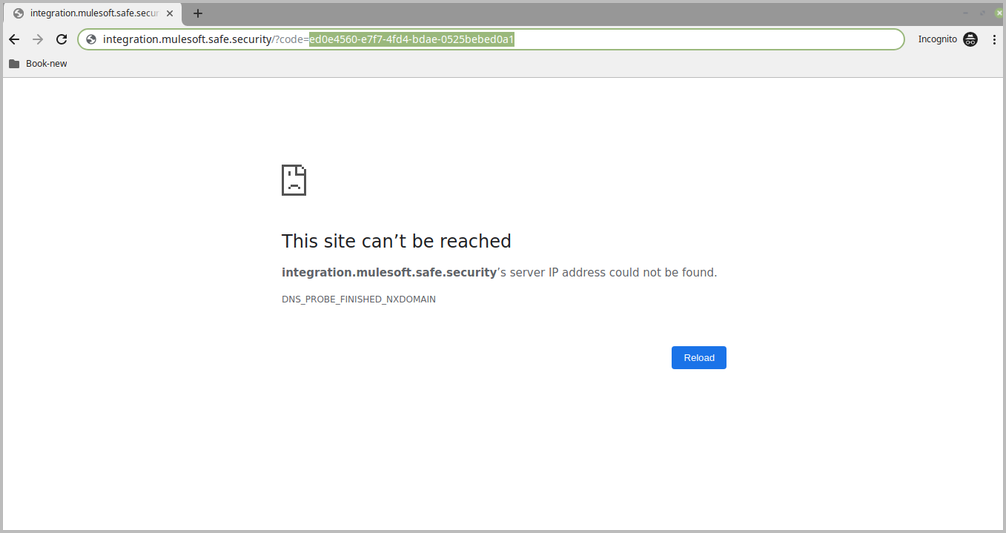
- After landing on the redirected page, copy the authorization code from the URL and send it to the SAFE Support team. Refer to below screenshot highlighted part.
- SAFE support team notifies you for the successful onboarding of the Mulesoft asset.