About this document
This document provides step-by-step instructions for configuring the "SeviceNow ITSM" Integration and create requests in Service Catalog directly from SAFE.
Note
This integration currently supports creation of requests in ServiceNow Service Catalog for Risk Treatment Plans. Create ServiceNow Request will only be enabled if “ServiceNow ITSM” connector is configured.
Introduction
The integration allows you to create requests in ServiceNow Service Catalog for Risk Treatment Plans directly from SAFE. SAFE Admins can configure this integration from the "ServiceNow ITSM" card available on the Integrations page.
Prerequisites
A ServiceNow ITSM user with oauth access and the following roles:
catalog_admin (to have create ticket access within service catalog)
oauth_admin (to register new oauth Client ID and Client Secret in Application Registry). This can also be done by ServiceNow Admin user.
sn_request_write
snc_internal
Generate Connection Details
To integrate SAFE with ServiceNow ITSM, we need the following details:
Instance Name
Username
Password
Client ID
Client Secret
Create ServiceNow User and generate Client ID and Client Secret
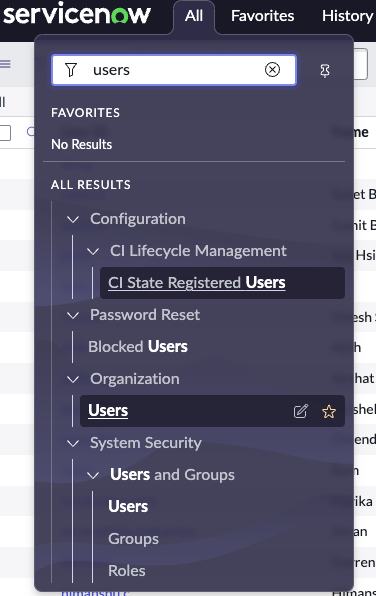
Navigate to ServiceNow and search for Users to add a new User.
Enter the user’s details such as User ID and Password, and mark the Active checkbox.
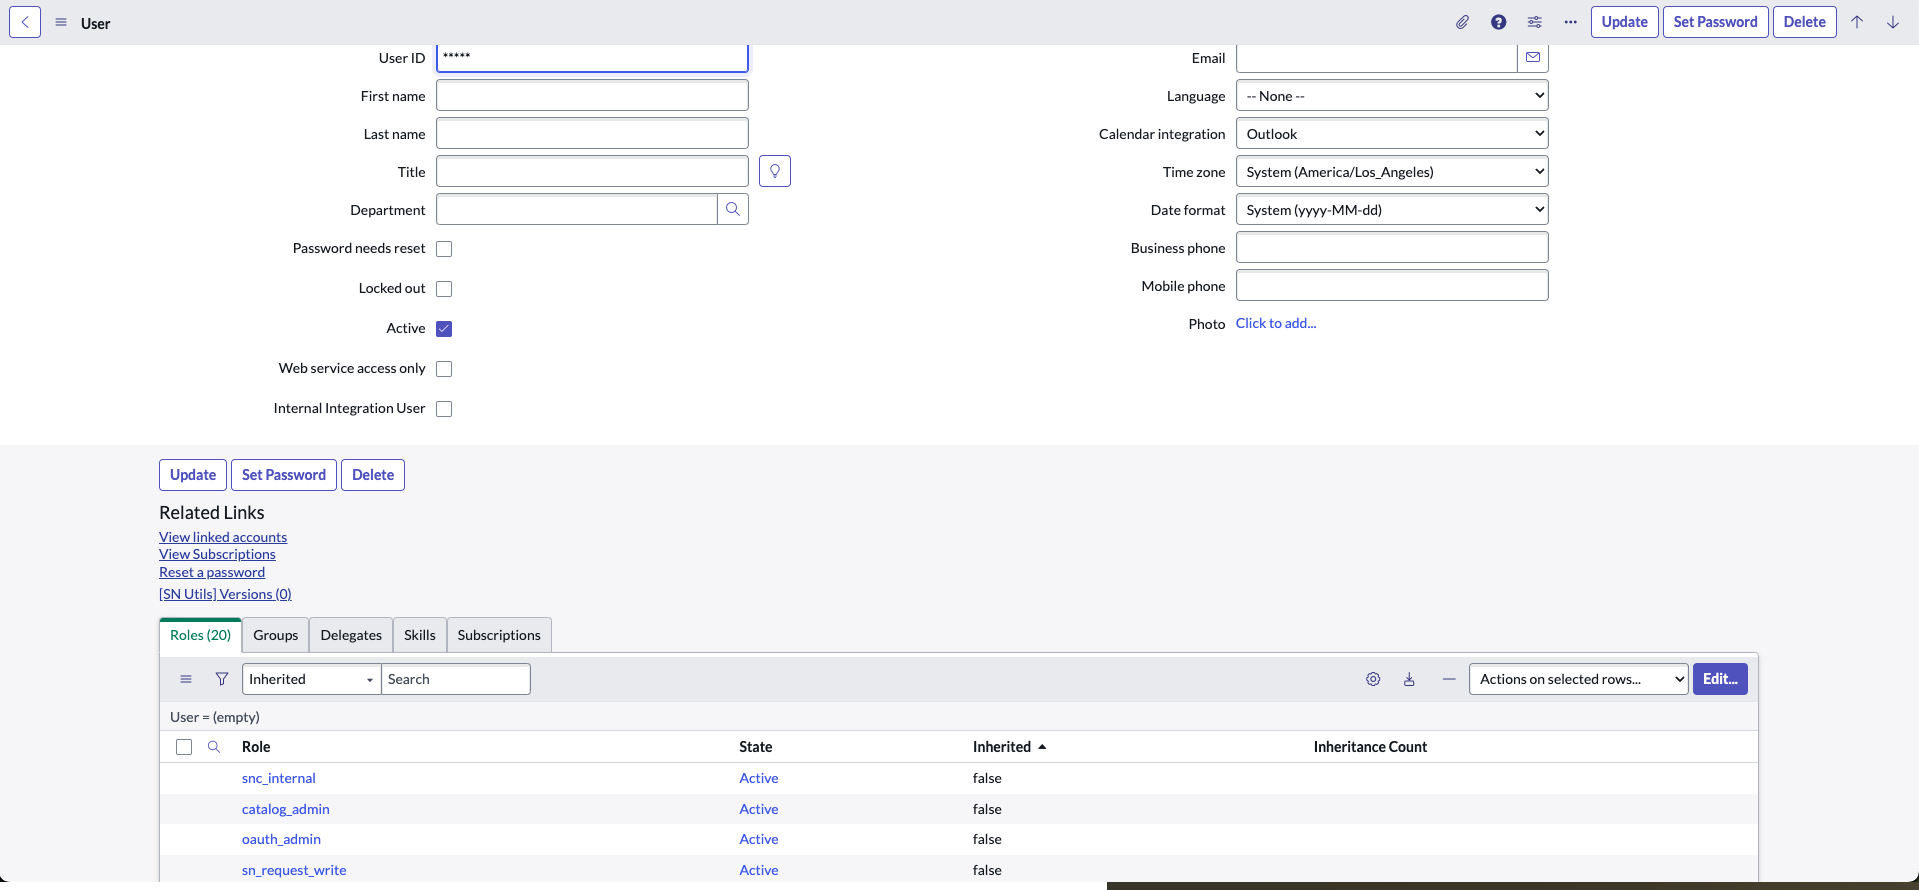
Assign following roles to the user:
catalog_admin (to have create ticket access within service catalog)
oauth_admin (to register new oauth Client ID and Client Secret in Application Registry). This can also be done by ServiceNow Admin user.
sn_request_write and snc_internal (required for fetching and creating requests and updating few properties of request like description)
Log in to your ServiceNow Account as admin.
Click the All Tab, and search for System OAuth > Application Registry.
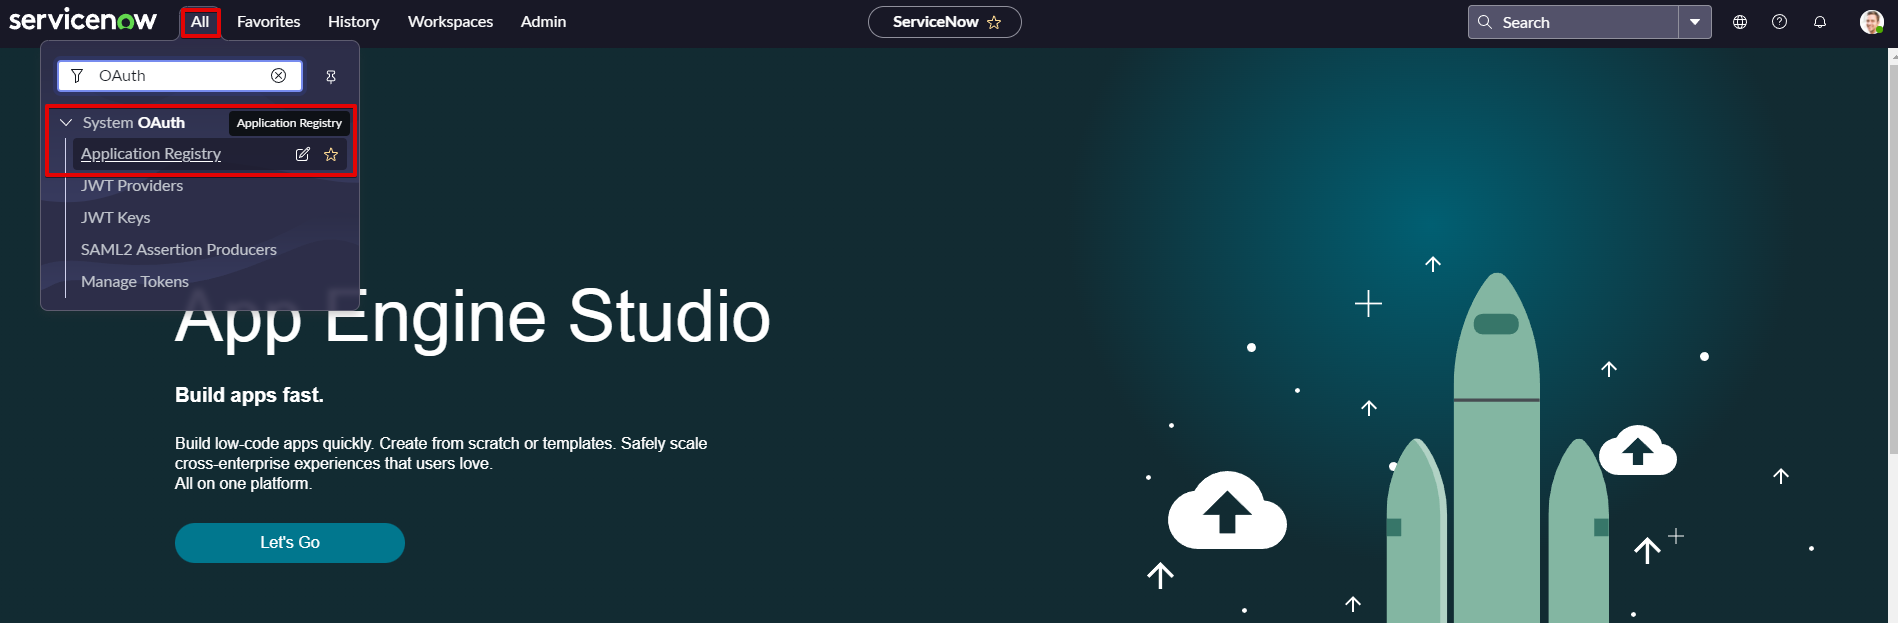
Click the Application Registry option.
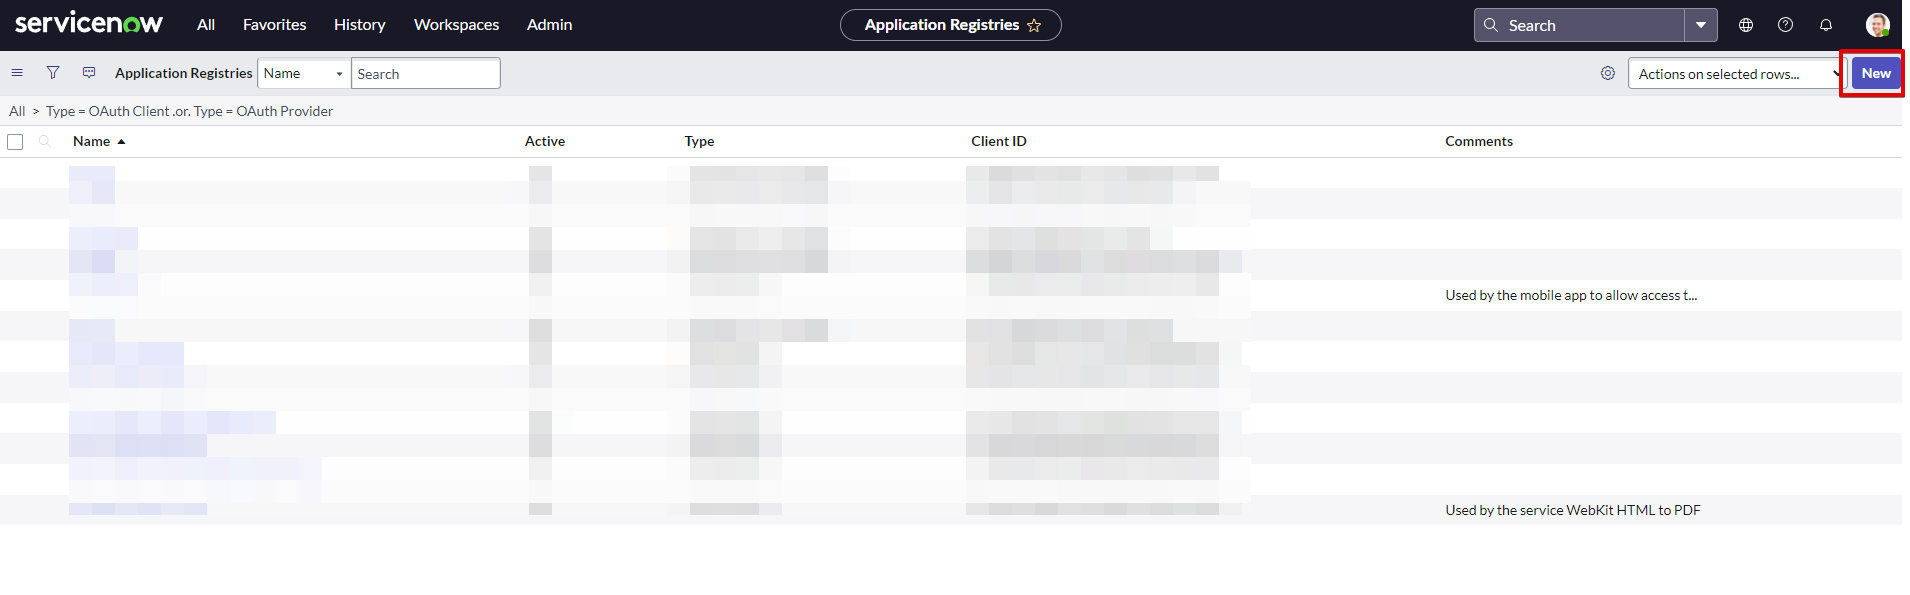
Click the New button available at the top-right corner of the screen.
On the New page, click the “Create an OAuth API endpoint for external clients” option.
.png)
Enter a Name for the application, define the access token lifespan (3600 recommended) and click the submit button. The system creates a new app.
.png)
Scroll down to the Application Scopes section.

If Scope is not created, create a new Rest API Auth Scope as follows:
Click the New button.

Enter Name, Auth Scope, and select Tables API in the REST API field.
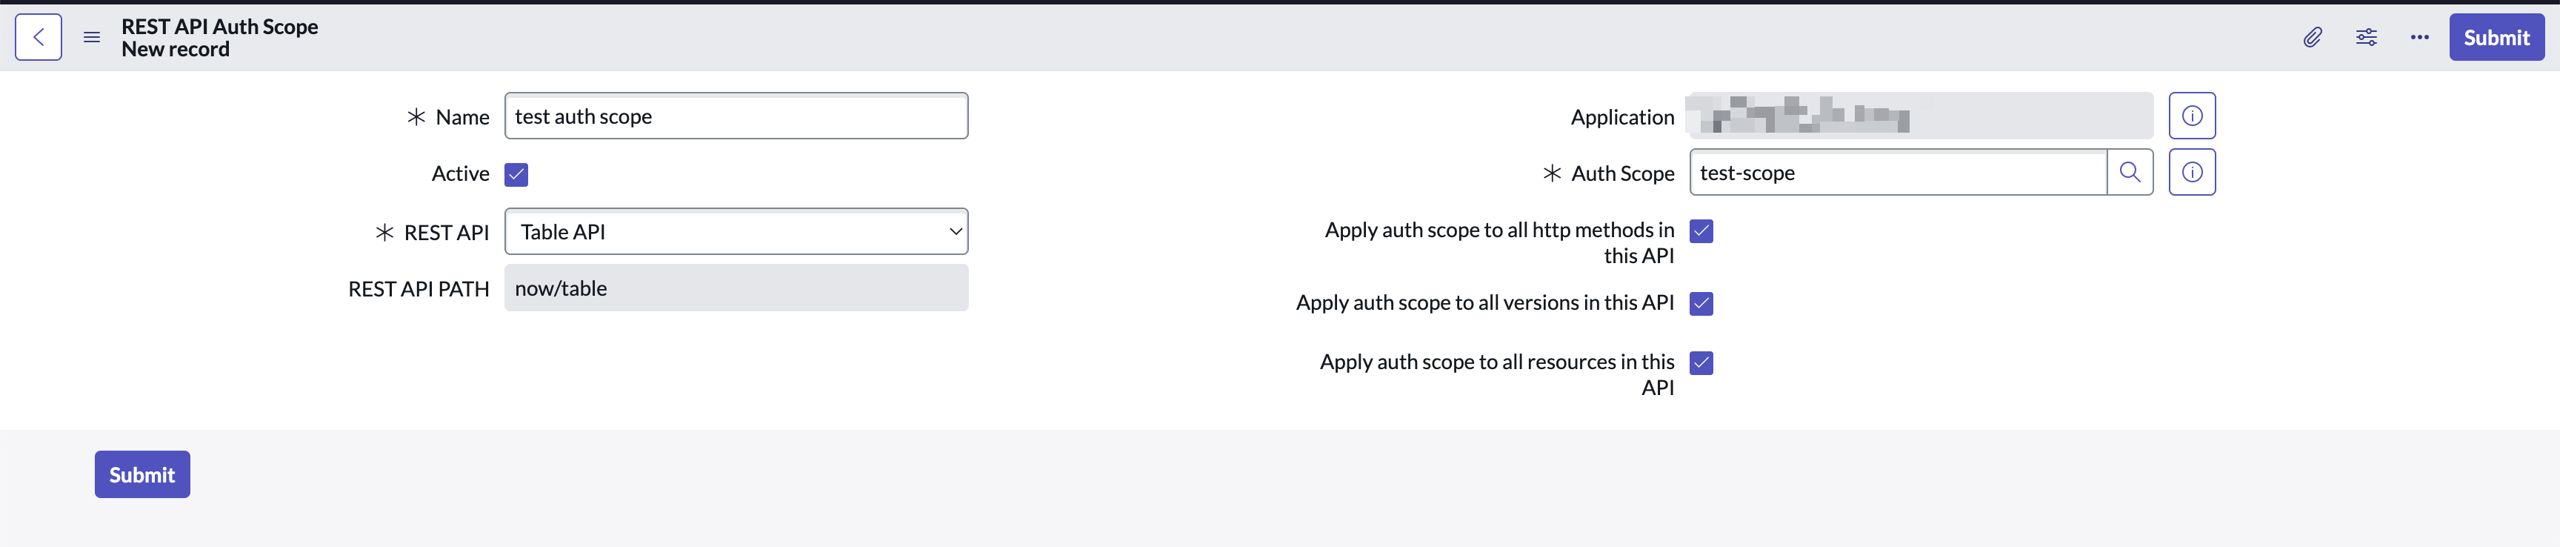
Insert the newly created scope to the Authentication Scope table.
.png)
Save the changes.
Go to the created app details page.
Copy and Save the Client ID and Client Secret.
Configure ServiceNow ITSM in SAFE
Follow the below steps to configure ServiceNow ITSM in SAFE.
Go to the Integrations page in SAFE and click the ServiceNow ITSM card.
Click the Configure button.
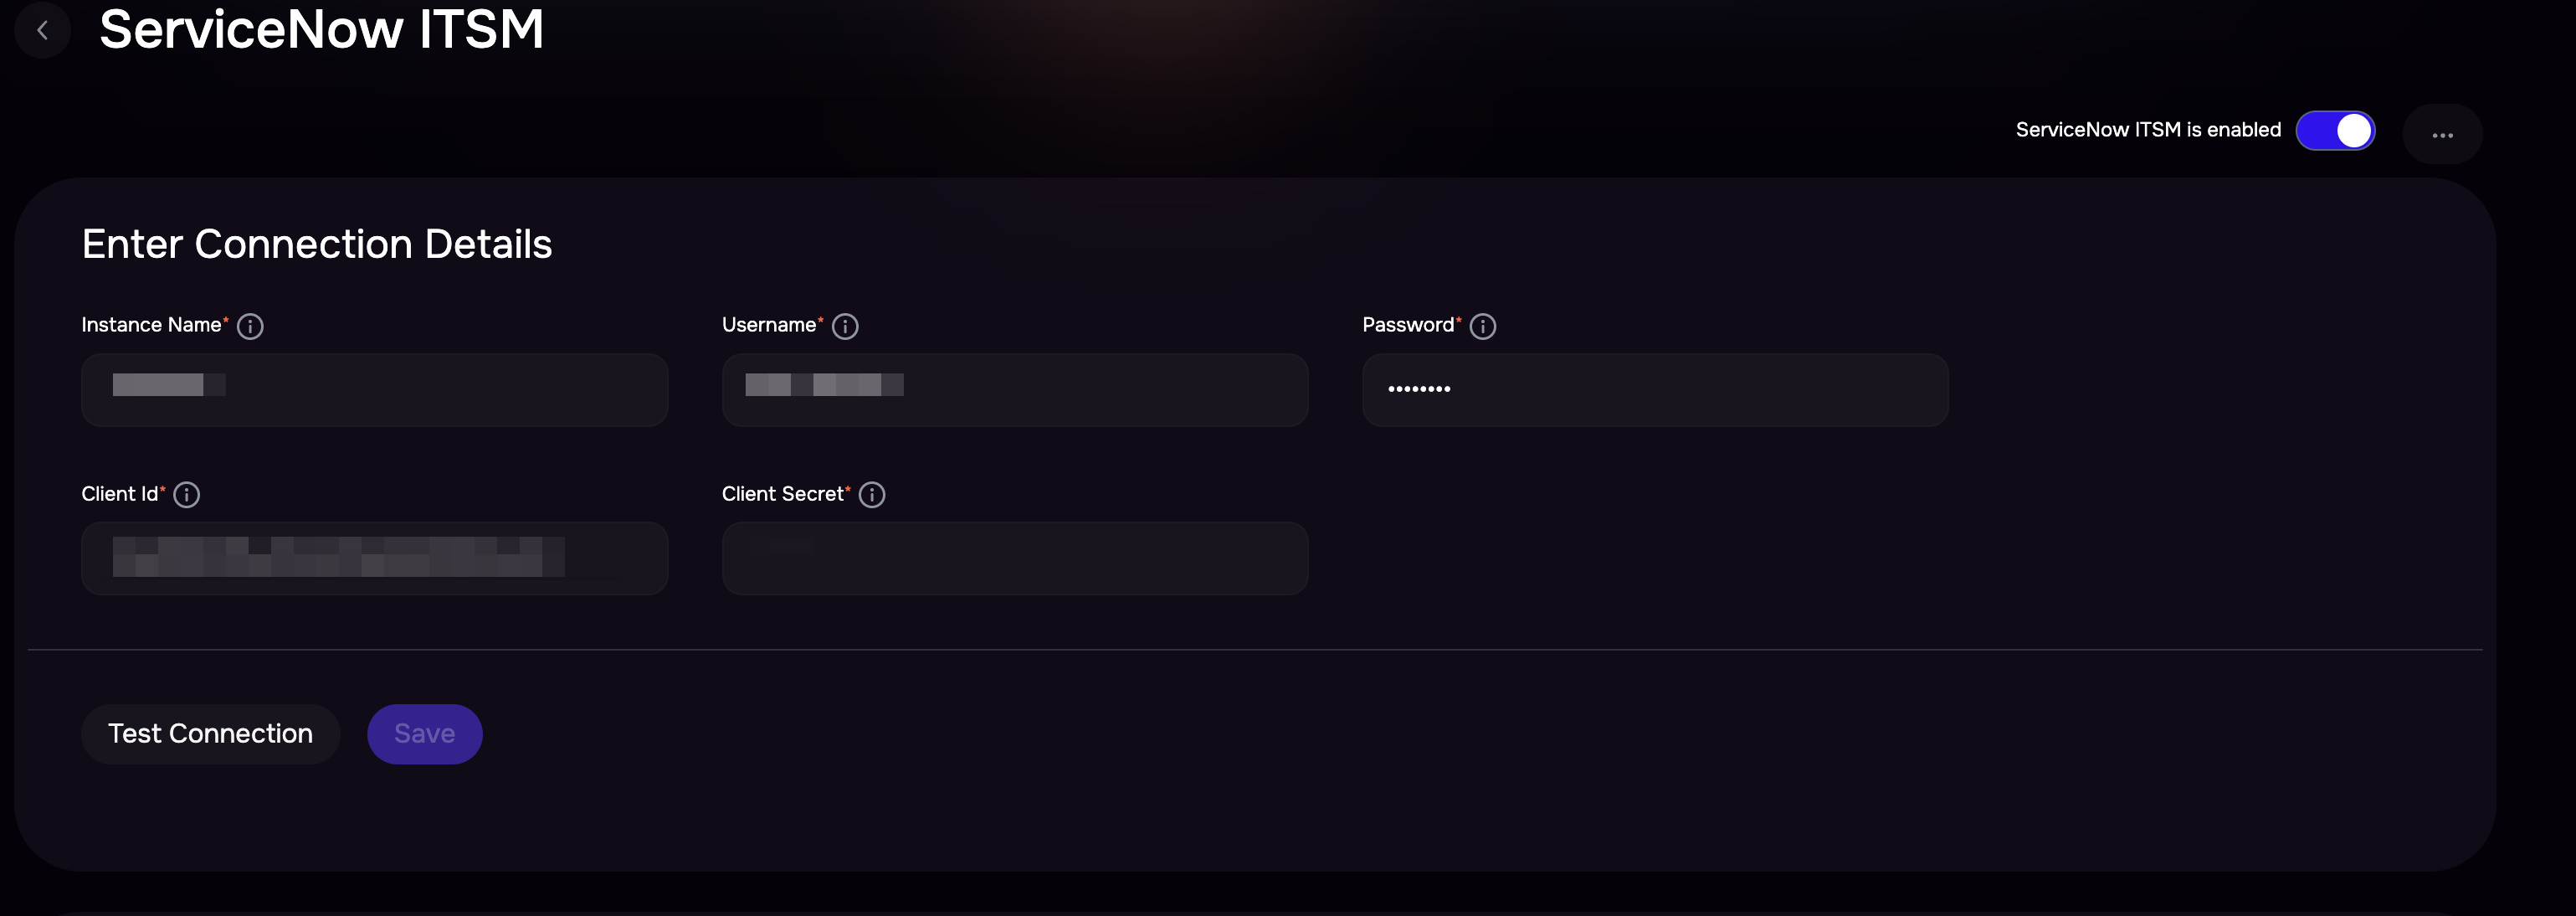
Enter the Instance name, Username, Password, Client ID and Client Secret.
Click the Test Connection button.
Once the connection is validated, click the Save button.
Create a ServiceNow Ticket for a Risk Treatment Plan
Go to the Risk Treatment Plan Page.
Click on any Risk Treatment Plan.
Click on the three-dot options available at the top-right of the page and then click the Create ServiceNow Request option.
.png)
Enter all the details: Request Title, Description, Assignee Email, and Priority. All are required fields. Click on the Create Request button.
Once the request is successful, you will be able to see the ServiceNow Request ID of the created request in the Risk Treatment Plan details page with its current status. Clicking this will take you to the created request in ServiceNow.

To unlink a request, click on the unlink icon adjacent to the ServiceNow request status and click confirm.
FAQs
Does unlinking a request, delete it from ServiceNow?
Unlinking the request unlinks/unbinds the request from the current Risk Treatment Plan and it does not delete the request from ServiceNow.
How many requests can I create for a single Risk Treatment Plan?
You can create only 1 request for a Risk Treatment Plan at a time. If a request has already been already created for a treatment plan, the Create ServiceNow Request option will be disabled. To create another request, you will have to unlink the current request.