About this document
This document provides the step-by-step procedure to configure SentinelOne in SAFE.
Introduction
SAFE integrates with SentinelOne and allows you to effortlessly discover and import assets and their EDR findings directly into SAFE.
Key Highlights of This Integration:
Import Assets and EDR Findings: With this integration, you can now discover and import assets from SentielOne with their respective EDR findings into SAFE.
Automated and On-Demand Synchronization: Take control of your assessment results with the option to set predefined time intervals for automatic synchronization. Furthermore, you can initiate on-demand assessments as needed.
Data Filtering Flexibility: SAFE allows users to fine-tune data retrieval from SentileOne through the Group Filter feature. You have the freedom to specify group names for data filtering. In the absence of group names, SAFE pulls all assets accessible to the user into its system.
Prerequisites
You need the following connector details to configure SentielOne in SAFE:
SentinelOne URL
SentinelOneAPIToken
Generate SentinelOne API Token
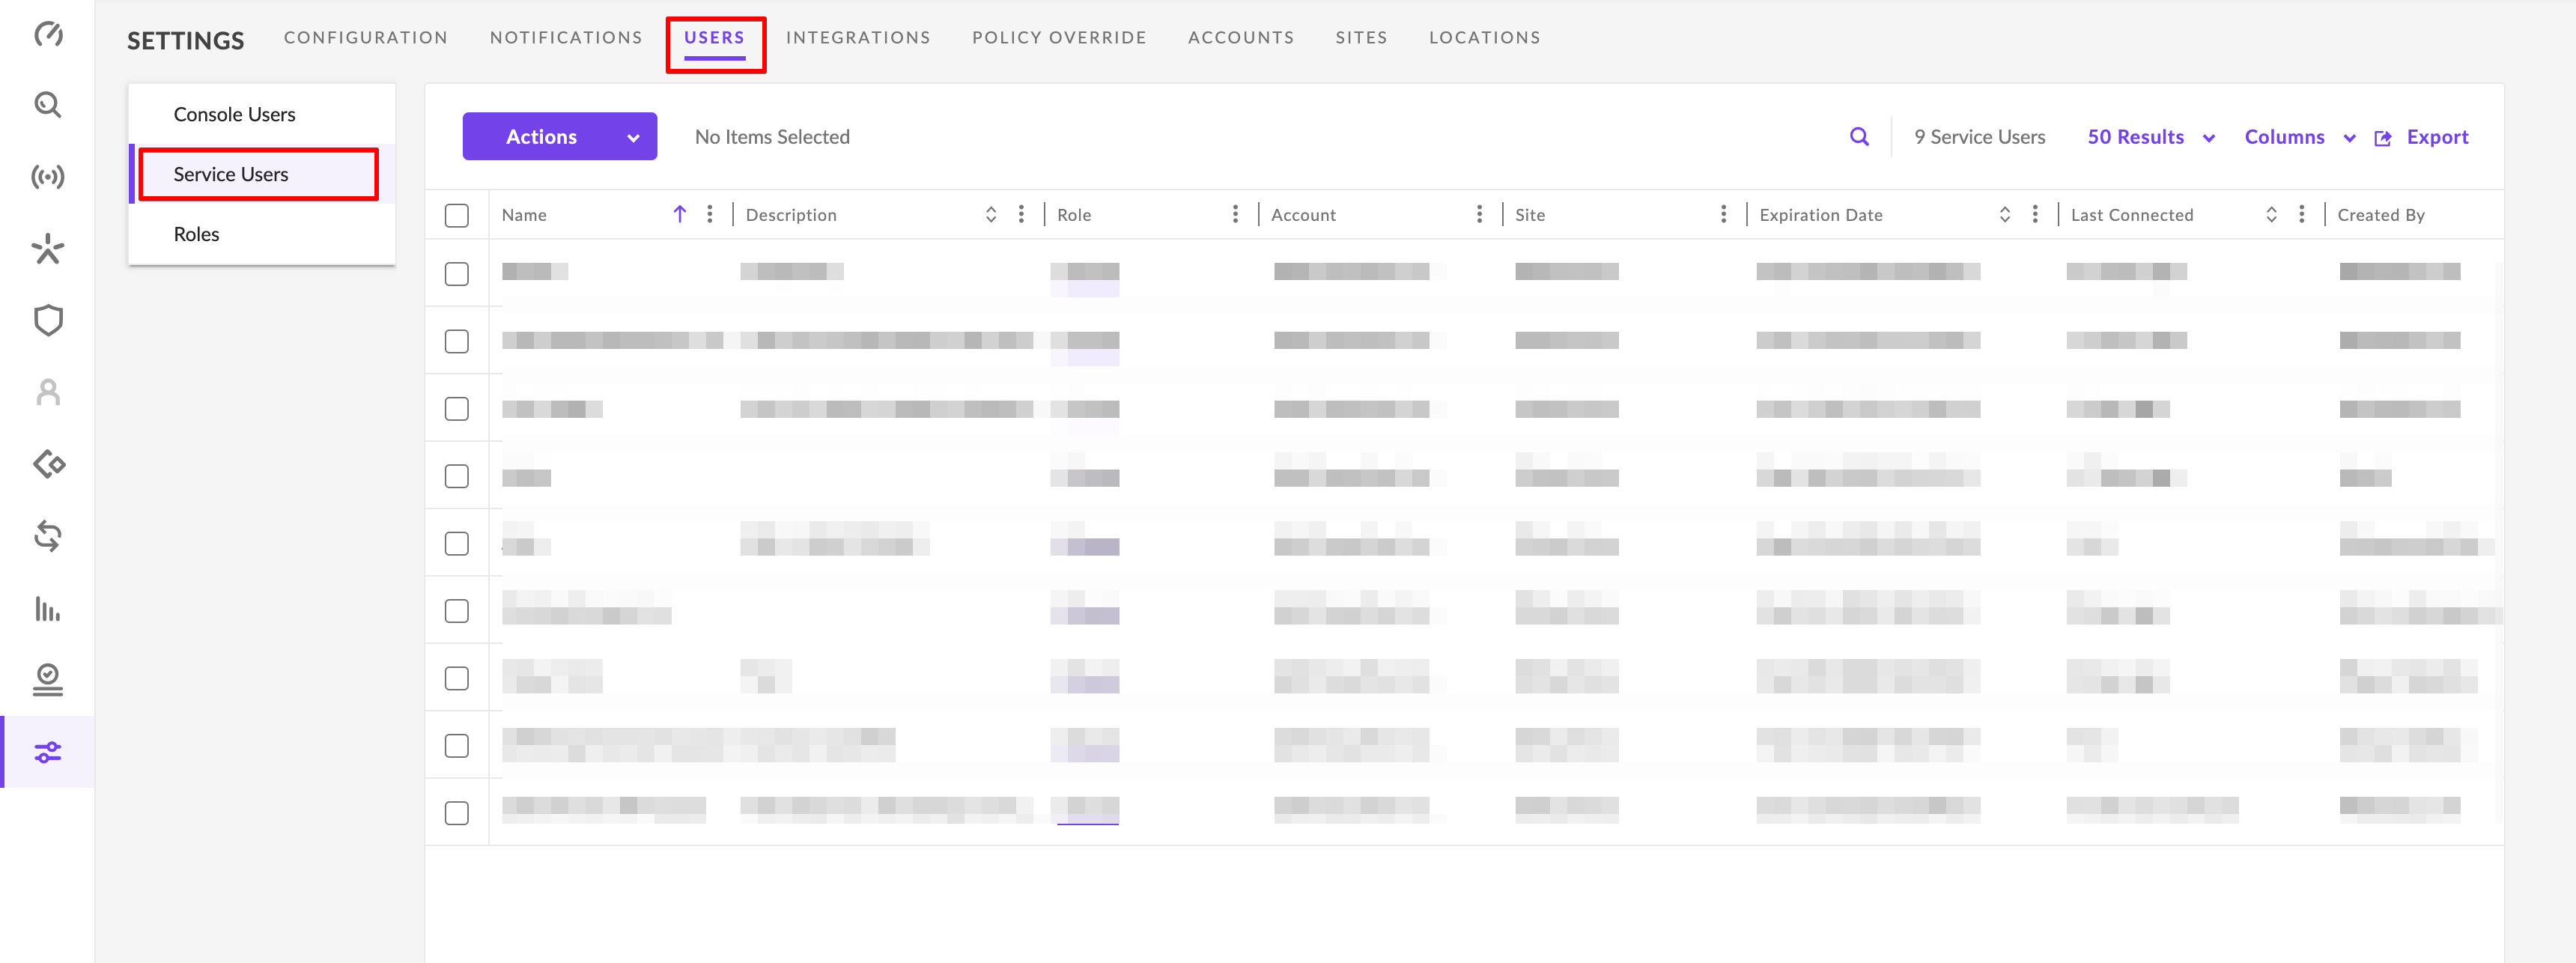
Log in to your SentinelOne account.
Click Settings from the left navigation.
Click the Users tab available in the header.
Click the Service Users option available in the left navigation.
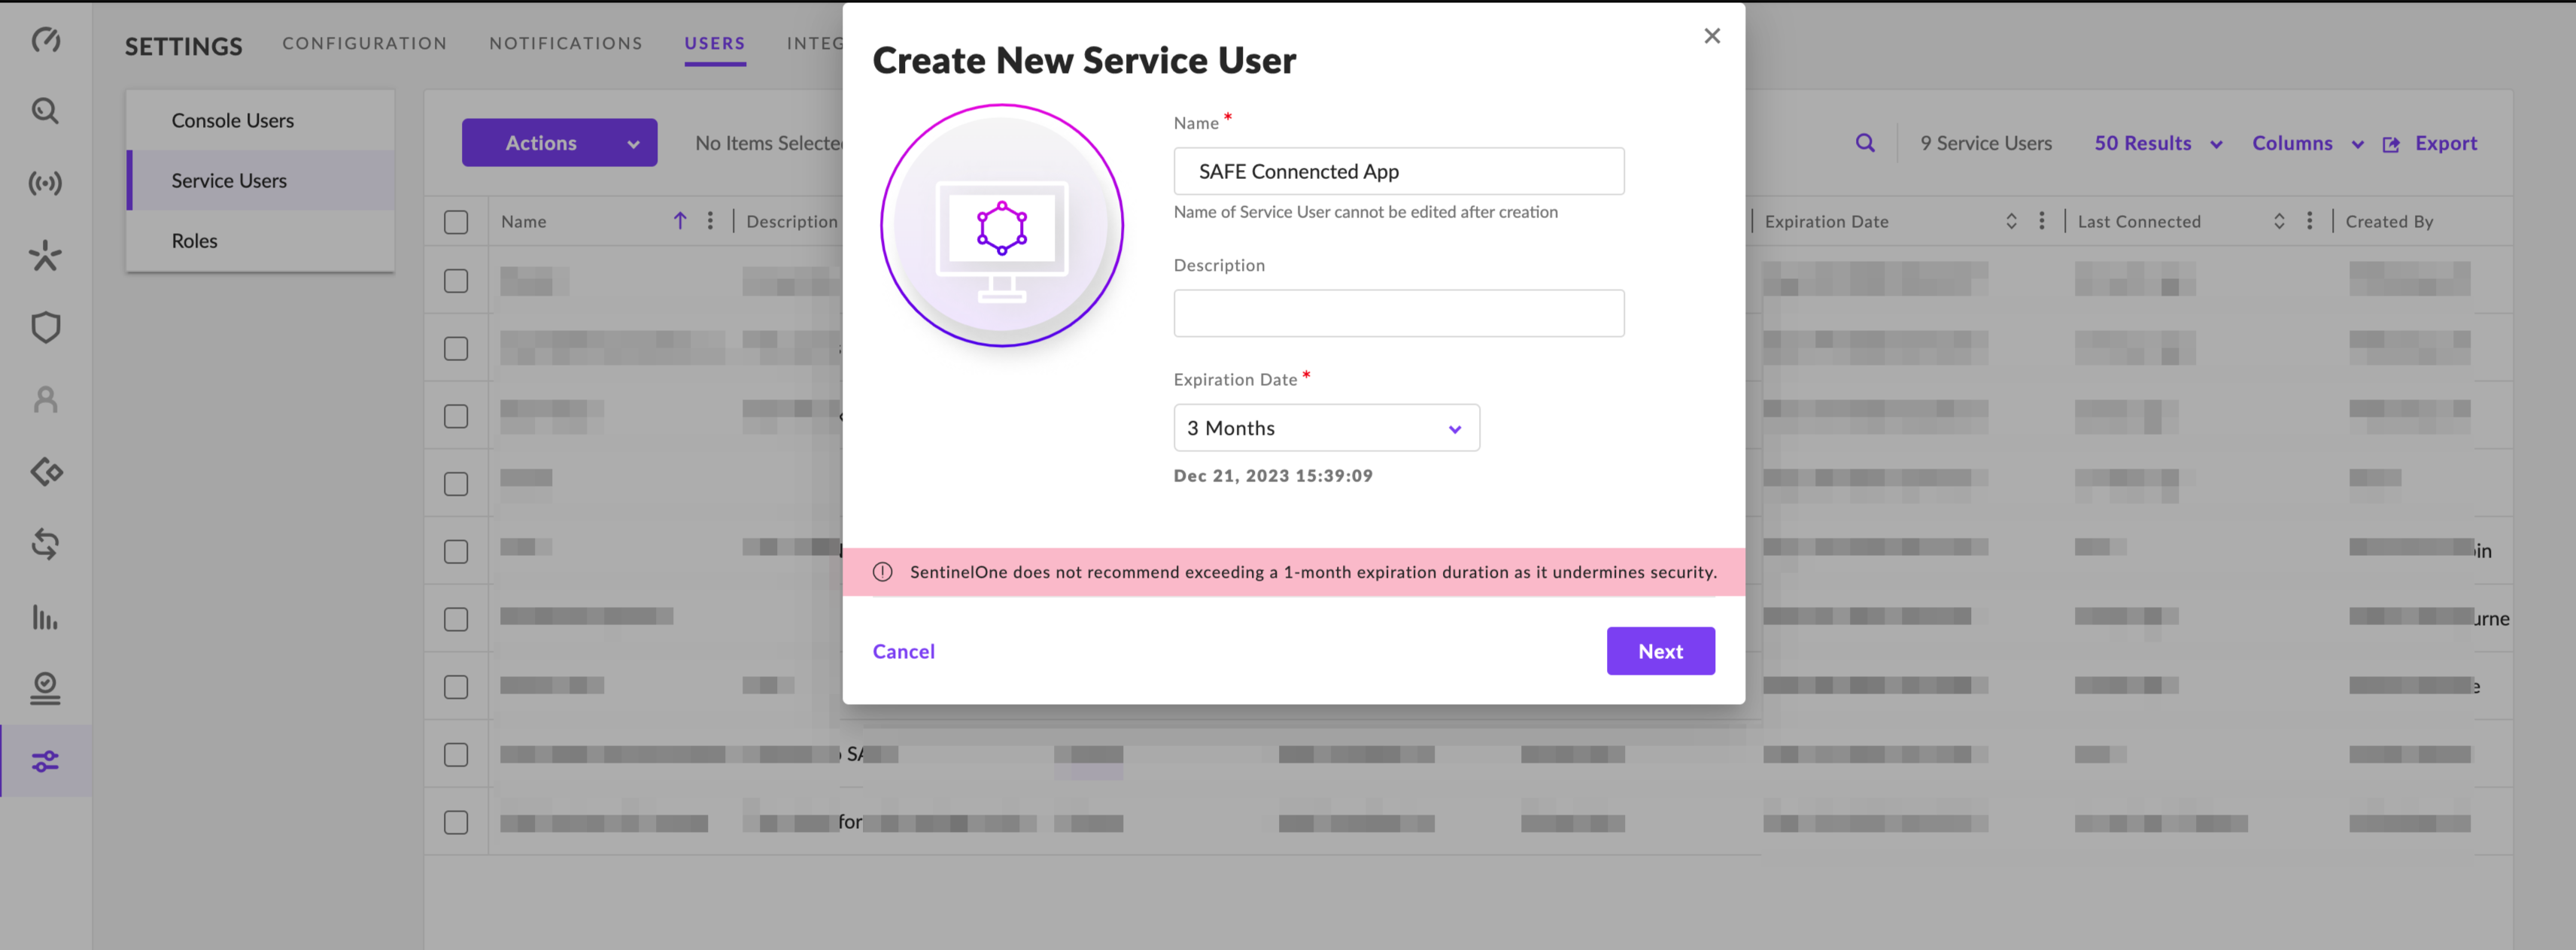
Click the Actions dropdown and select Create New Service User. If this option is not available, contact your SentielOne admin.
On the Create New Service User pop-up, enter the Name, Description, and Expiration Date.
Click the Next button.
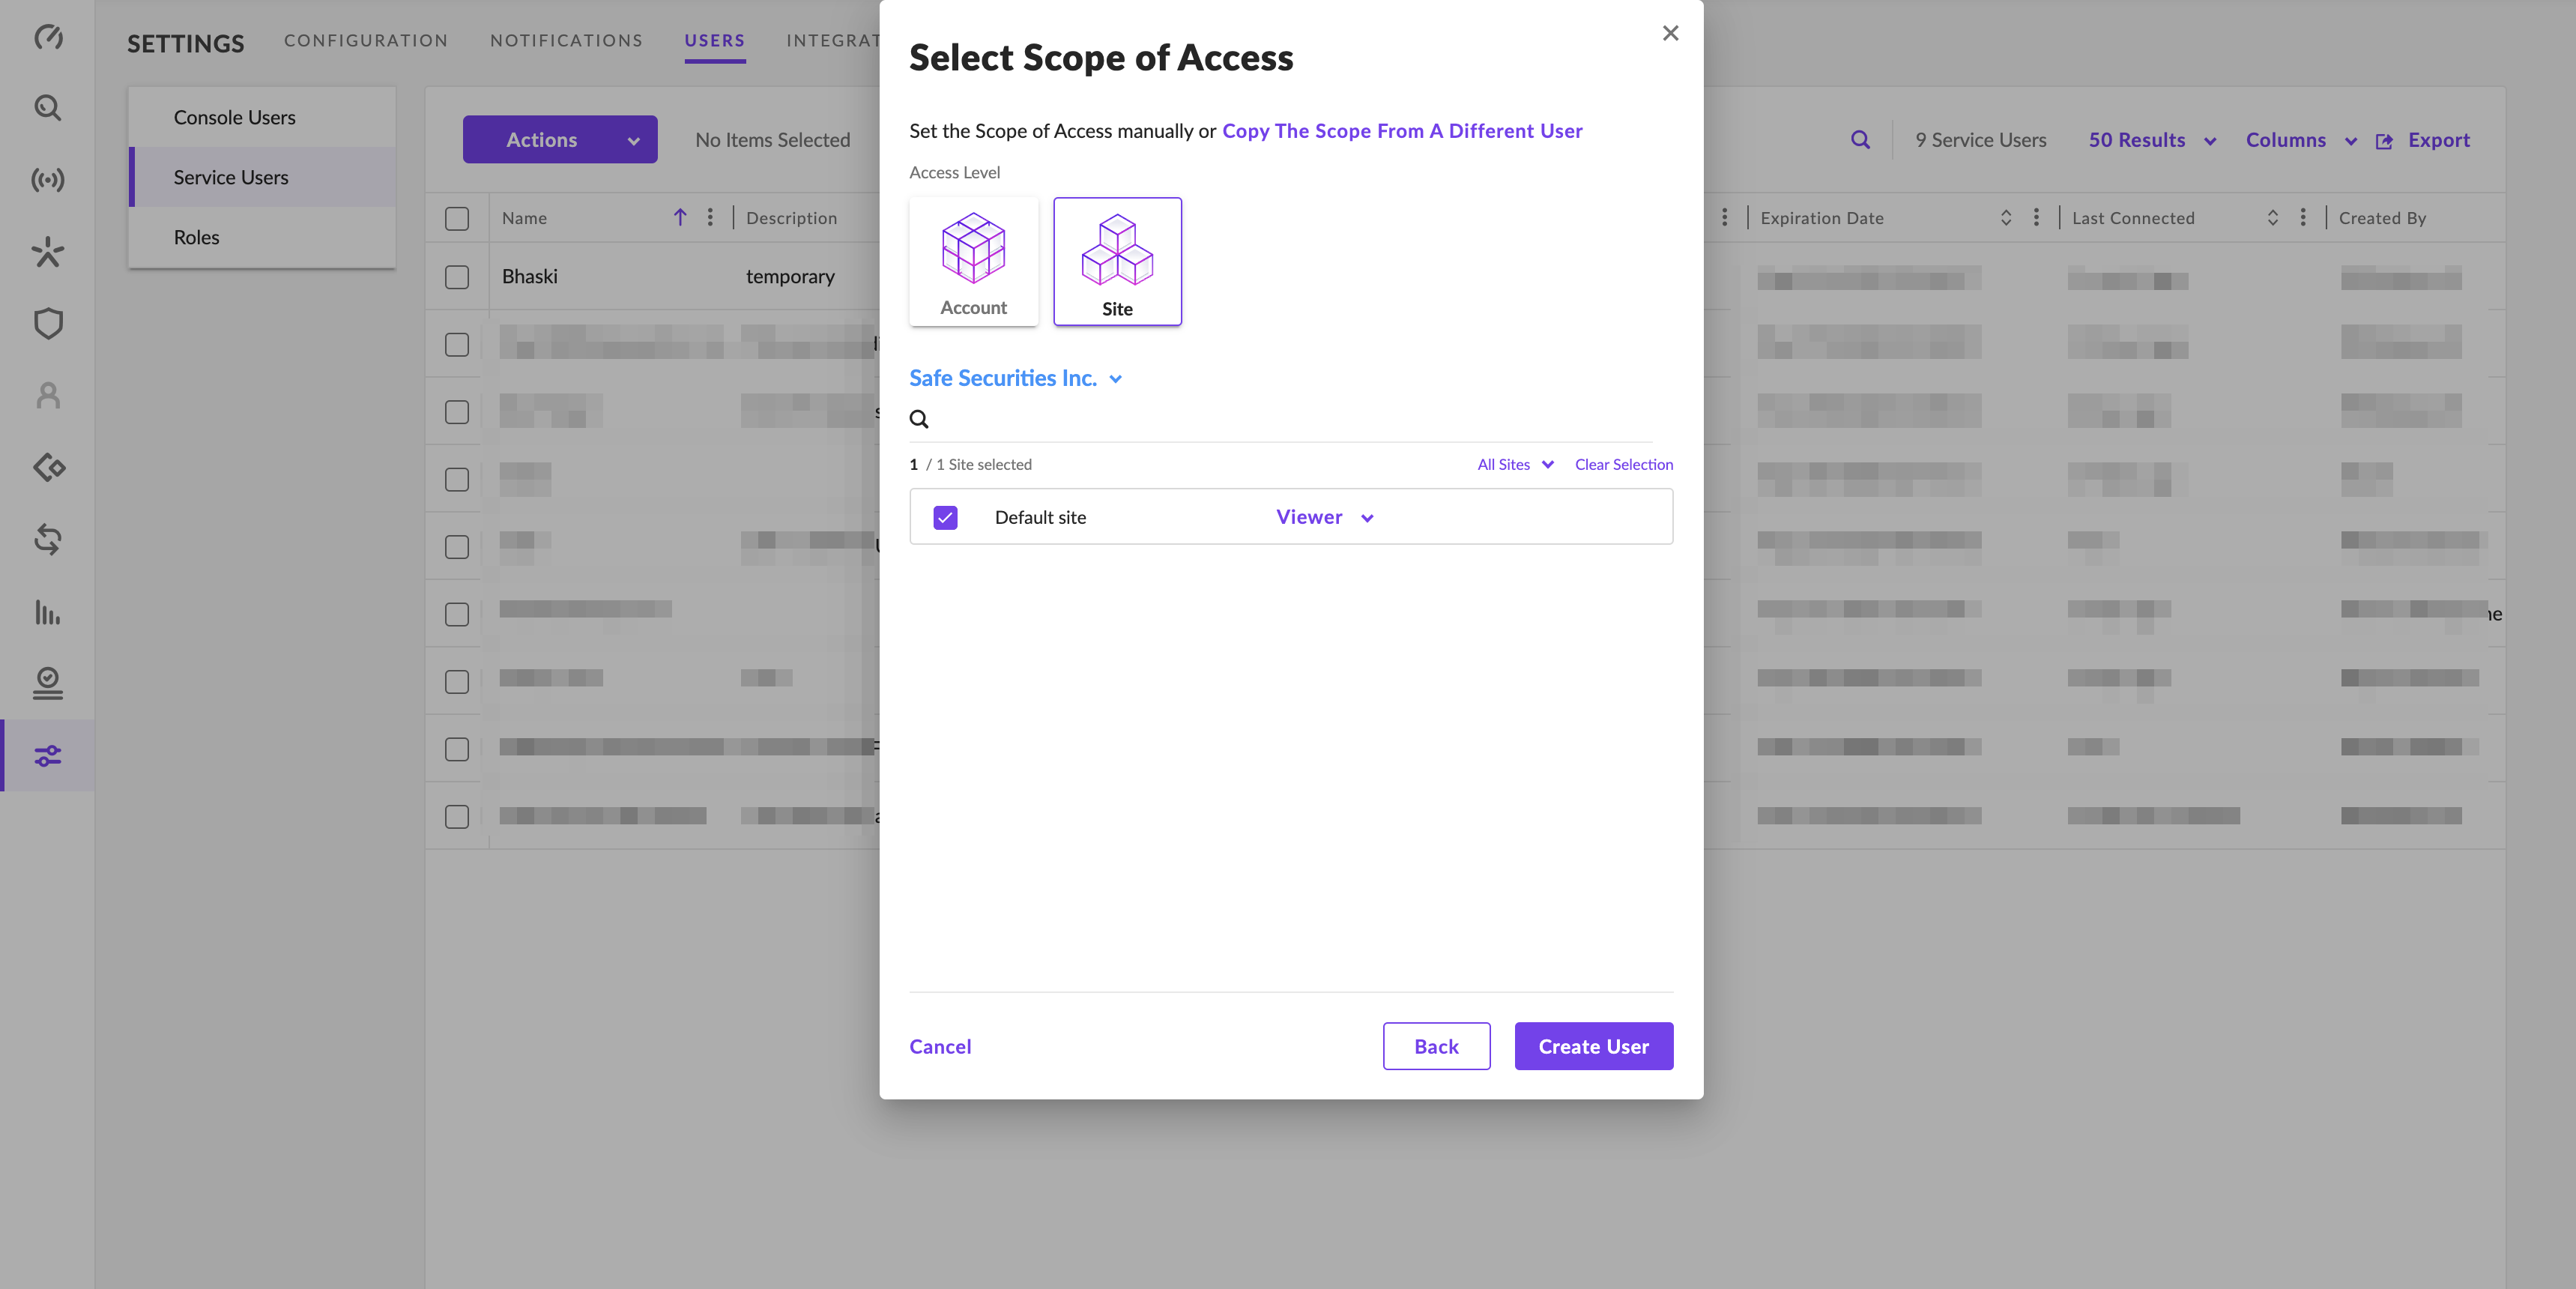
In the Scope of Access pop-up, Click the Site card.
In the SelectAccount, search for the account you want to pull the data to SAFE and click it.
The system displays a checklist for all the available sites for the account.
Selecting the Default site, the system displays a Role drop-down that allows you to select Roles. Select the Viewer role.
Click the Create User button.
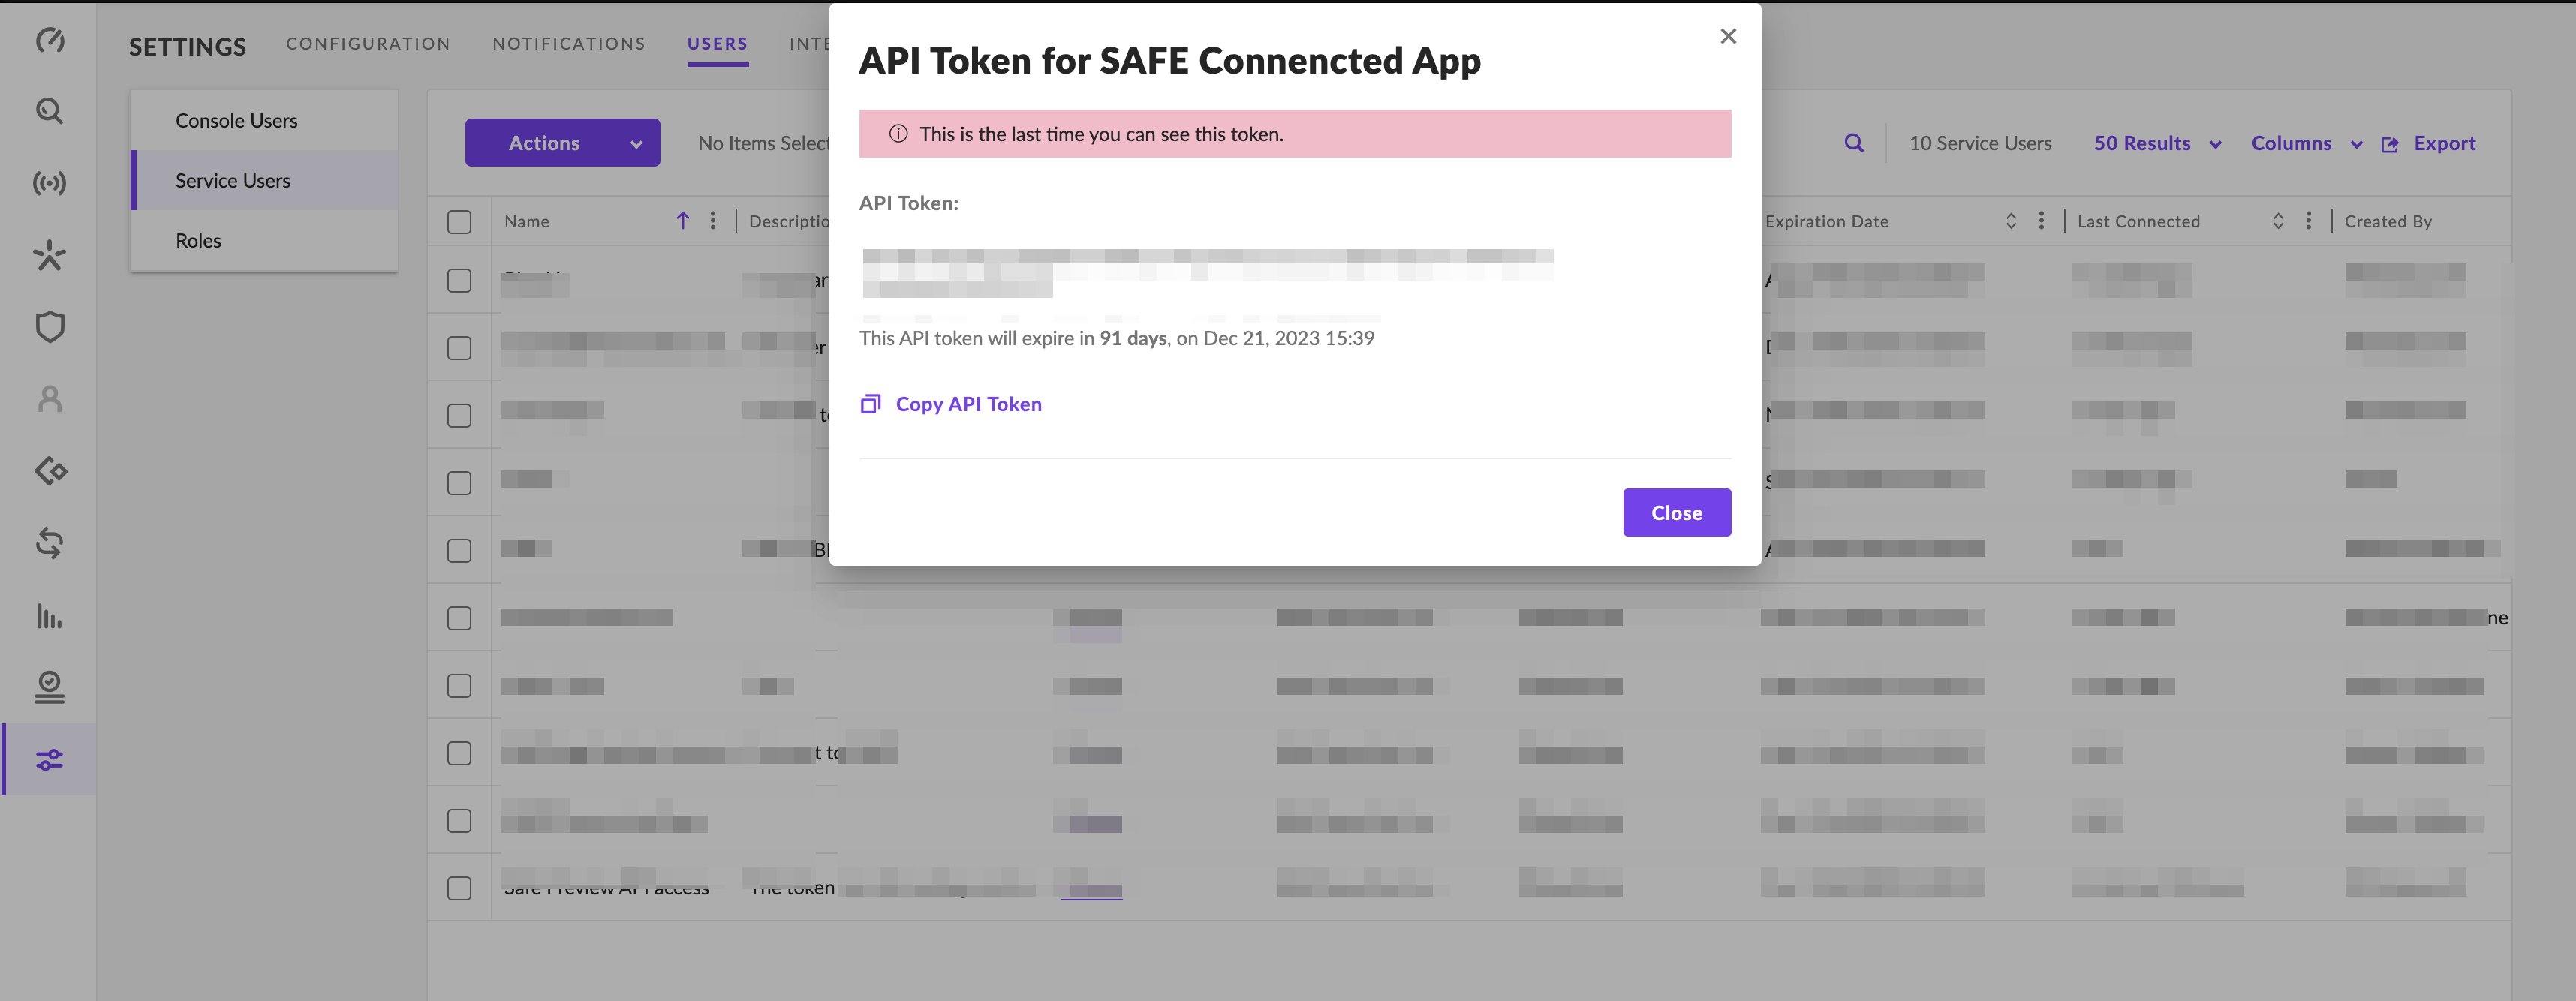
The system creates the service user account and also displays an API Token. Copy and save the API Token to use later while configuring the SentielOne account in SAFE. The system displays this API Token only once.
Configuring SentinelOne in SAFE
Navigate to Integrations on the left navigation.
Click the SentinelOne card.

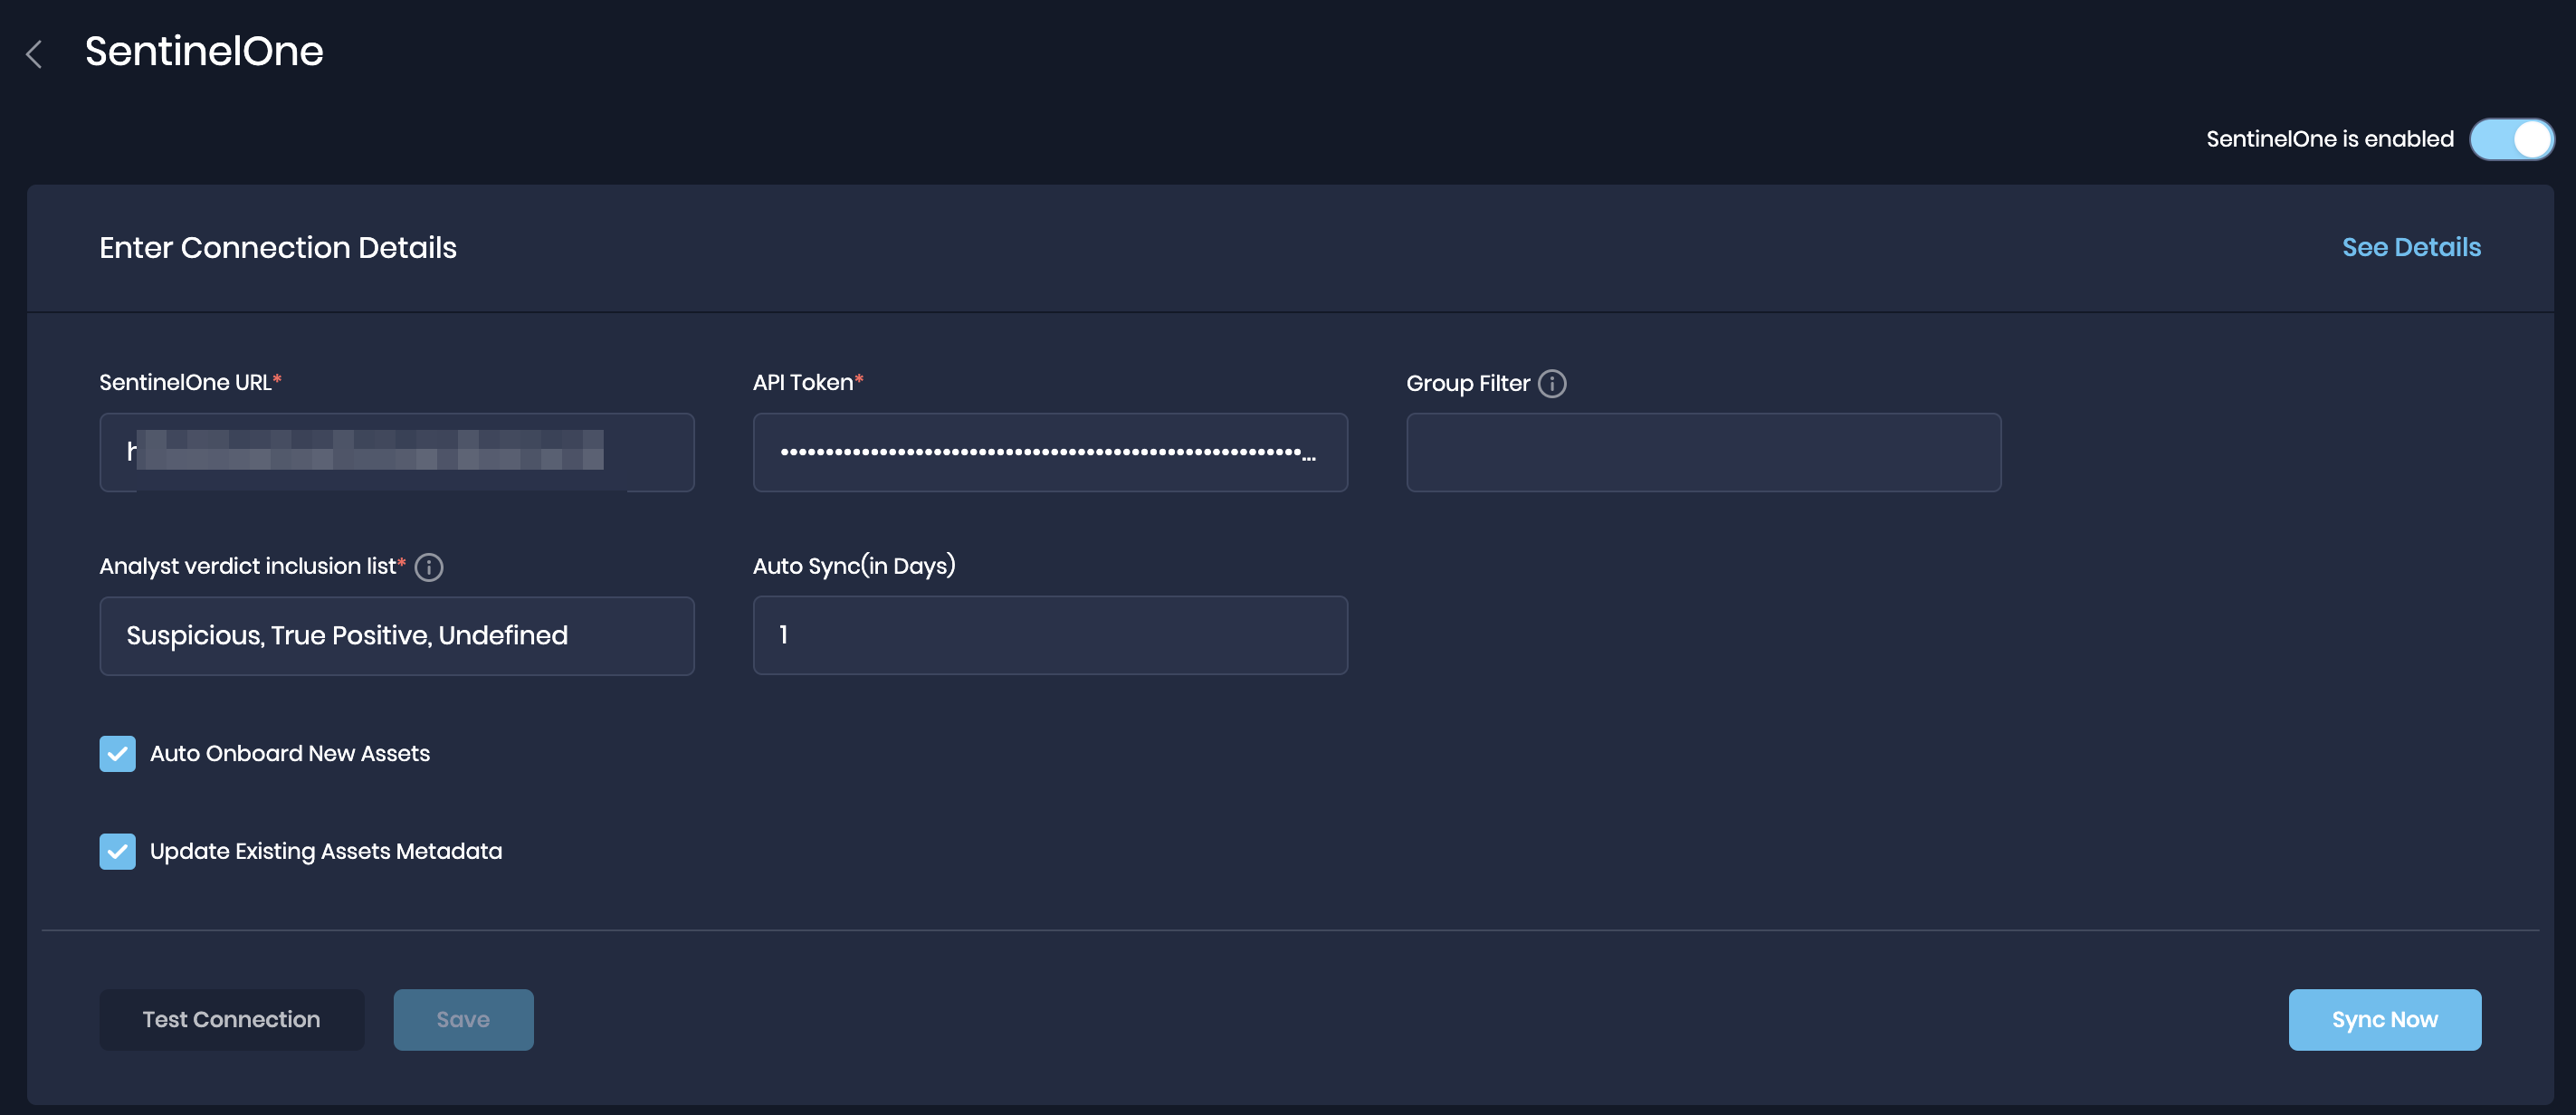
Enter the details in their respective field
SentinelOne URL
APIToken generated above.
AnalystVerdictInclusionList: This field is populated by default. You can modify it to include specific analyst verdict statuses that should appear as failed findings in SAFE.
AutoSync (in Days)
Auto Onboard New Assets - By default, any resource that is present in SentinelOne and is not found in SAFE will be onboarded. The identifier used for the same is the Computer Name. To limit the integration to assessing only the endpoints/assets present in SAFE, uncheck this option.
Update Existing Assets Metadata: If this checkbox is marked, the asset's metadata, such as asset name, IP address, etc., will get updated based on the data pulled from SentinelOne.
GroupsNames(Optional): This field allows you to select which groups' threat data you wish to synchronize with SAFE. If left blank, it will automatically fetch data from all groups. This field accepts a comma-separated string input.
Click the TestConnection button to verify the connection.
Once the connection is verified, click Save to save the configuration.
To trigger an on-demand sync outside of the scheduled auto-sync, click Sync Now. The auto-sync time is 01:15 UTC.
Import Tags from SentinelOne via Custom-field
SAFE can bring in tags from SentinelOne. Since SentinelOne uses key-value tags, you can import these tags into SAFE using a Custom Field.
To do this, go to Settings > Custom Field and create a new custom field. Make sure the name of this custom field matches exactly with the key of the tag in SentinelOne..png "image(384).png")
When the next sync with SentinelOne happens, the values for your custom field will be updated. You can also start a manual sync by going to Integrations > SentinelOne > Configure.
Viewing Results from SentinelOne
After configuring SentinelOne in SAFE, you can view assets and findings generated from SentinelOne threats.
Go to the Integrations on the left navigation.
Scroll to find the SentinelOne integration card or search for SentinelOne in the search bar.
Click on the SentinelOne integration card for Finding View and Asset View.
Finding View: This tab displays all the findings details pulled from Fastly.

Asset View: This tab displays all the Asset details pulled from Fastly.
