Introduction - Smart Custom Role
Note
Smart Custom Roles are designed for Groups and Third-Party entities.
A maximum of 20 Custom Roles is supported across both Static Custom Roles and Smart Custom Roles combined. If you require more than 20 Custom Roles, please contact SAFE Support or submit a Service Request for further assistance.
Smart Custom Roles provide granular, action-level permissions, enabling fine control over what users can do within specific modules.
Define permissions at action level (e.g., Create Org, Add Questionnaire, Edit Third Party, Update Group, Create Risk Scenarios, and more)
Restrict access specifically to the Group or Third-Party based on the configuration
Enable the least privilege access model
Automatically adapts based on selected actions
Feature | Description |
|---|---|
Permission Model | Action-level (Create, Edit, Delete, Submit, etc.) |
Scope Control | Primarily Organization-level (Third-Party focused) and Group-level |
Flexibility | Dynamic and granular |
Use Case | Group Management, Risk Treatment Plans, TPRM workflows, vendor access control, and least-privilege enforcement |
Notes
When configuring a custom role:
Carefully review both the permissions and filters assigned to the role.
Permissions determine the actions a user can perform (for example, view, create, edit, or manage records).
Filters determine the data the user can access, such as specific third parties, groups, tags, or business units.
Applying filters helps ensure users only have access to information relevant to their responsibilities.
If no filters are configured, users will have access to all groups or third parties permitted by the role's assigned permissions.
It is recommended to follow the principle of least privilege and grant only the level of access required for users to perform their responsibilities.
For a step-by-step walkthrough of Smart Custom Roles and filter configuration, refer to the interactive video guide available here.
Creating a Smart Custom Role
Follow these steps to create a Smart Custom Role in SAFE:
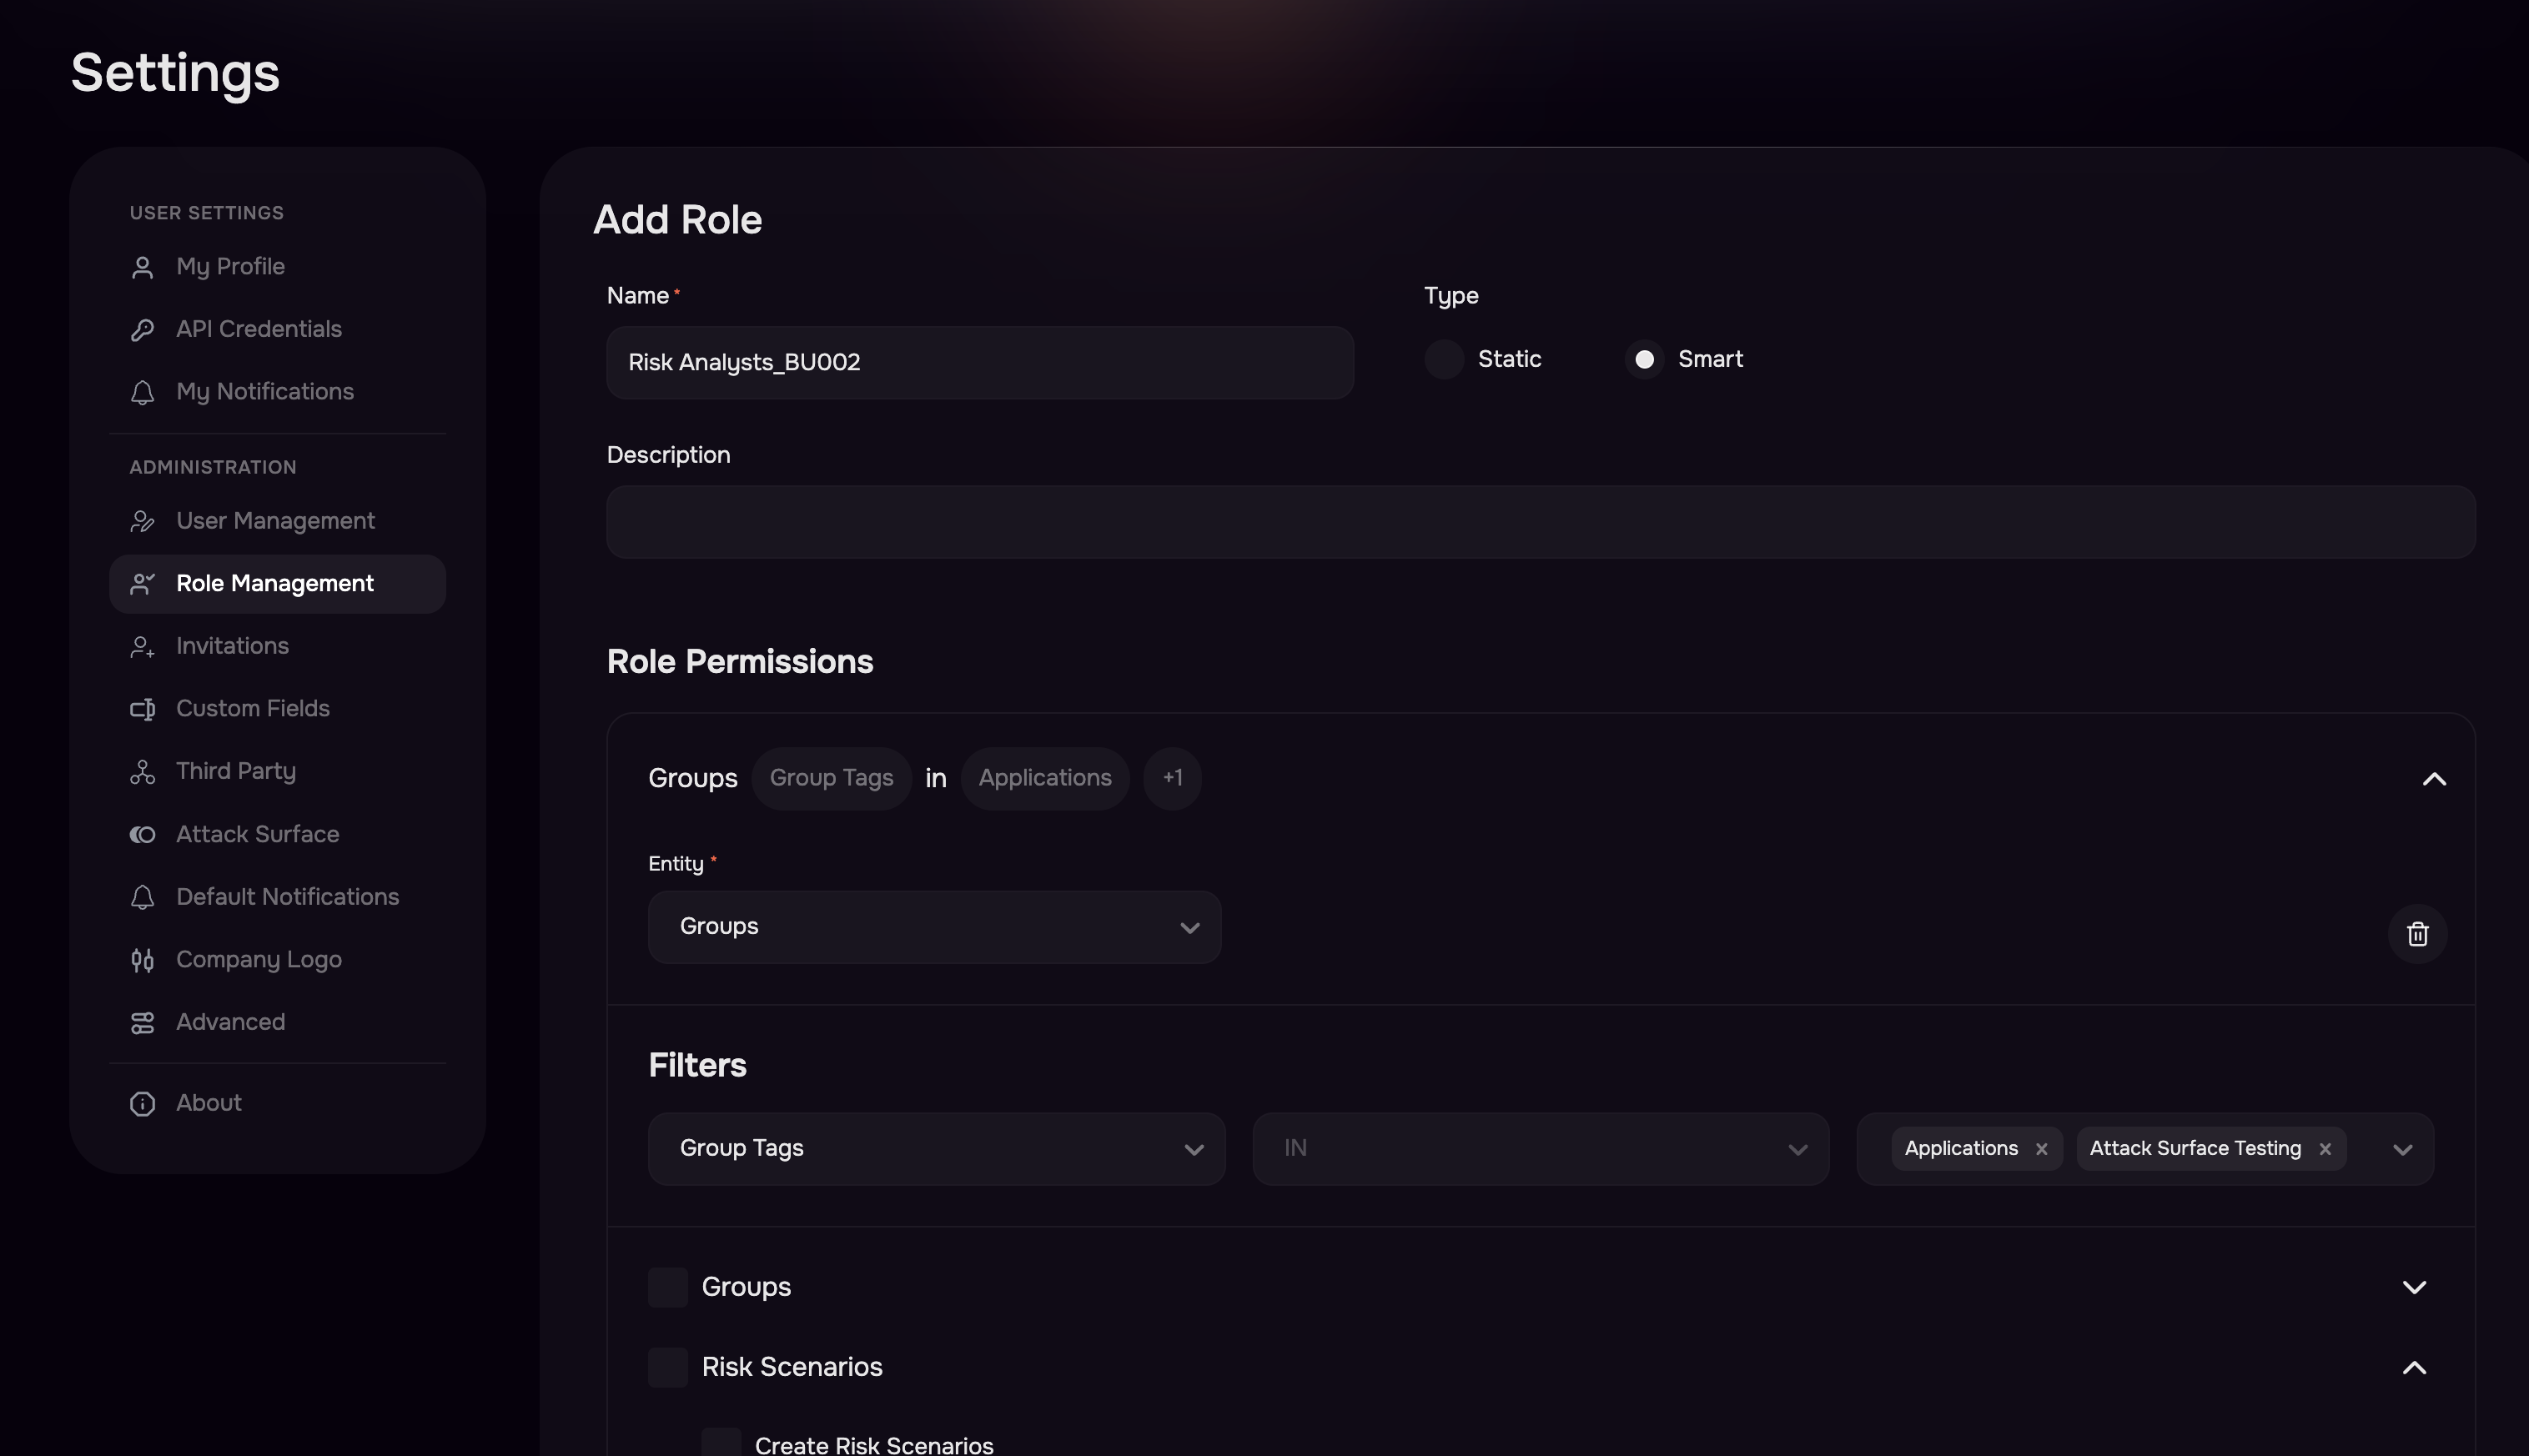
Navigate to Settings > Role Management.
Click on the Add Role button.
Select the Smart option.
Enter a name and description for the Role.
Click the Add Permission button.
Select the Entity as Group or Third-party based on the requirement.
Expand the permissions section and add the actions by selecting the checkboxes.
Use the filter option to include groups or third parties based on the entity selection.
Groups: Allows you to filter by Group Name and Group Tags
Third-party: Allows you to filter by Primary Business Unit and Tags
Click the Save button. The system will create the Smart Custom Role, making it accessible within the role selection when inviting a user to SAFE.
Editing or Deleting Custom Roles
In the SAFE application, you can edit or delete custom roles as your organizational needs evolve.
Editing a Custom Role
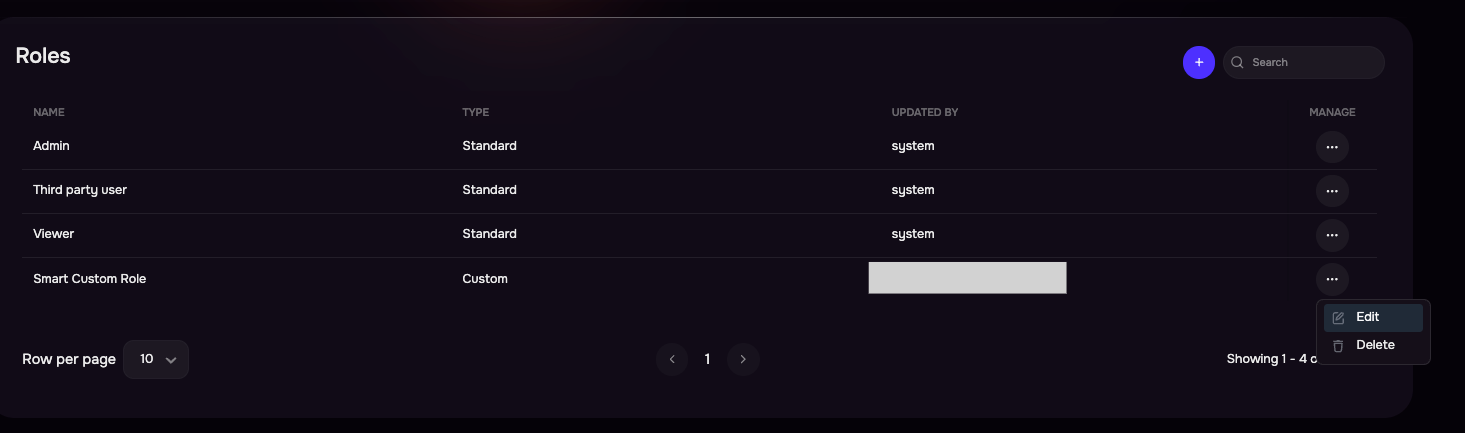
Navigate to Settings > Role Management.
Click on the three-dot options menu for the custom role you wish to edit.
From the menu, select the Edit option.
Modify the role name or adjust read/write permissions for the associated groups as needed.
Click the Save button.
Deleting a Custom Role
Notes
Before deletion, make sure that the user role is not currently assigned to any user.
Navigate to Settings > Role Management.
Click on the three-dot options menu for the custom role you wish to delete.
From the menu, select the Delete option.
Click the Delete button on the confirmation screen.