About this document
This document describes the step-by-step procedure to configure Imperva WAF in SAFE.
Introduction
SAFE integrates with Imperva WAF, allowing you to assess the configuration of web applications protected by the Imperva WAF service. This integration checks for any misconfigurations in the WAF rules and includes them in the overall risk posture of the organization. The WAF controls in SAFE are included in different risk scenarios, such as DDoS, and having these controls in place can prevent certain types of cyber attacks.
Prerequisites
To configure Imperva in SAFE, you need the following details:
- API ID and API Key: You need the Imperva WAF API ID and API Key to configure it in SAFE. You need an Imperva Console Administrator role to create these connection details.
Generate Connection Details
Follow the below steps to generate the API ID and API Key from Imperva WAF.
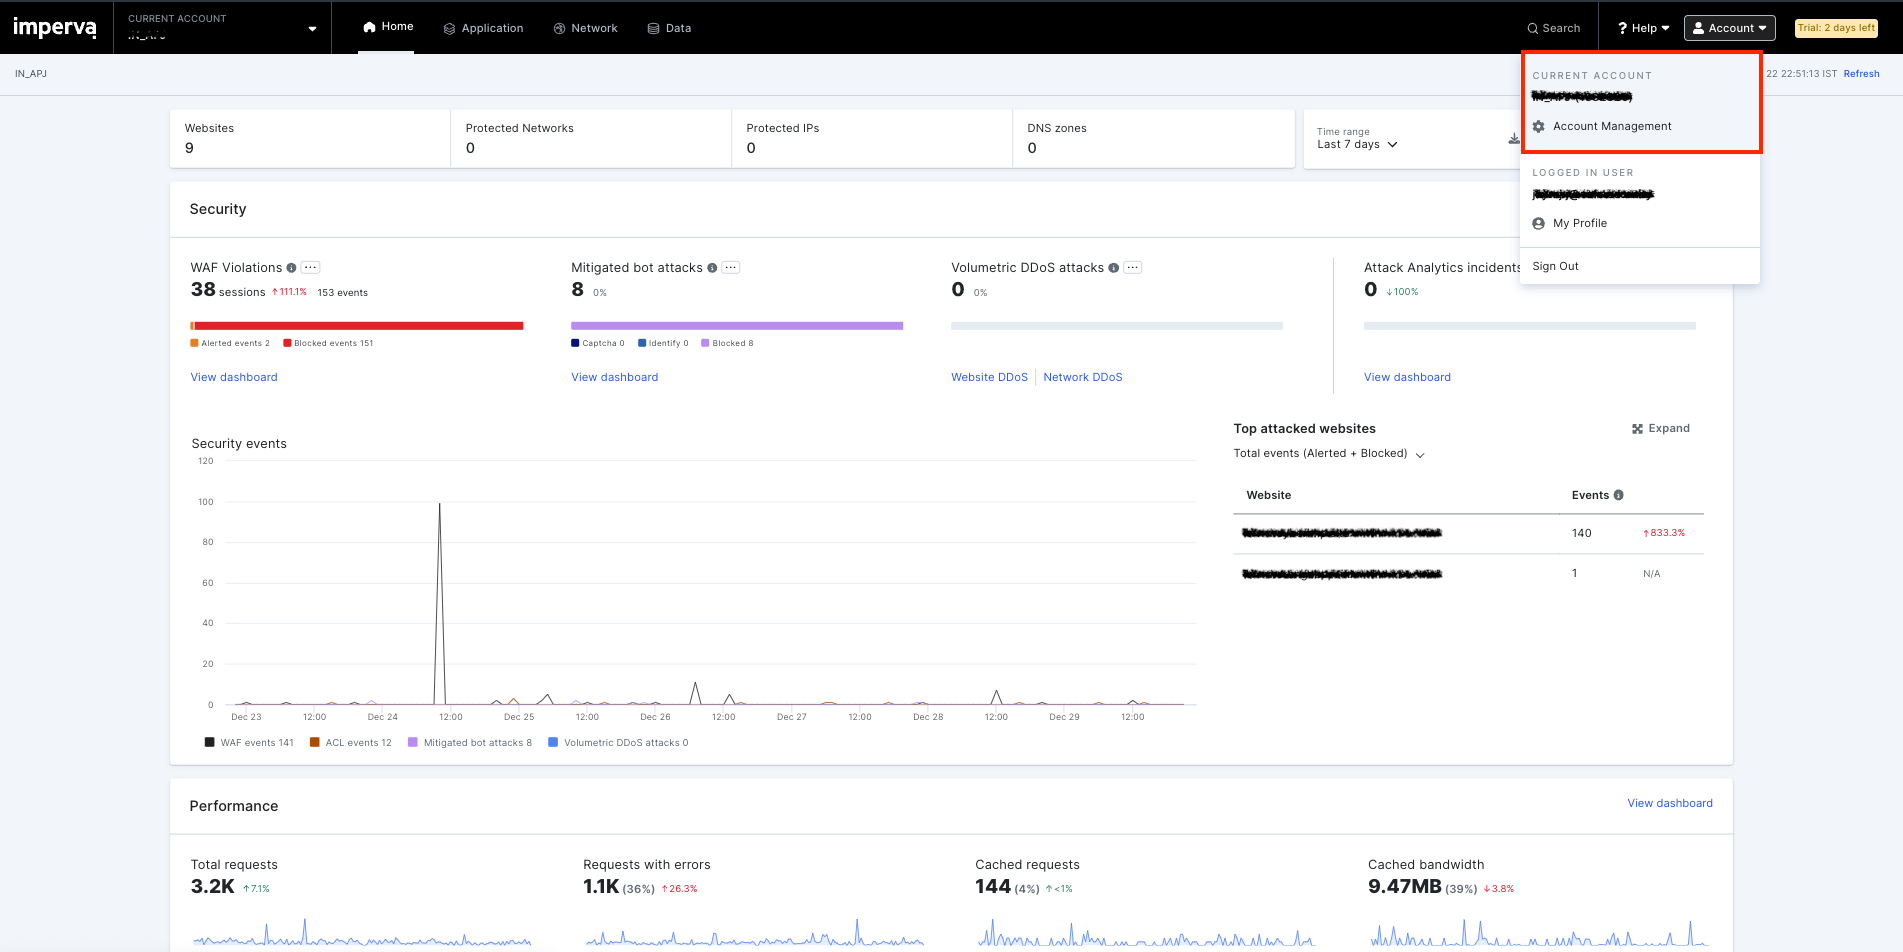
- Log in to your Imperva Cloud Security Console as Admin.
- Click the account drop-down available at the top-right corner of the home page and click Account Management.
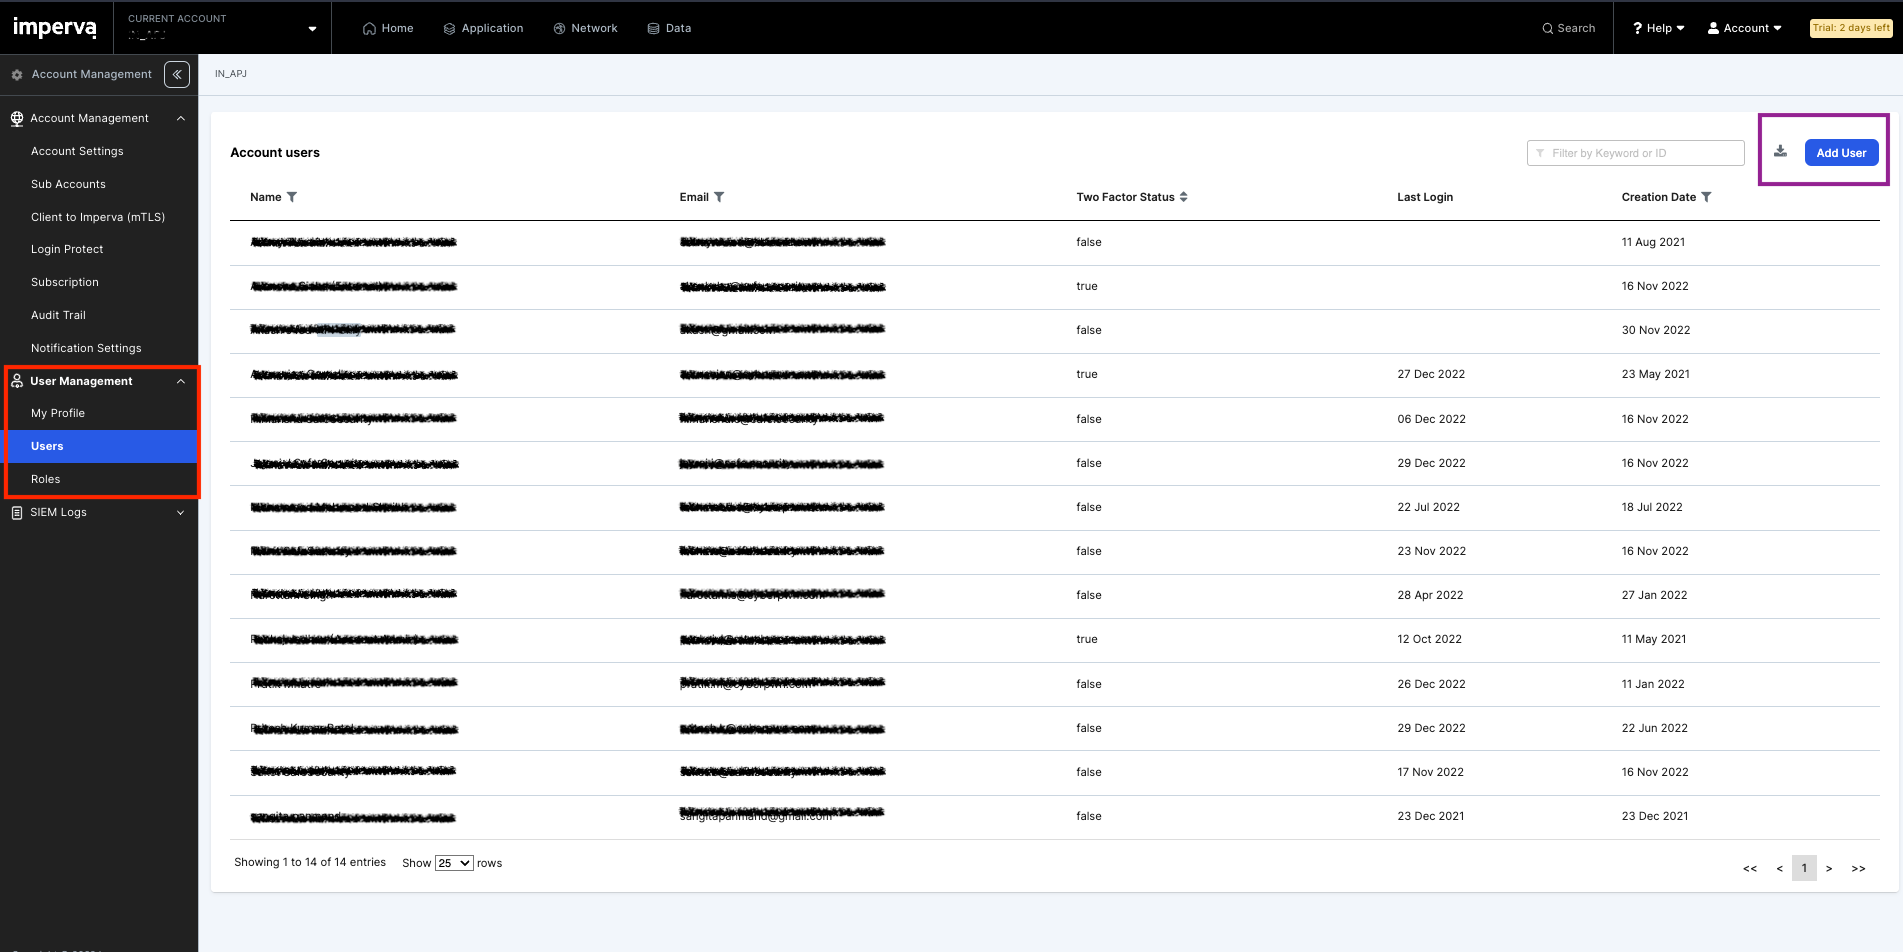
- Click Users under User Management from the left navigation.
- Click the Add User button available at the top-right corner of the screen.
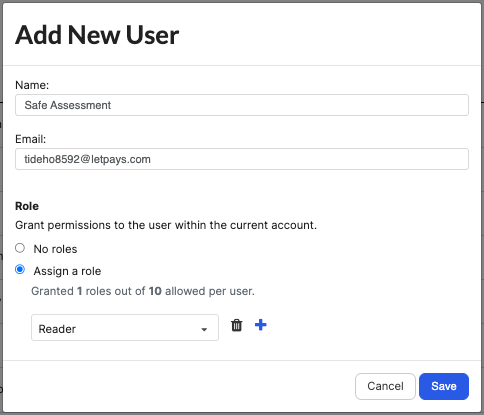
- Enter the Name and Email.
- Assign the Reader Role to the user by selecting the “Assign a role” radio button and selecting Reader from the drop-down.
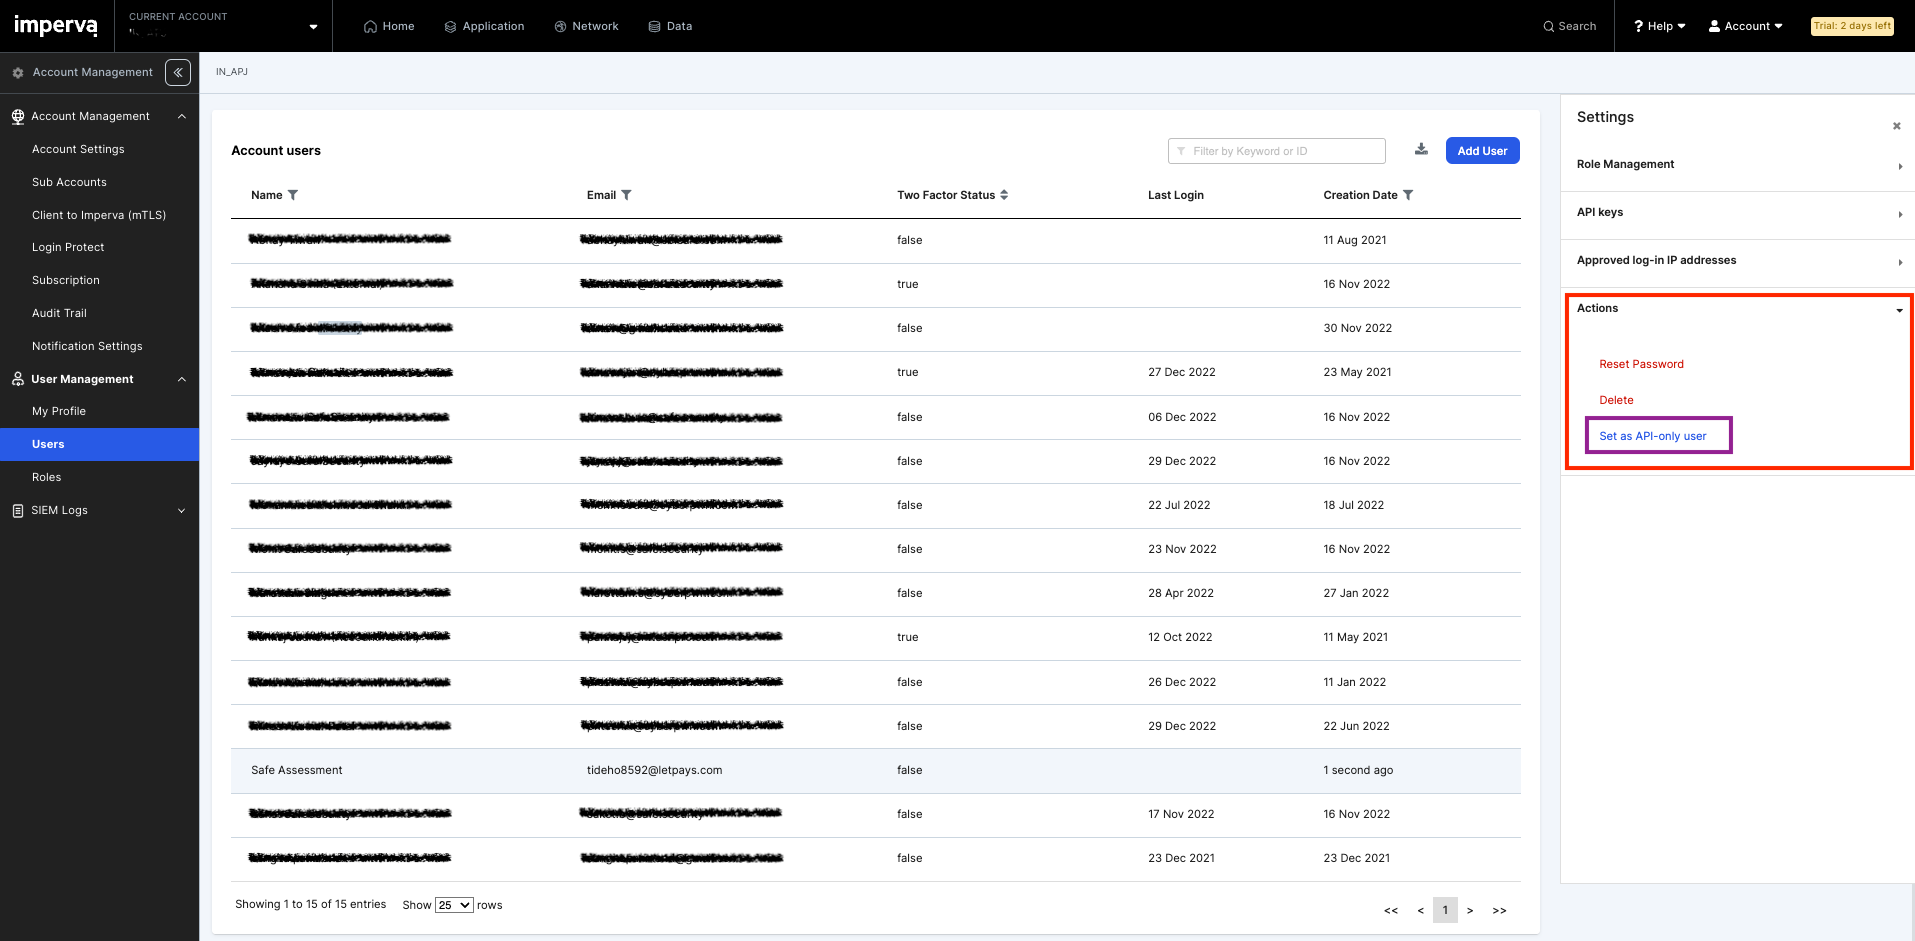
- Click the User created on the Users Page.
- In the right panel, click the Actions option and click the "Set as API-only use" option.
- In the right panel, click the API Keys and then click the Add API Key.

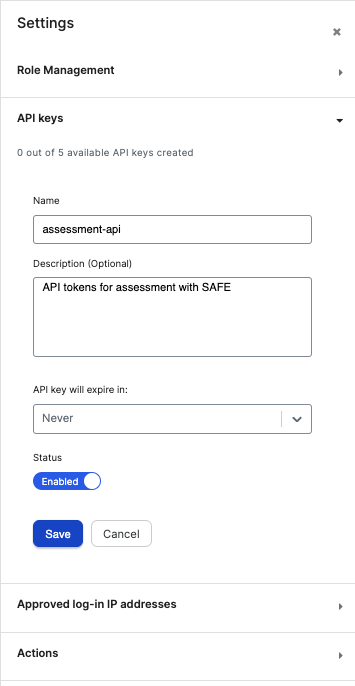
- Enter the Name, Description, and API Key Expiry time.
- Enable the Status button.
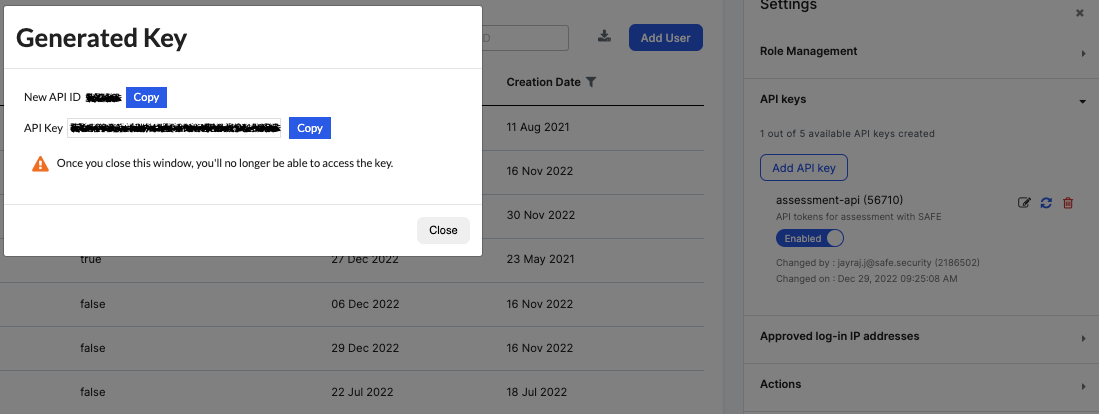
- Click the Save button to generate the API Key. The system displays the API ID and API Key.
- Copy and save the API ID and the API Key to use while configuring Imperva WAF in SAFE.
Configure Imperva WAF in SAFE
- Navigate to SAFE Hooks.
- Search and click the Imperva WAF card.
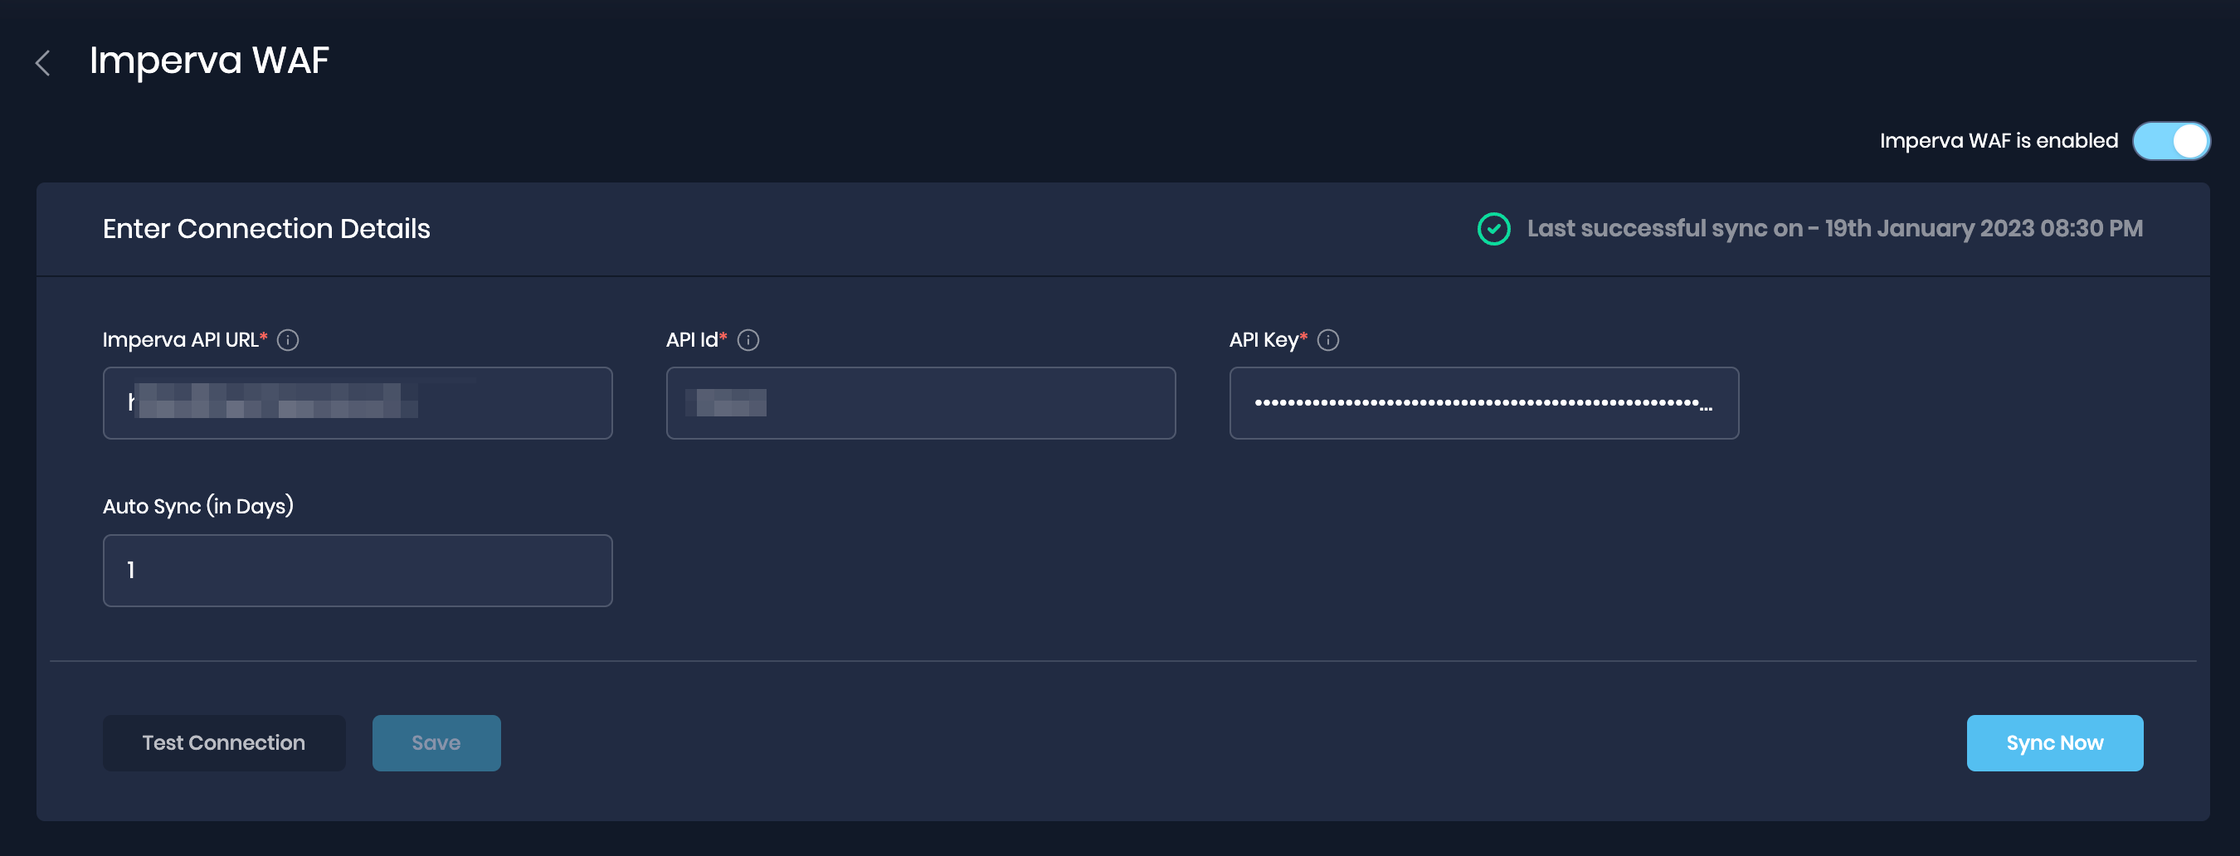
- Enter the Imperva API URL.
- Enter the API ID and API Key.
- Select the Auto-sync frequency.
- Click the Test Connection button.
- Once the connection is verified, click the Save button to save the configuration.
- Click the Sync Now button available at the bottom-right corner of the screen.
View Result
After a successful sync, the Imperva web application assets are automatically imported into SAFE.
View Assets
To view the assets pulled from Imperva:
- Click the See Updated Assets button available at the top-right of the History table.
- The system displays a filtered list of assets pulled from Imperva WAF.
View Findings
To view the findings:
- Navigate to the Risk Scenario created for the Imperva WAF assets.
- Scroll down to the Findings section. Here you can see the finding details of the Imperva WAF assets.