About this document
This guide provides step-by-step instructions for configuring the Ironclad CLM integration. Once set up, SAFE can automatically import third-party vendors and their associated contracts from Ironclad.
Introduction
The Ironclad CLM integration enables SAFE to:
Import third parties from Ironclad for seamless onboarding into the SAFE platform.
Retrieve contracts for onboarded third parties, making them available for analysis in SAFE.
SAFE Admins can configure this integration through the Ironclad CLM card on the Integrations page.
Notes
SAFE supports only one contract per third-party.
For any given third-party, only the most recent contract will be retrieved.
Prerequisites
Connection Details
API URL
Client ID
Client Secret
Refresh Token
The following OAuth scopes must be granted for the integration to function:
public.records.readAttachments – Allows access to attachments associated with records.
public.records.readRecords – Enables reading of contract records.
public.entities.readEntities – Provides access to vendor/entity details.
Generate Connection Details
Create an App and Credentials in Ironclad
Log in to Ironclad.
Click the profile icon in the top-right corner.
Select Company Settings.
Navigate to the API section.
Click on Apps and create a new app.
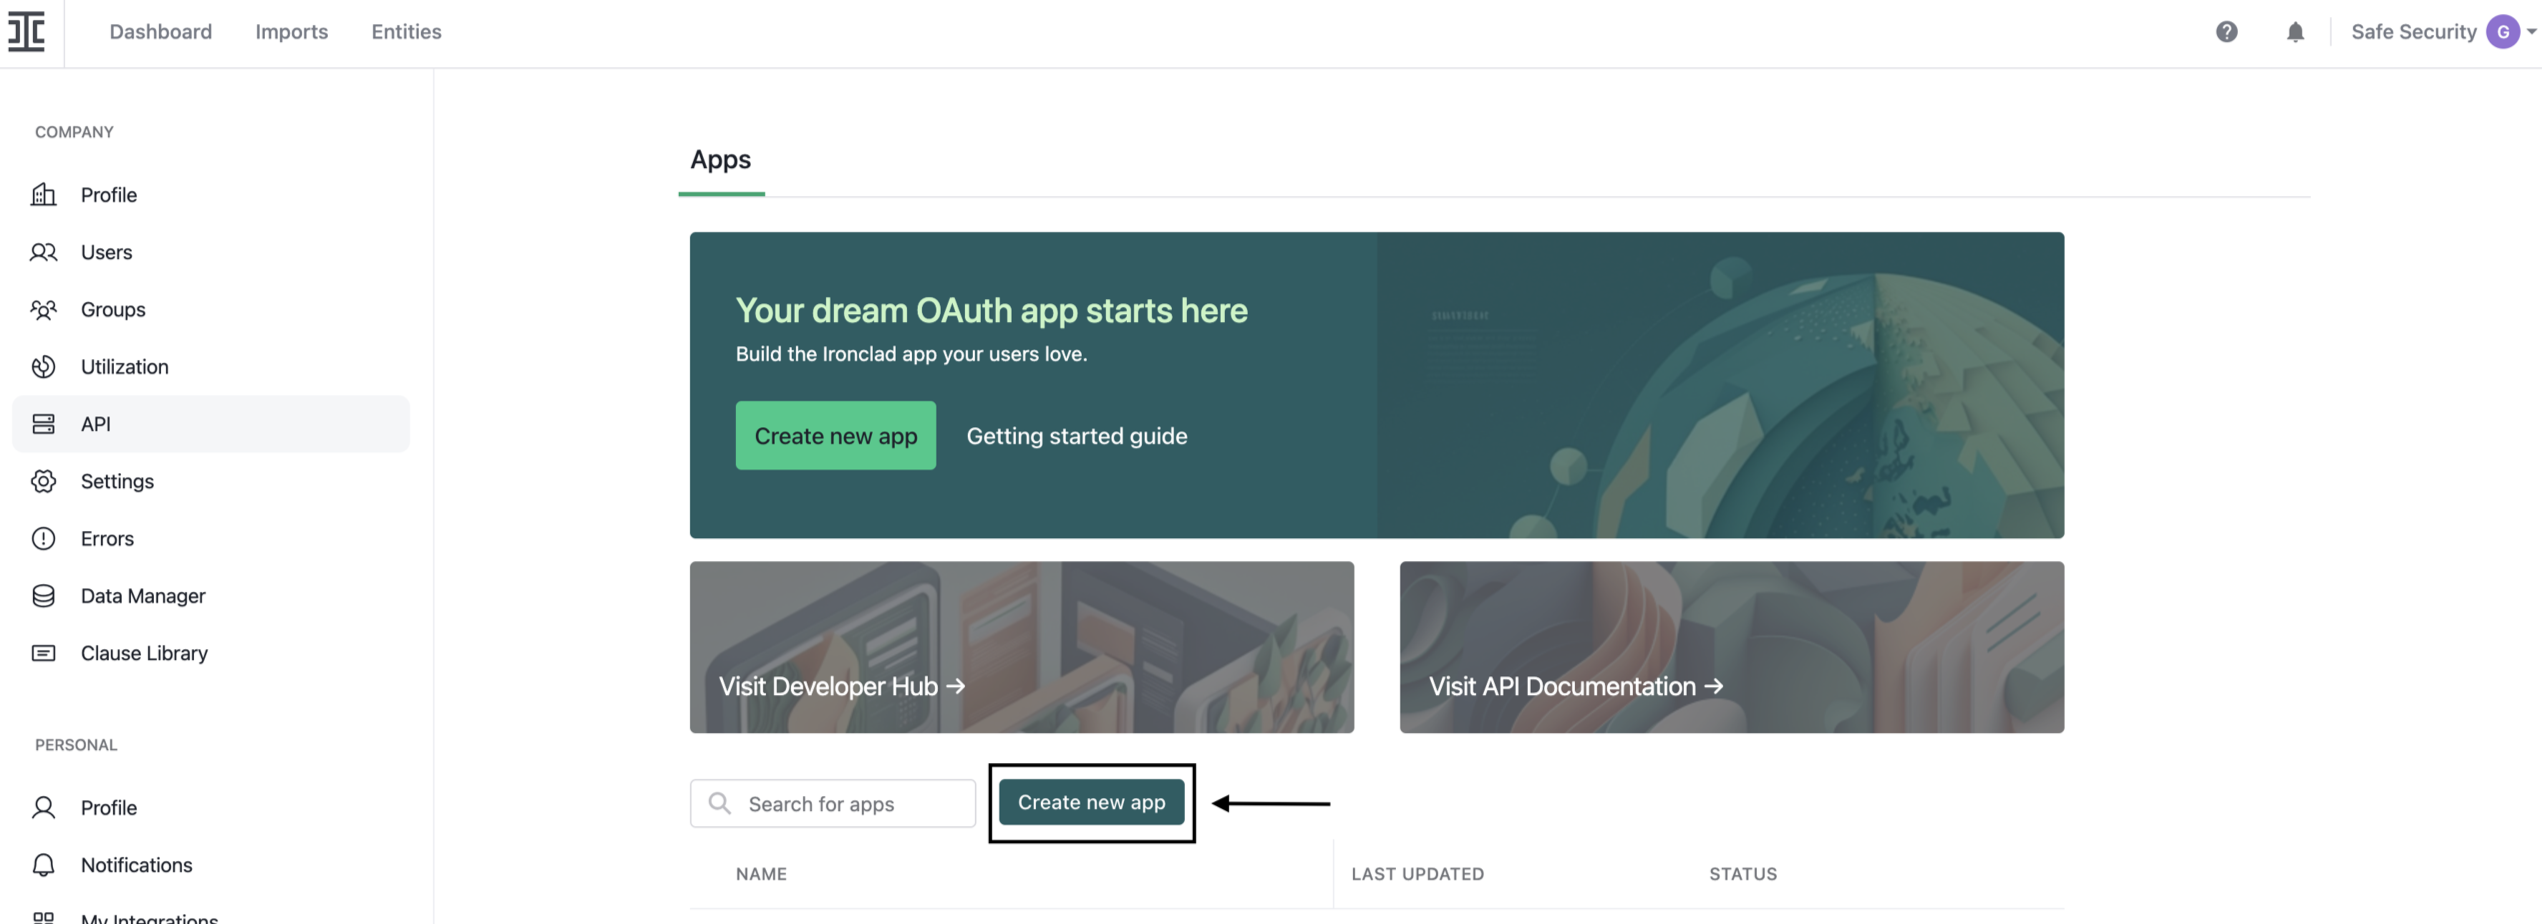
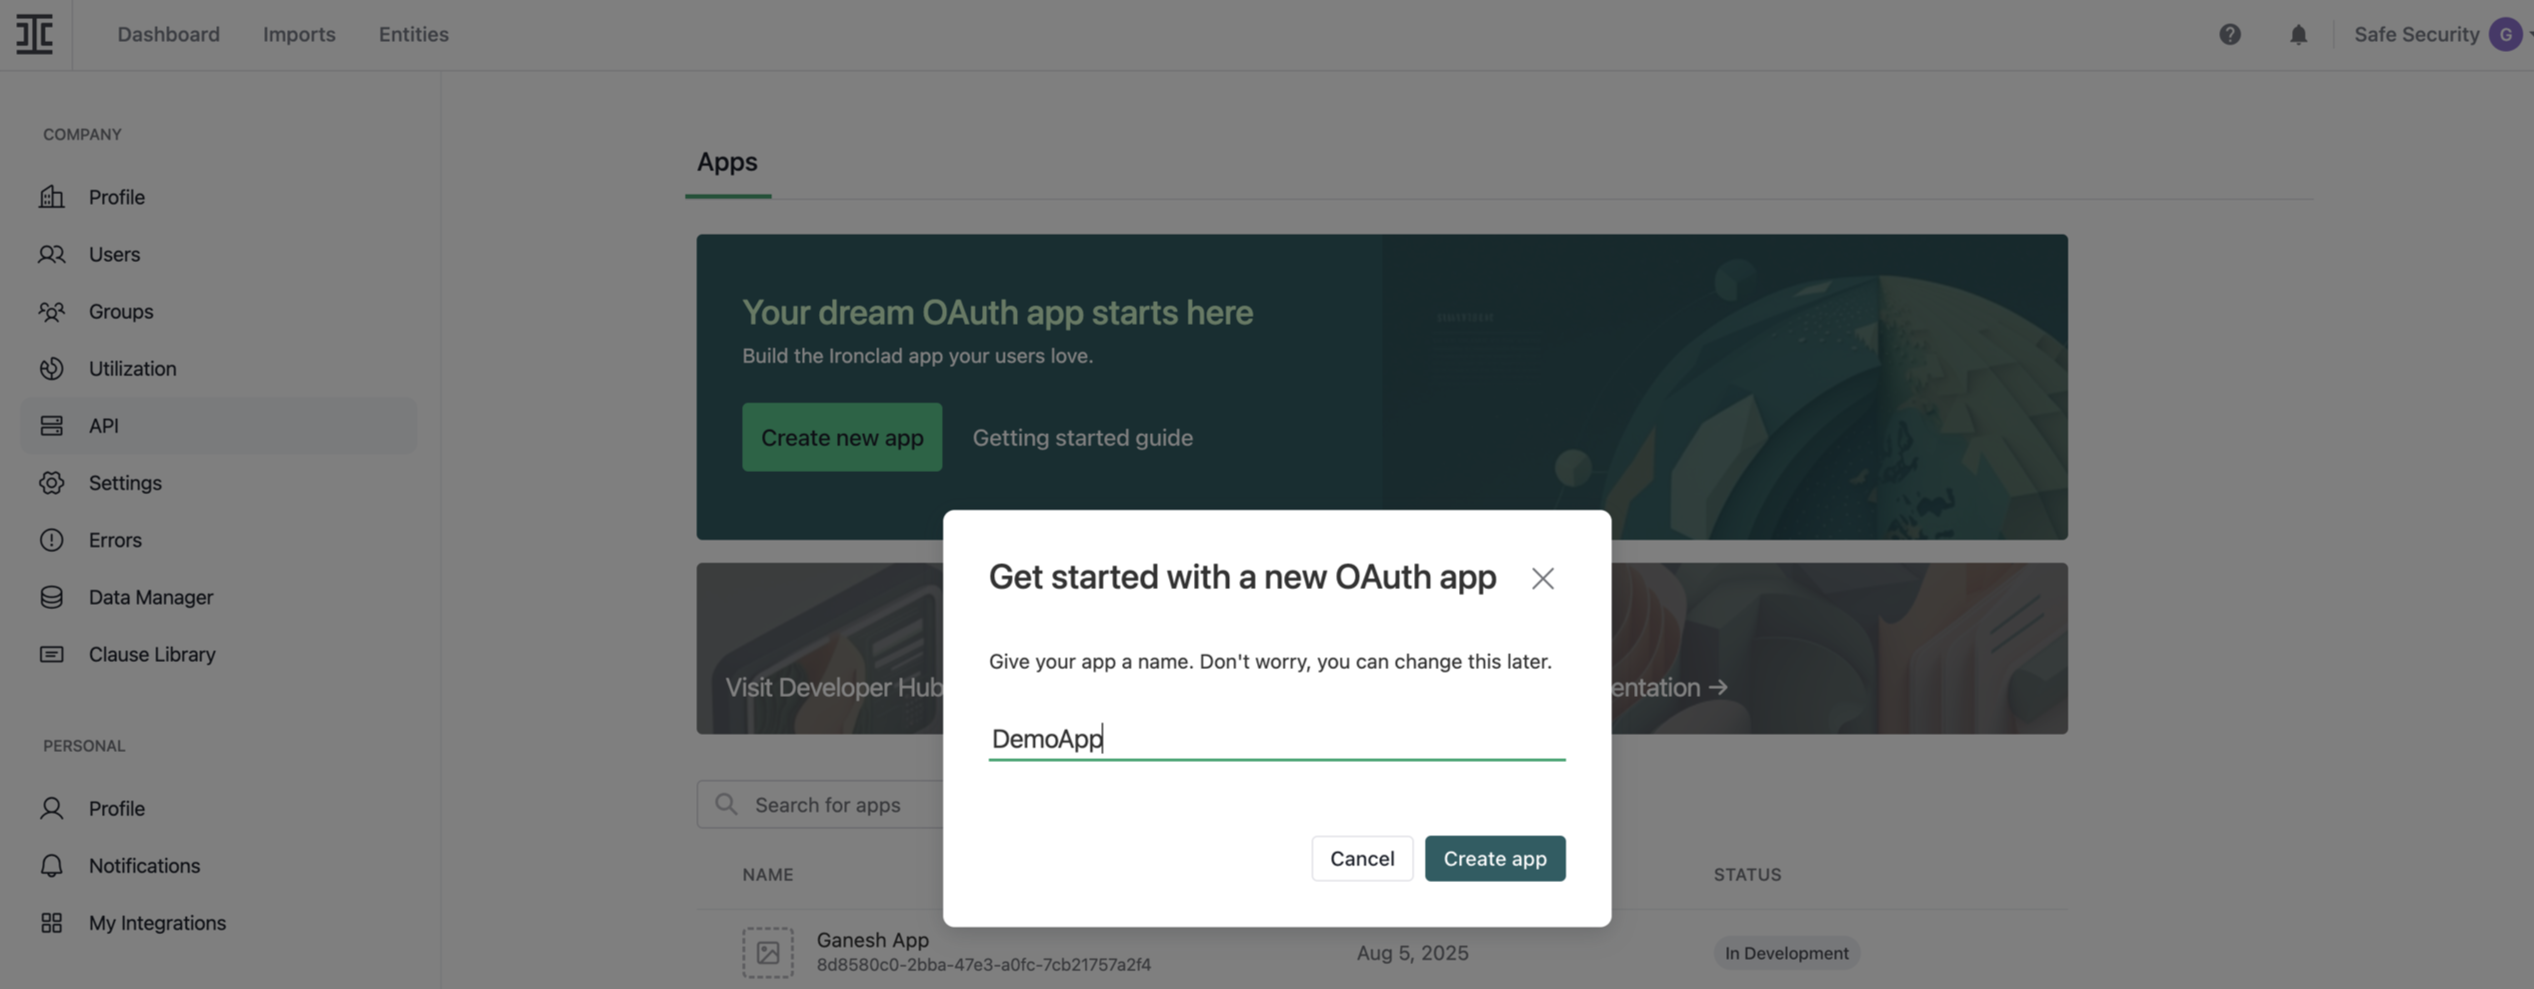
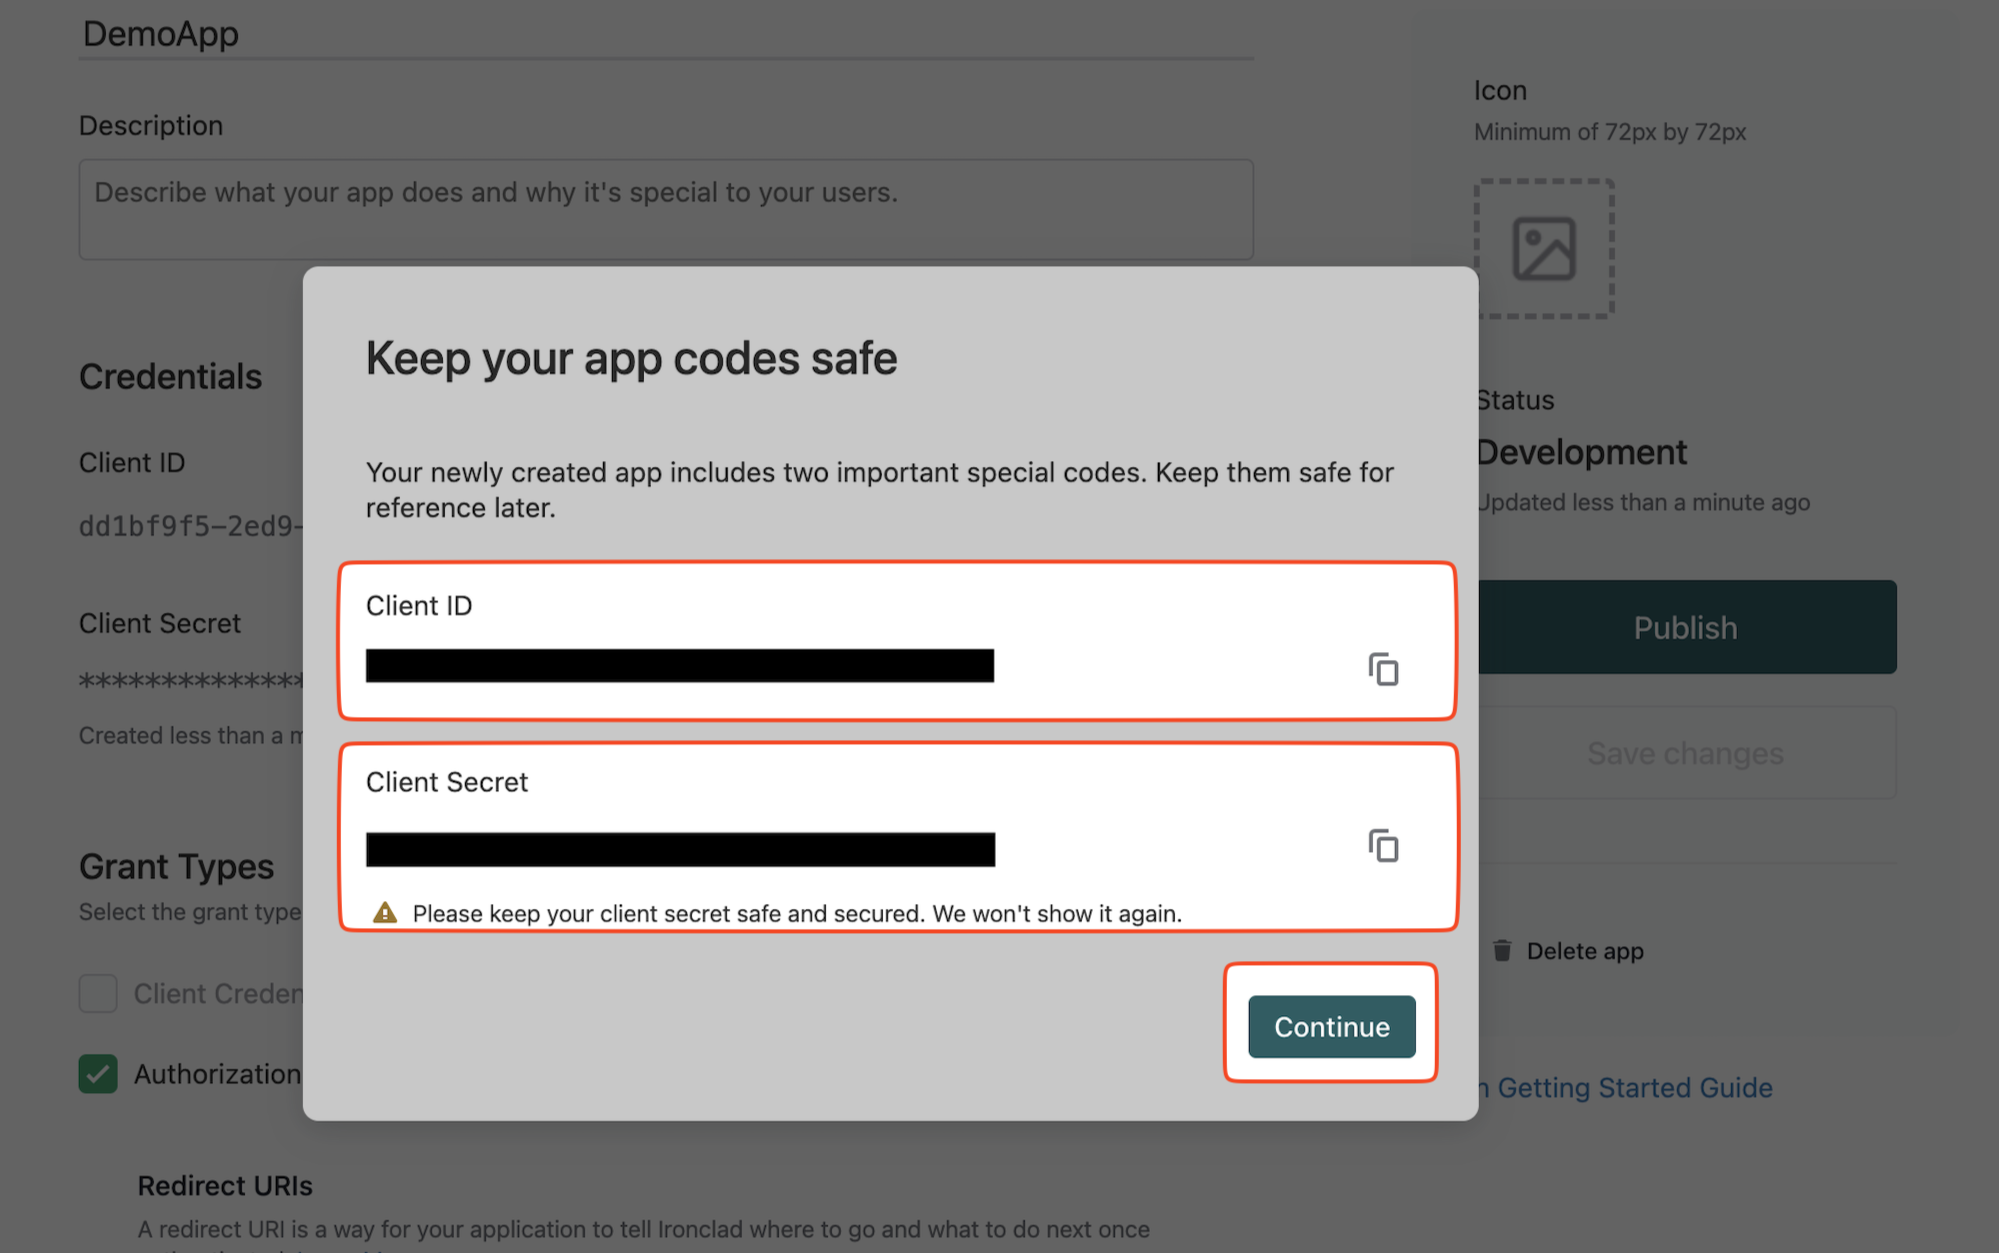
Enter Name and click the Create app button. The system displays the Client ID and Client Secret.
Copy and save the Client ID and Client Secret.
Make sure that the Authorization Code option is selected.
Add the Redirect URL: https://integrations.ironclad.safe.security
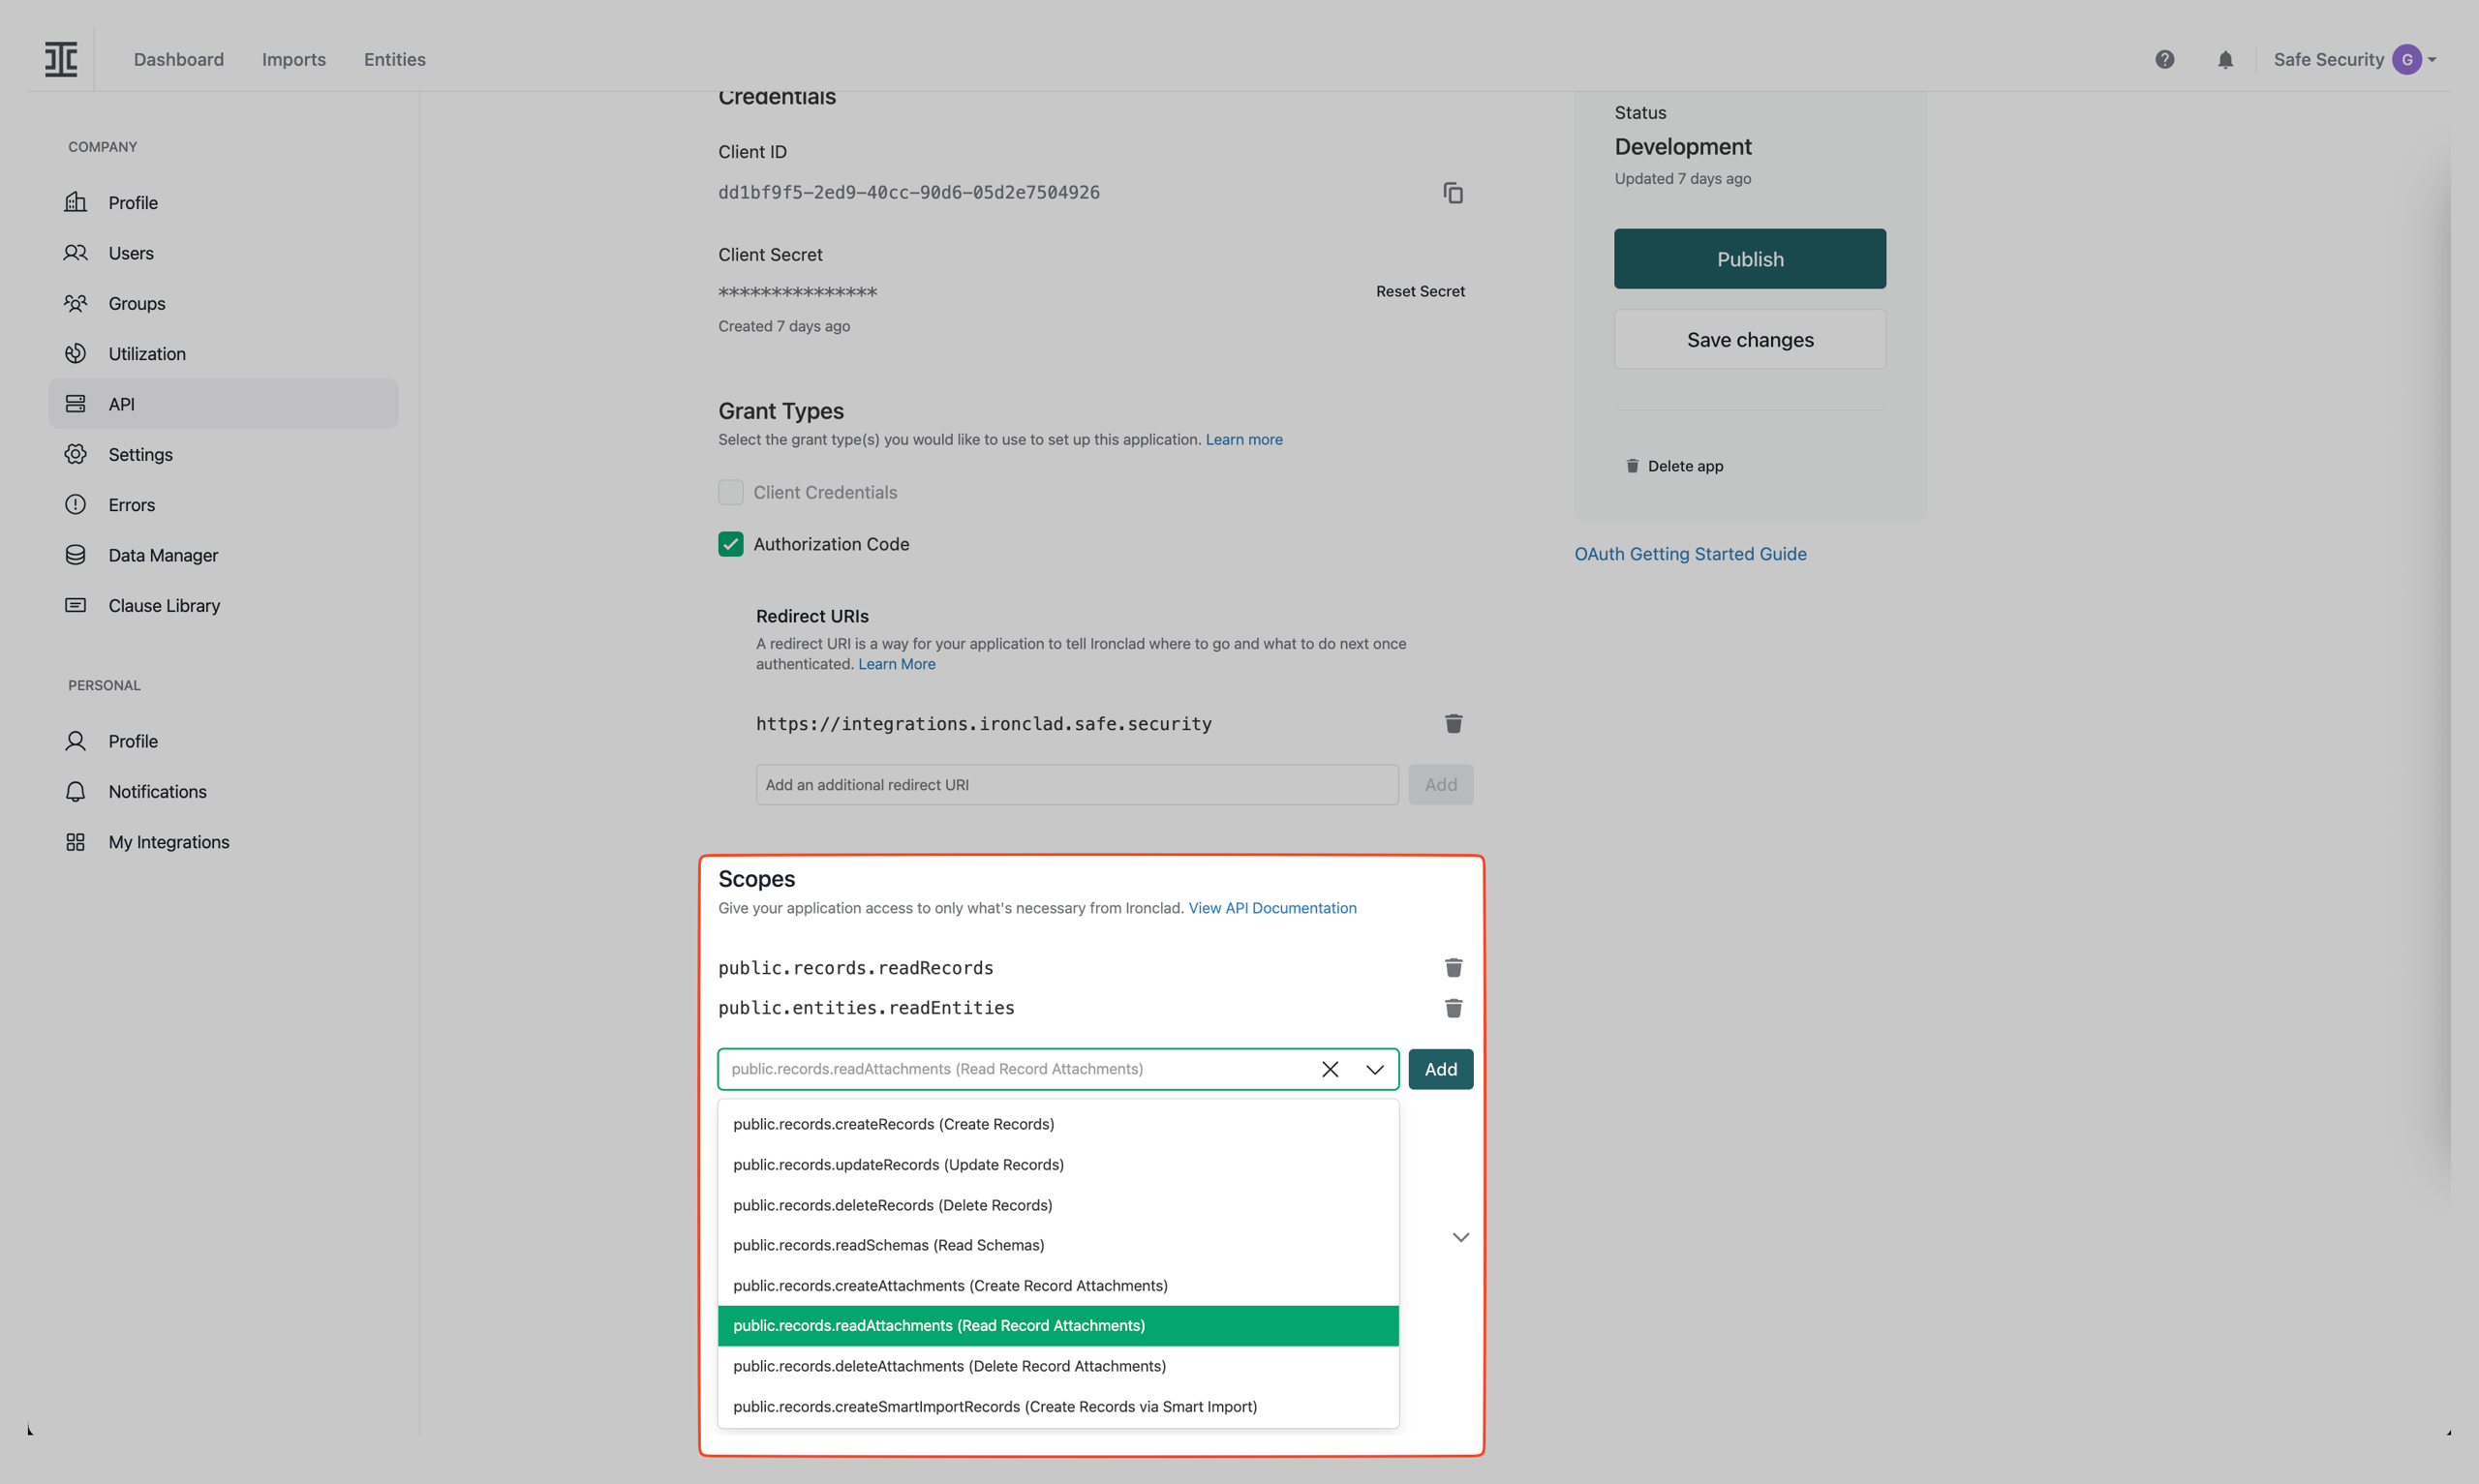
Add the required OAuth Scopes:
public.records.readAttachments
public.records.readRecords
public.entities.readEntities
Save the app configuration.
Note: Publishing the app is not required.
Generate an Authorization Code
Make sure you are logged in to the Ironclad account.
Replace the <base url> and <client_id> with your actual base url (e.g., app.ironcladapp.com) and client ID in the URL below:
https://<base_url>/oauth/authorize?response_type=code&client_id=<client_id>&redirect_uri=https://integrations.ironclad.safe.security&scope=public.records.readAttachments%20public.records.readRecords%20public.entities.readEntitiesOpen the updated URL in your browser.
Make sure you are logged in to the Ironclad account.
When prompted, grant the requested permissions by clicking the Allow access button.
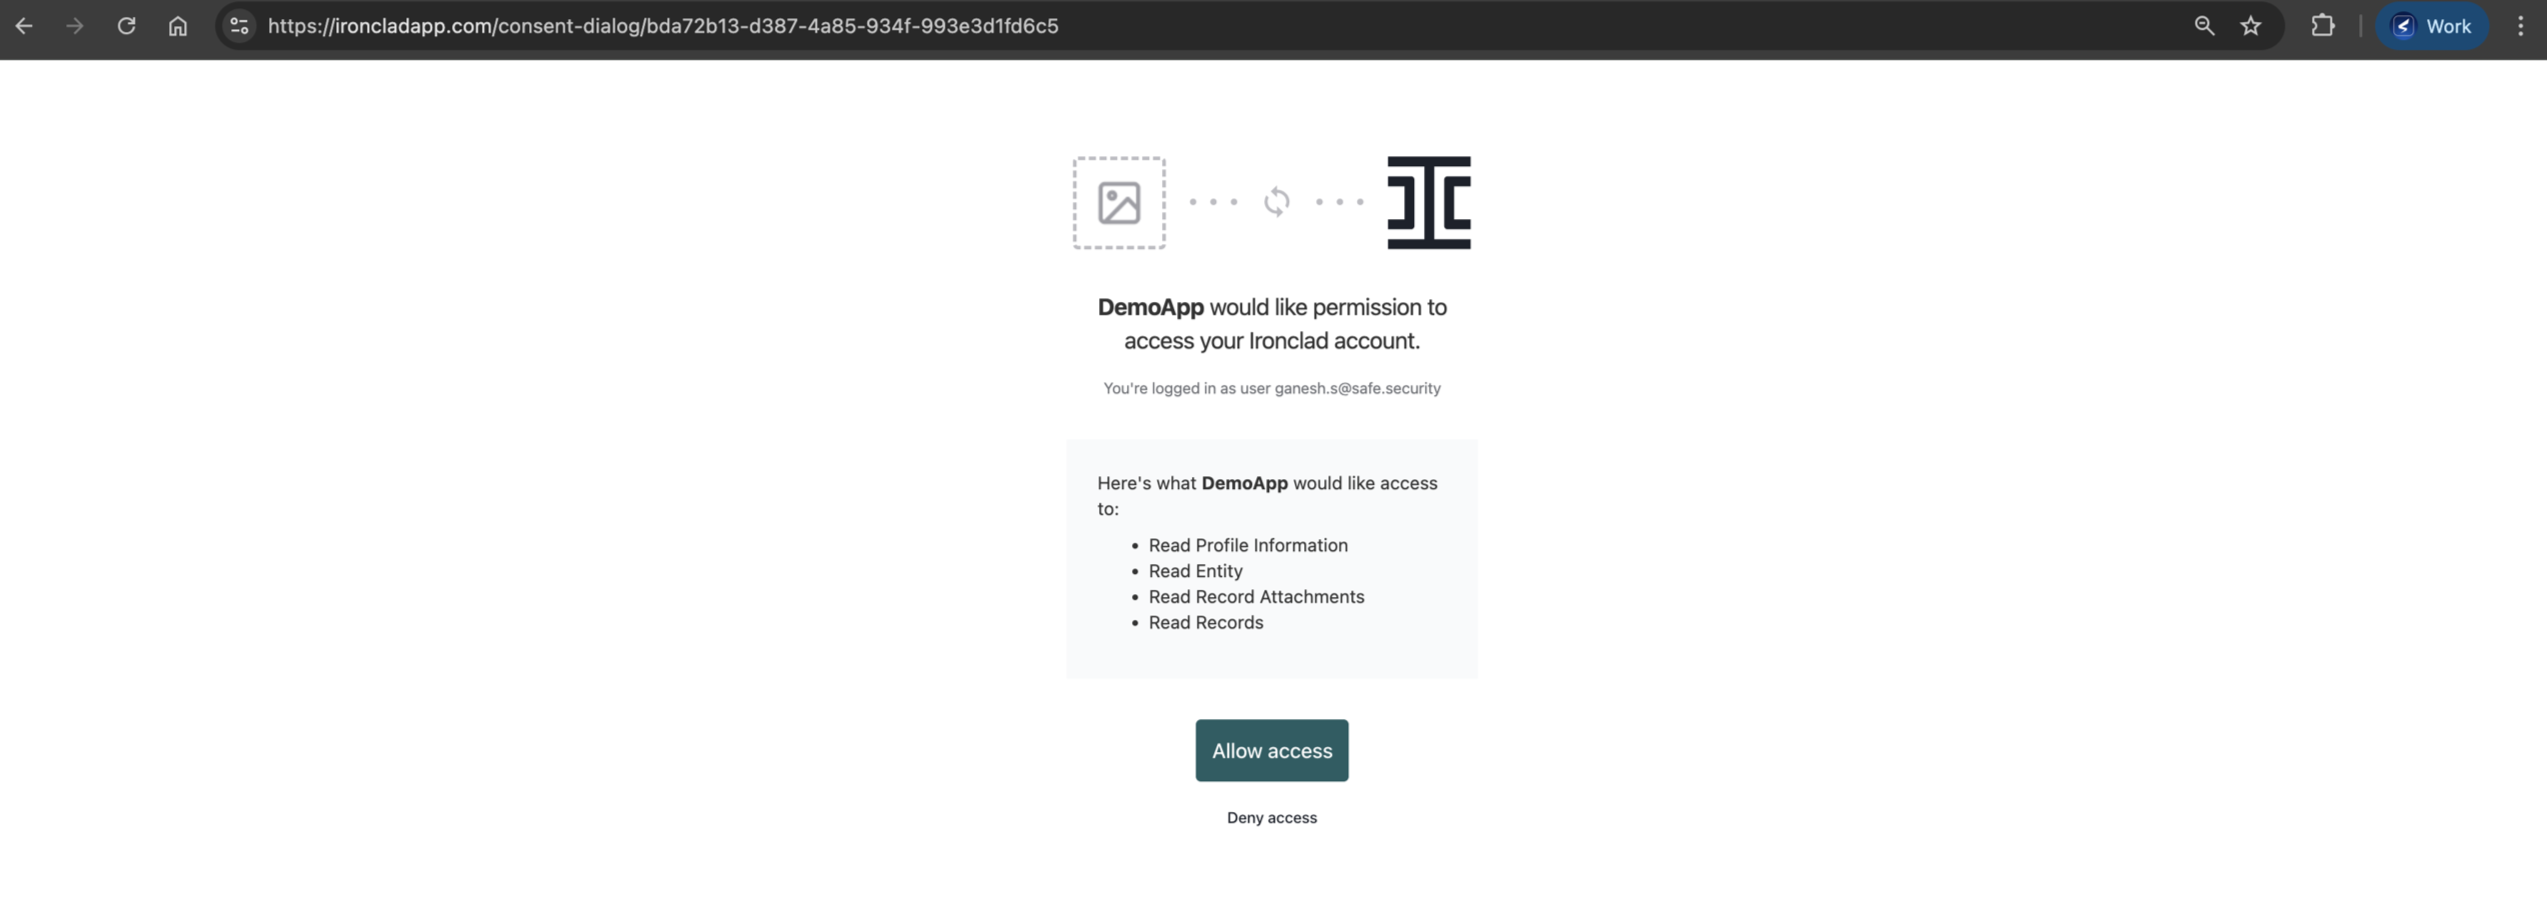
You will be redirected to: https://integrations.ironclad.safe.security/?code=<authorization_code>
Copy the authorization code from the URL.
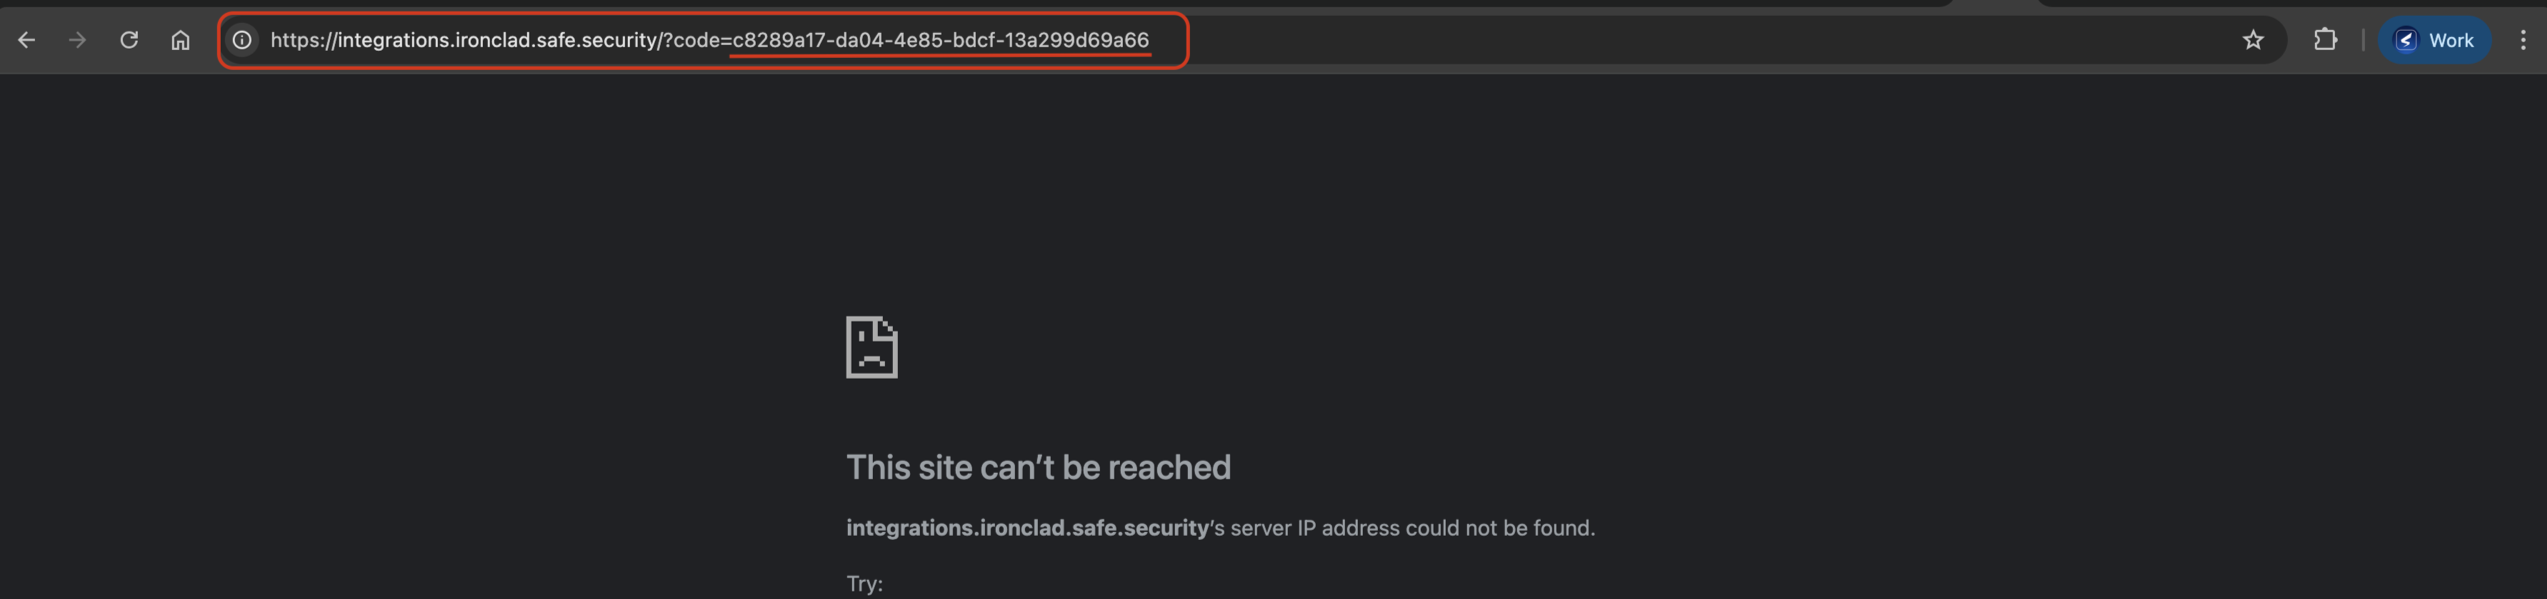
Save this code securely, it will be required for the next step.
Generate a Refresh Token
Use the authorization code from the previous step.
Run the following curl command (replace placeholders with actual values)
  curl --location 'https://<base_url>/oauth/token' \
--header 'Content-Type: application/x-www-form-urlencoded' \
--data-urlencode 'grant_type=authorization_code' \
--data-urlencode 'client_id=<client_id>' \
--data-urlencode 'client_secret=<client_secret>' \
--data-urlencode 'code=<authorization_code>' \
--data-urlencode 'redirect_uri=https://integrations.ironclad.safe.security'
Enter the values for the below placeholder.
<base_url> → Your Ironclad environment domain.
<client_id> → Your Client ID.
<client_secret> → Your Client Secret.
<authorization_code> → The code copied from the redirect URL.
Run this command in your terminal.
The response will include an access token and a refresh token.
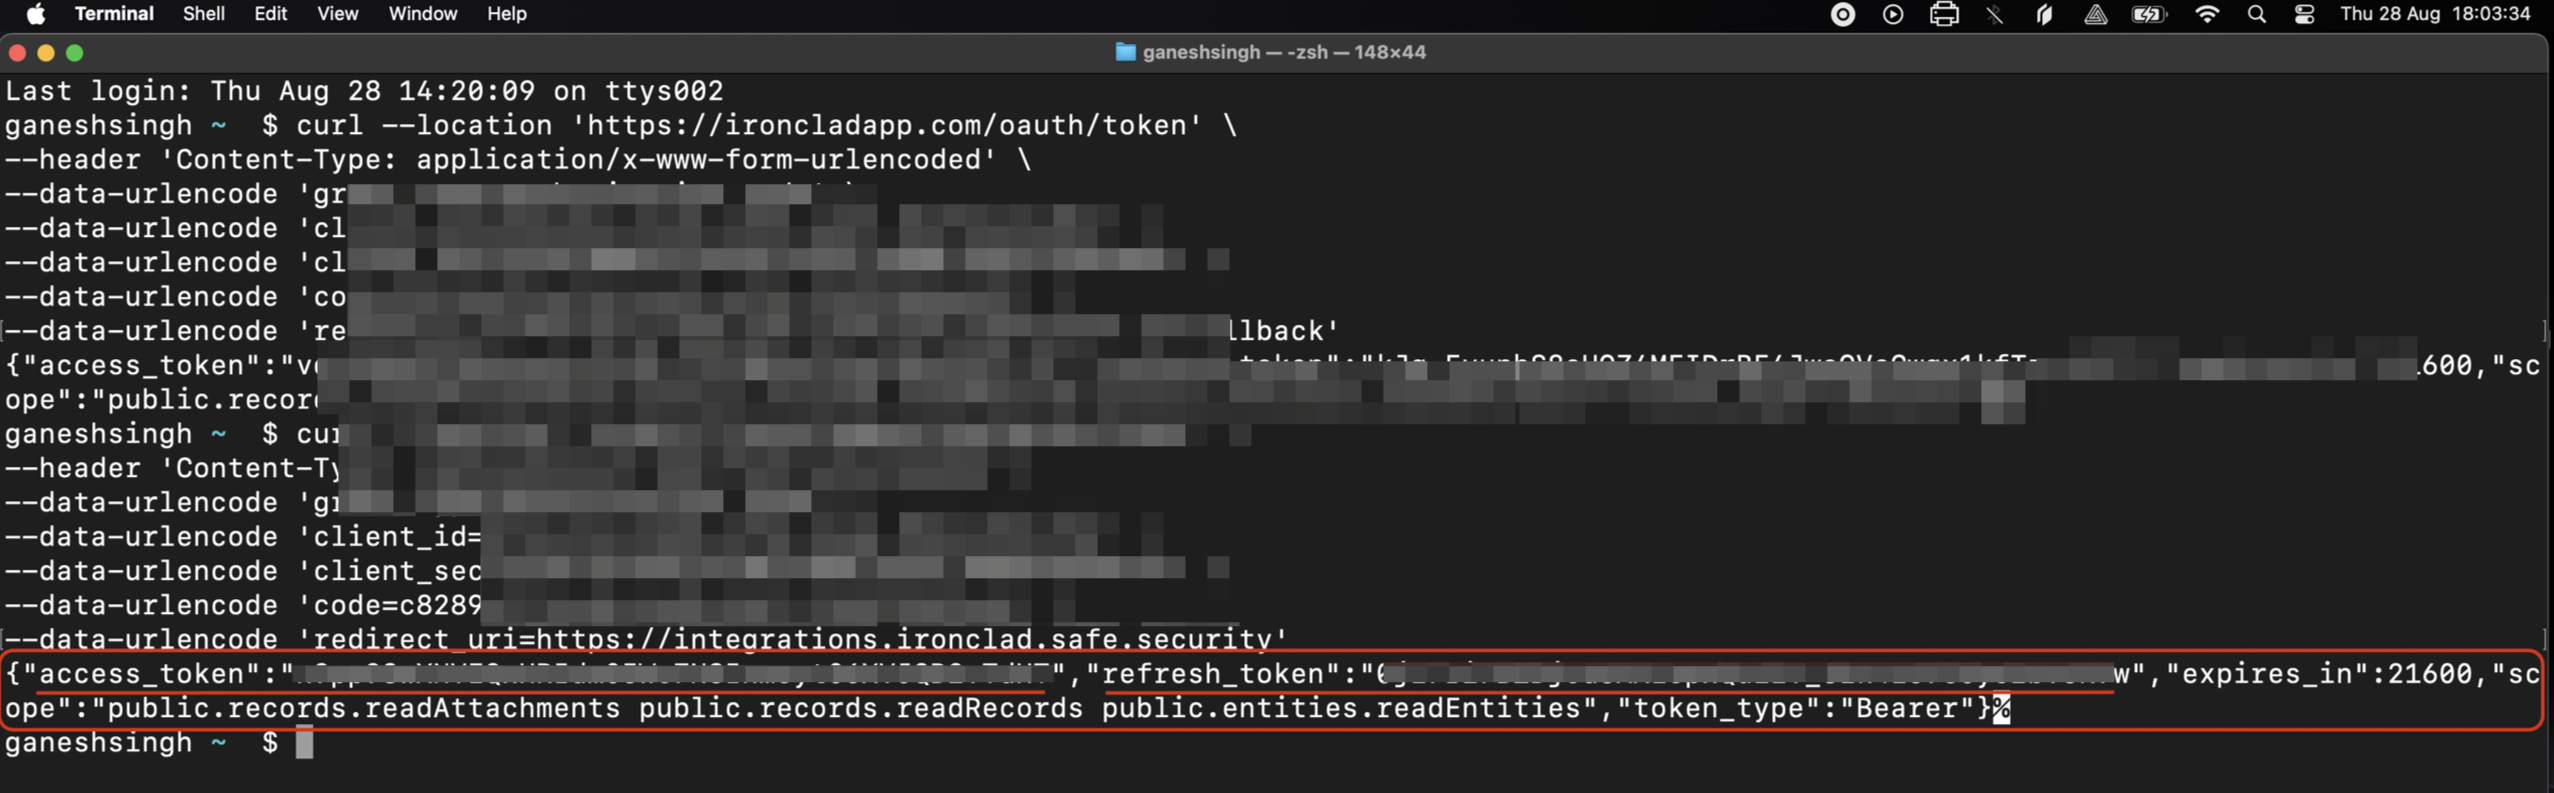
Save these tokens securely. The refresh token is essential for generating new access tokens when the old ones expire.
Configure Ironclad CLM in SAFE
Follow the steps below to complete the configuration in SAFE:
Navigate to the Integrations page and click the Ironclad CLM card.
On the Configure page, enter the following details:
Client ID
Client Secret
Refresh Token
Record Type – Specify the record types to be synced. Use a semicolon (;) to separate multiple entries.
Click Save to store the credentials.
Click Test Connection to verify the integration.
Click the Sync Now button to start the synchronization. Once the sync is complete, the History table will display the status as Success.

Note: Running Test Connection without saving first may result in a failed connection.
Using the Ironclad CLM Integration
Third Party exists in Ironclad but not in SAFE
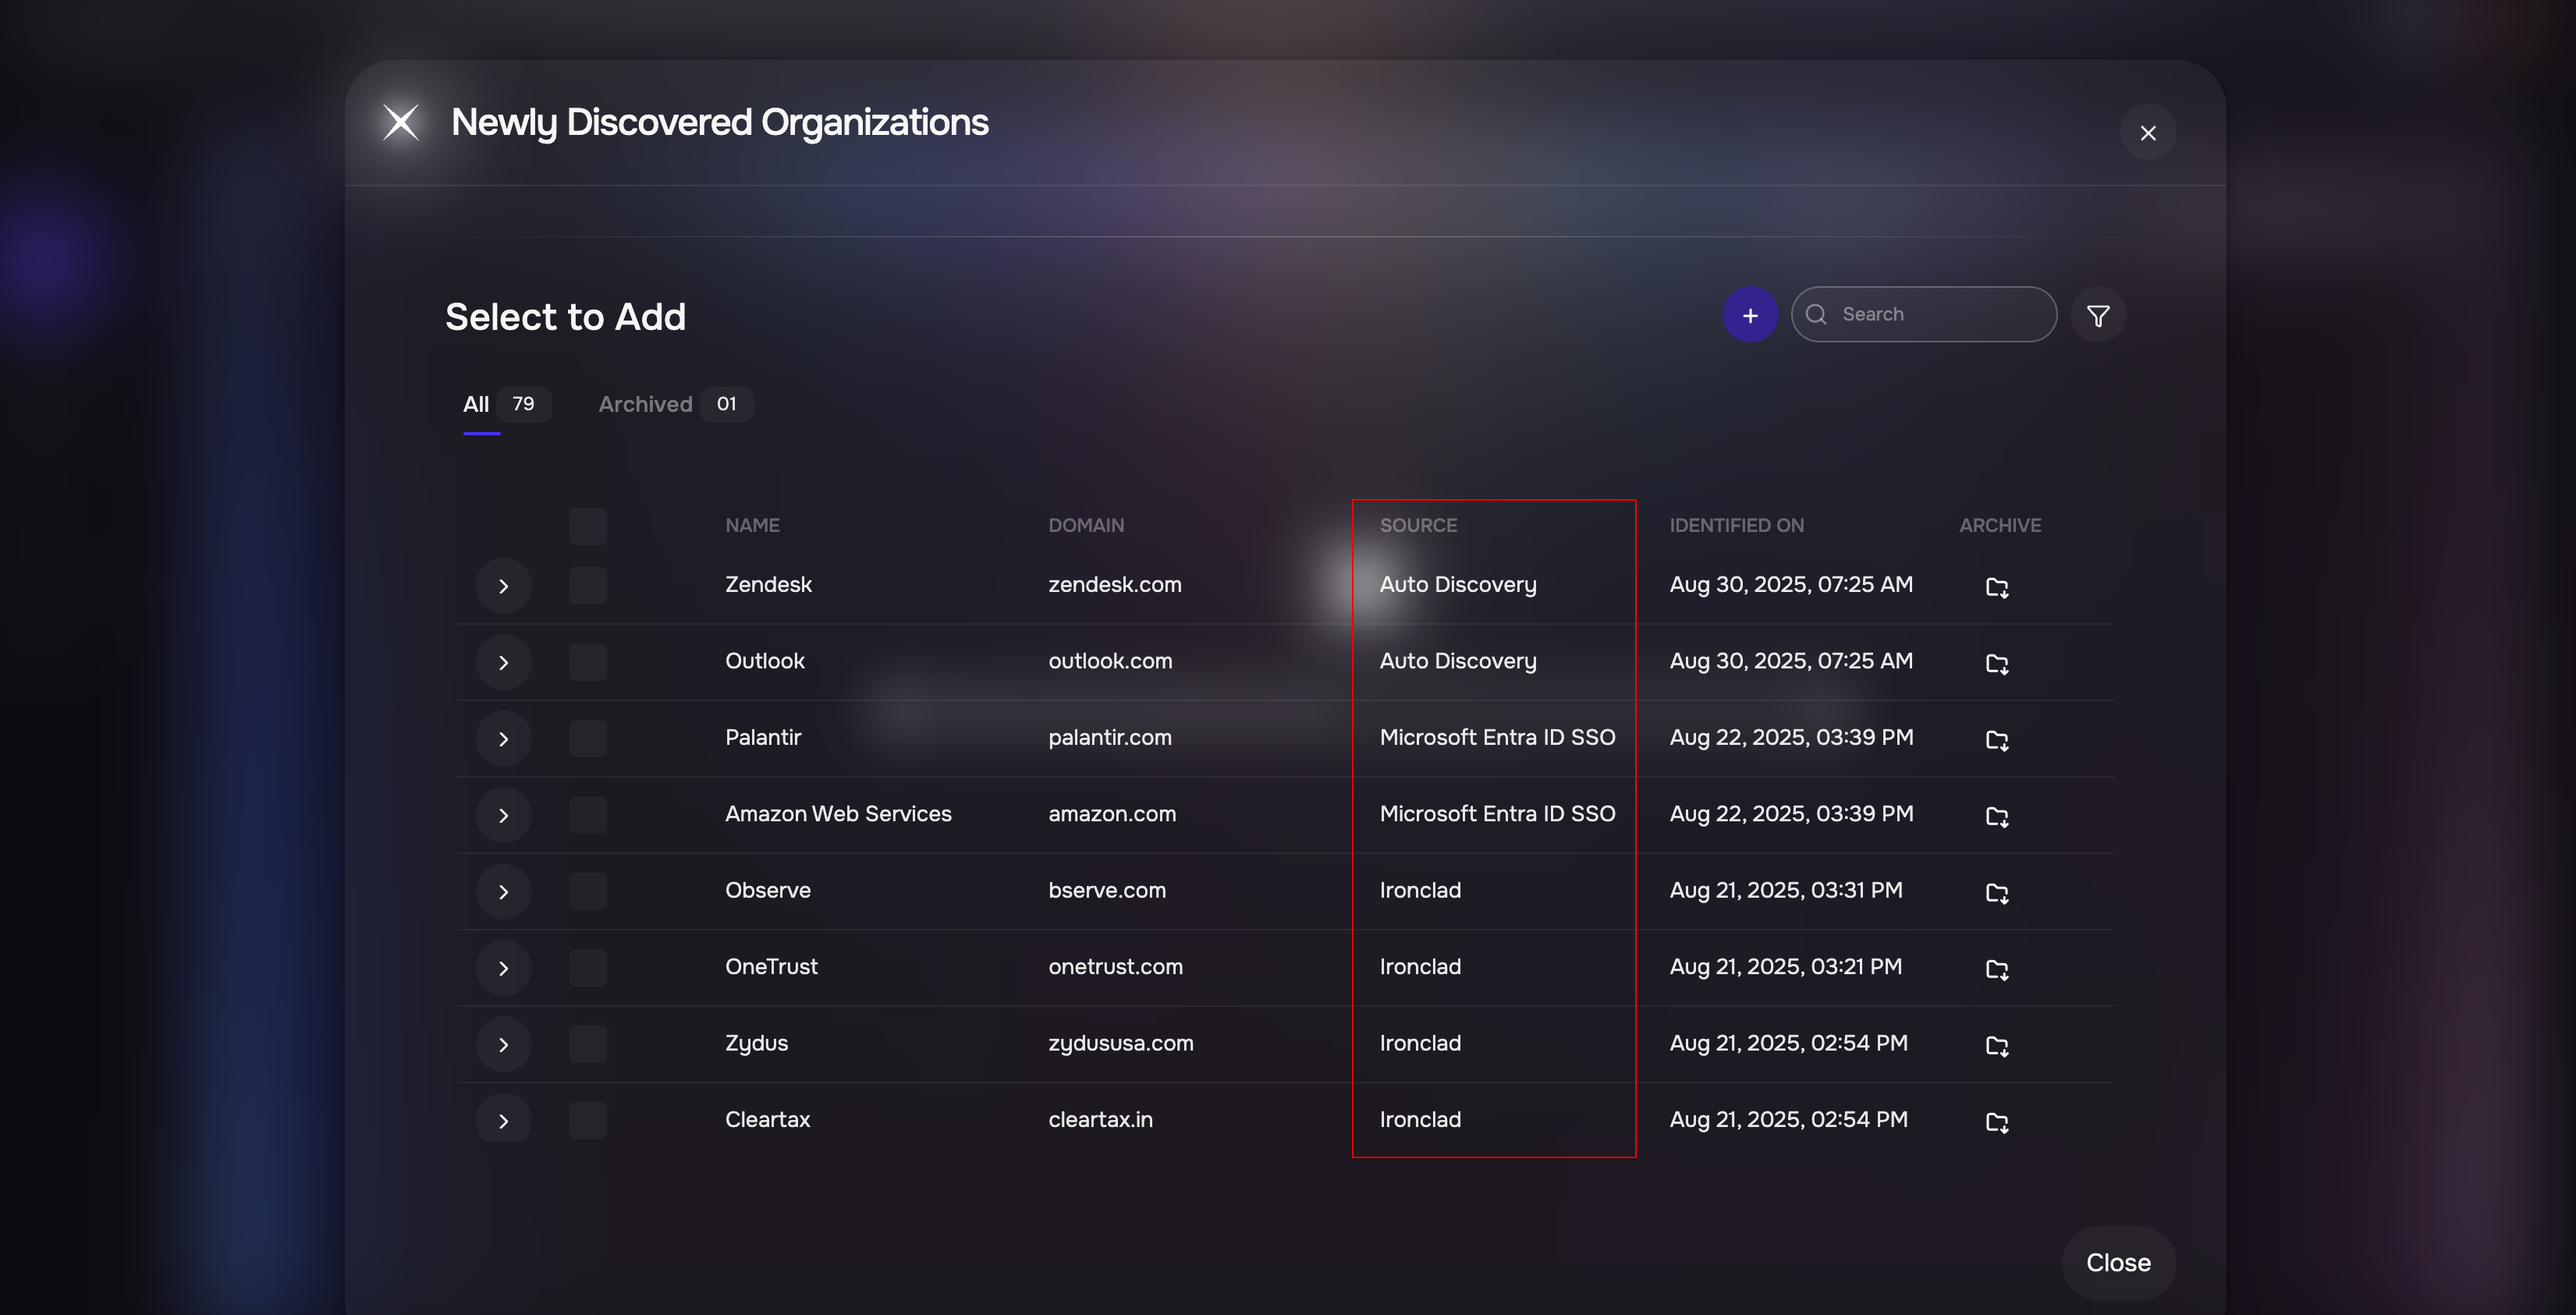
The sync will fetch the third-party data from Ironclad and list it under Newly Discovered in SAFE.
To onboard an organization as a third party in SAFE:
Open the Newly Discovered section.
Select the organization.
Click the “+” button to onboard it as a third party.
Third Party already added in SAFE
The sync will fetch the contracts associated with that third party from Ironclad and make them available in SAFE for contract analysis.
Go to Third Parties.
Select the onboarded third party.
Click on Contract to open the contract summary.
FAQs
Q1: Can I upload password-protected files into SAFE?
No, password-protected files are not supported.
Q2: What happens if a contract is already uploaded in SAFE?
If a contract already exists in SAFE, the integration will not pull or update that contract.
Q3: How does SAFE handle new organizations discovered during integration sync?
Newly discovered organizations appear in the Auto-Discovery section. Users must add these organizations as third parties in SAFE. Contracts for these organizations will only be retrieved during subsequent syncs.
Q4: How many contracts per domain does SAFE support?
SAFE supports one contract per domain.
Q5: What happens if the token refresh process fails?
While rare, if the refreshed token cannot be saved, the user must redo the authentication process to continue using the integration.