About this document
This document provides step-by-step instructions for configuring the "Third-party discovery via Microsoft Entra ID" Integration in SAFE for auto-discovering third parties from MicroSoft Entra ID SSO into SAFE.
Introduction
This integration enables automatic discovery of third parties from Microsoft Entra ID for adding into SAFE. It identifies SAML (SSO) applications in Entra ID and leverages their metadata to recognize and add third parties in SAFE. Administrators can configure the integration through the “Third-party discovery via Microsoft Entra ID” card on the Integrations page.
Prerequisites
Admin access to Azure for creating an application in Entra ID
Generate connection details
To integrate SAFE with Third-party discovery via Microsoft Entra ID, we need 3 details to be generated from Azure:
Tenant Id
Client Id
Client Secret
To generate these details, an application will be created in the Azure portal and given the required API read-only permissions.
Register App on Azure
Log in to the Azure Portal.
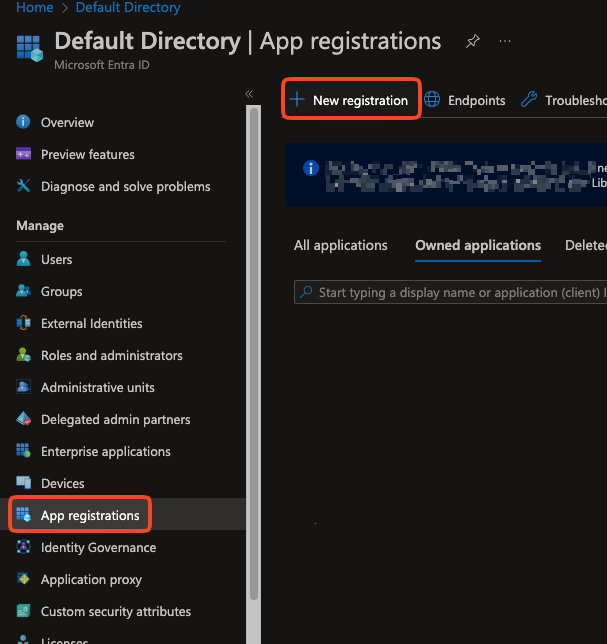
Navigate to Microsoft Entra ID.
Go to the App registrations and click the New Registration button.
On the app registration page, enter the Name for the application, select the Account Type, and Redirect URI.
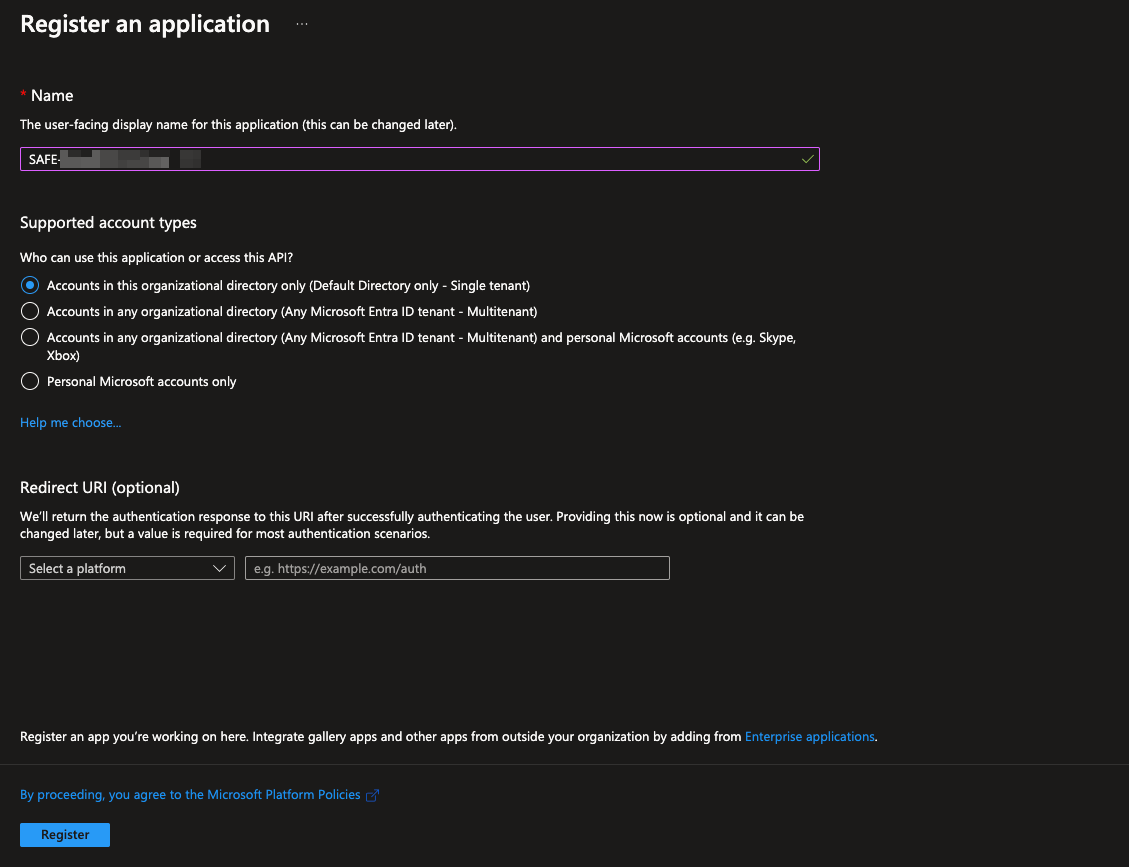
Name: Enter an application name of your choice.
AccountType: Select the option "Accounts in the organizational directory only (Default Directory only - Single Tenant)"
Redirect URI: This can be left blank.
Click the Register button. The system registers the application.
Create the Client Secret
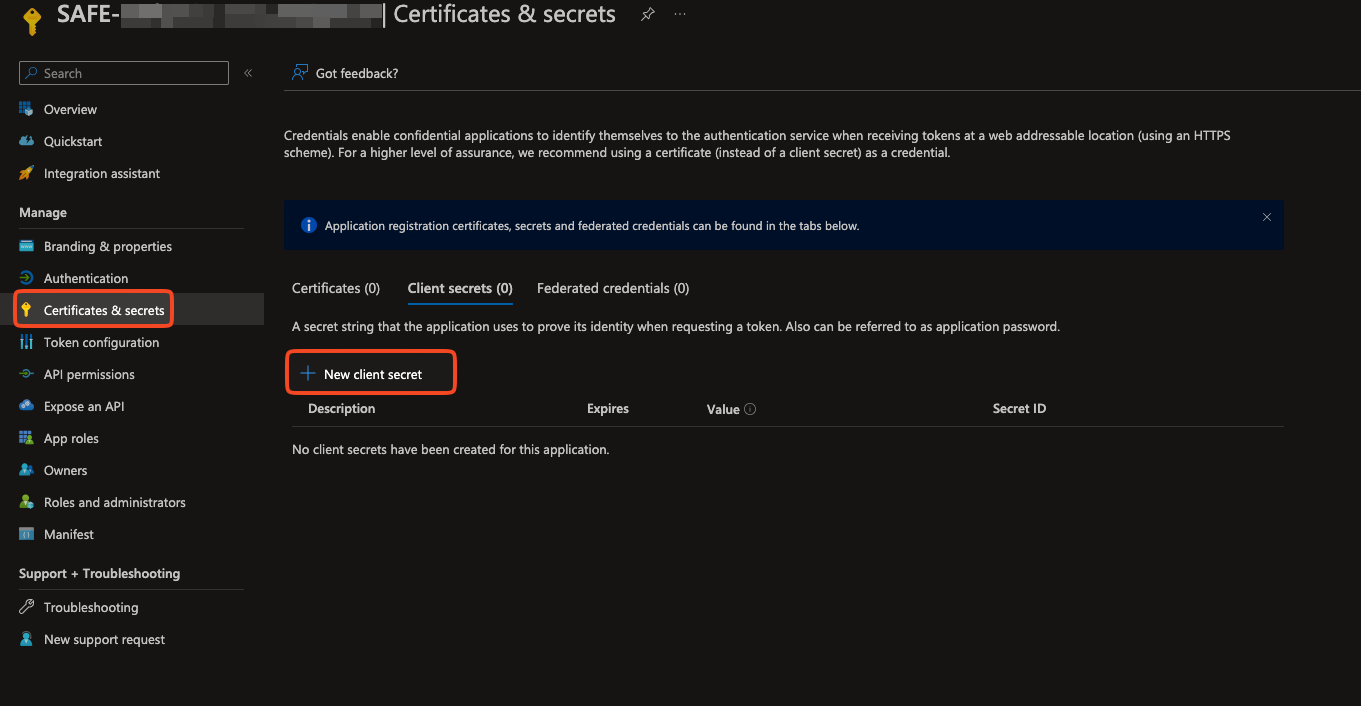
When we register a new application in Azure, it does not have any client secrets. To create a Client Secret:
Navigate to Certificates & Secrets from the left navigation.
Click the New Client Secret button.
Enter the Description and Expiry for the Client Secret.
Click the Add button.
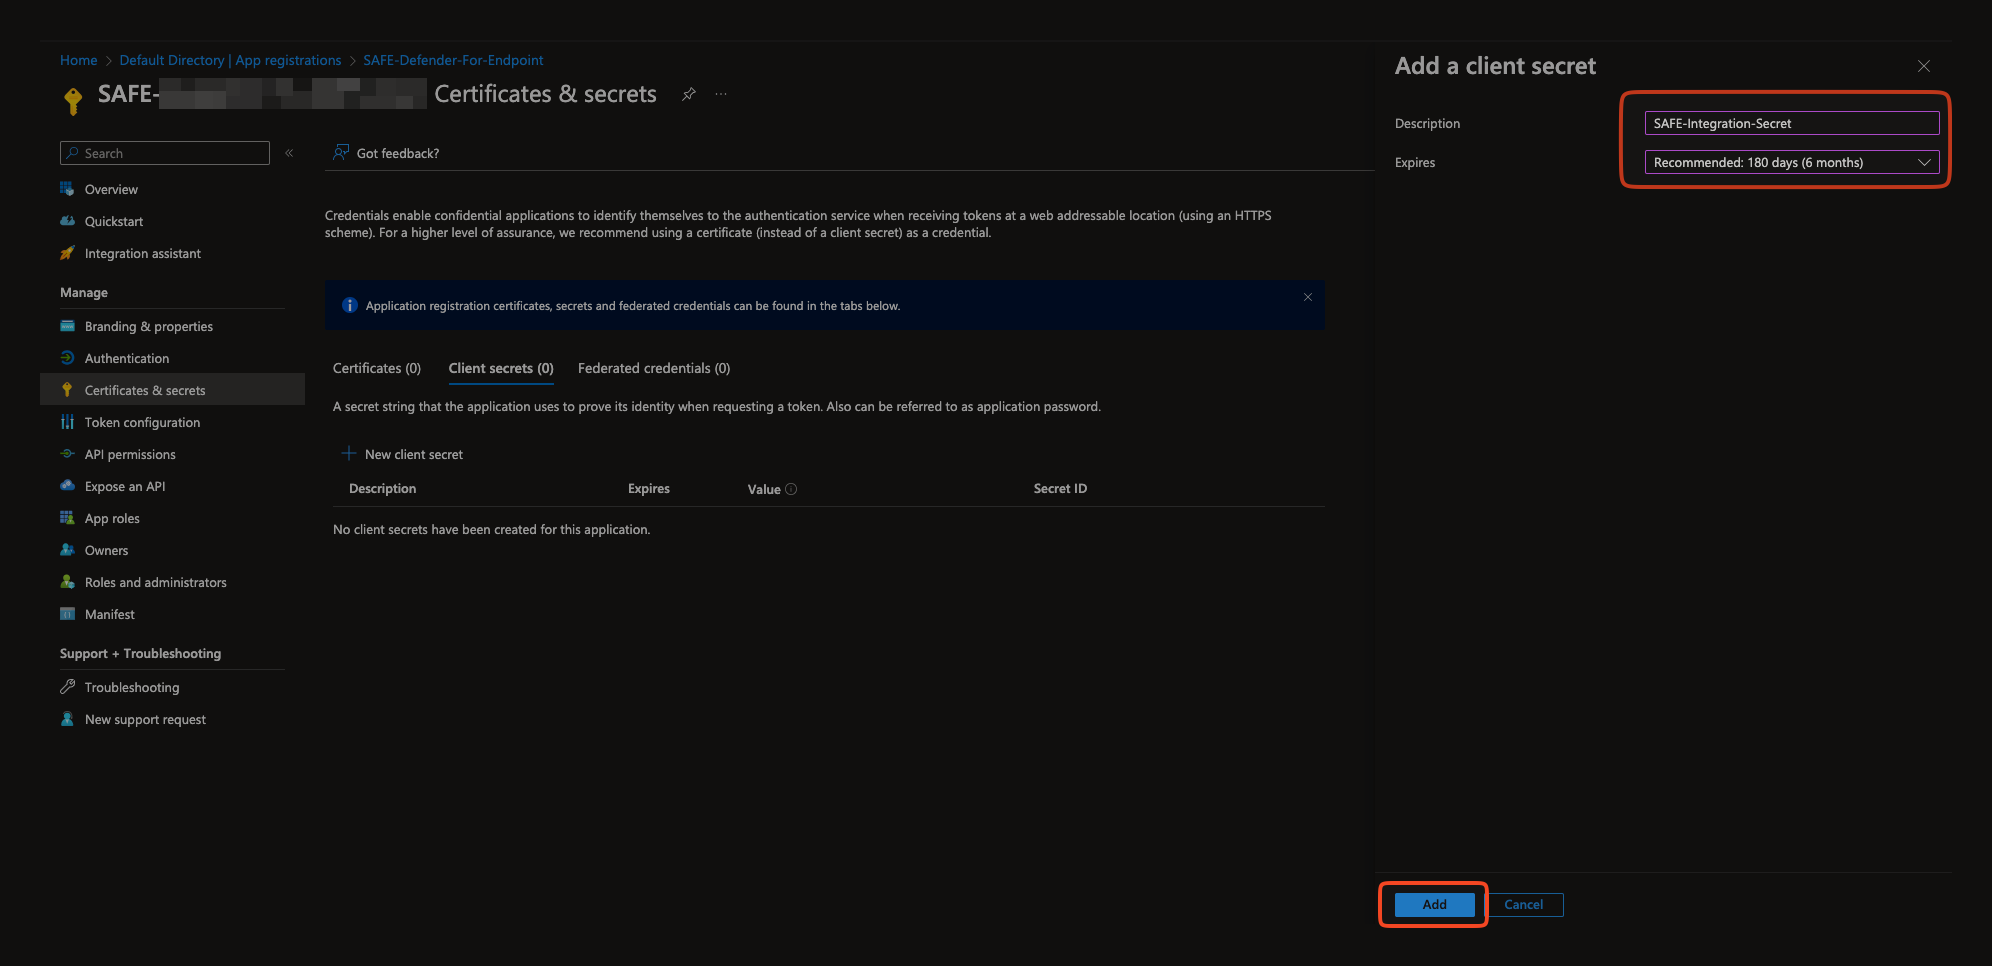
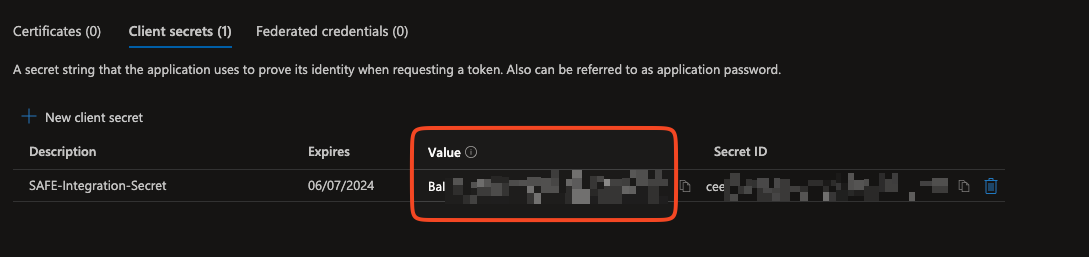
The system adds the Client Secret and displays the details on the same page.
The Value field is the secret created. Copy and save the Client Secret on your system for later usage while configuring the integration in SAFE.
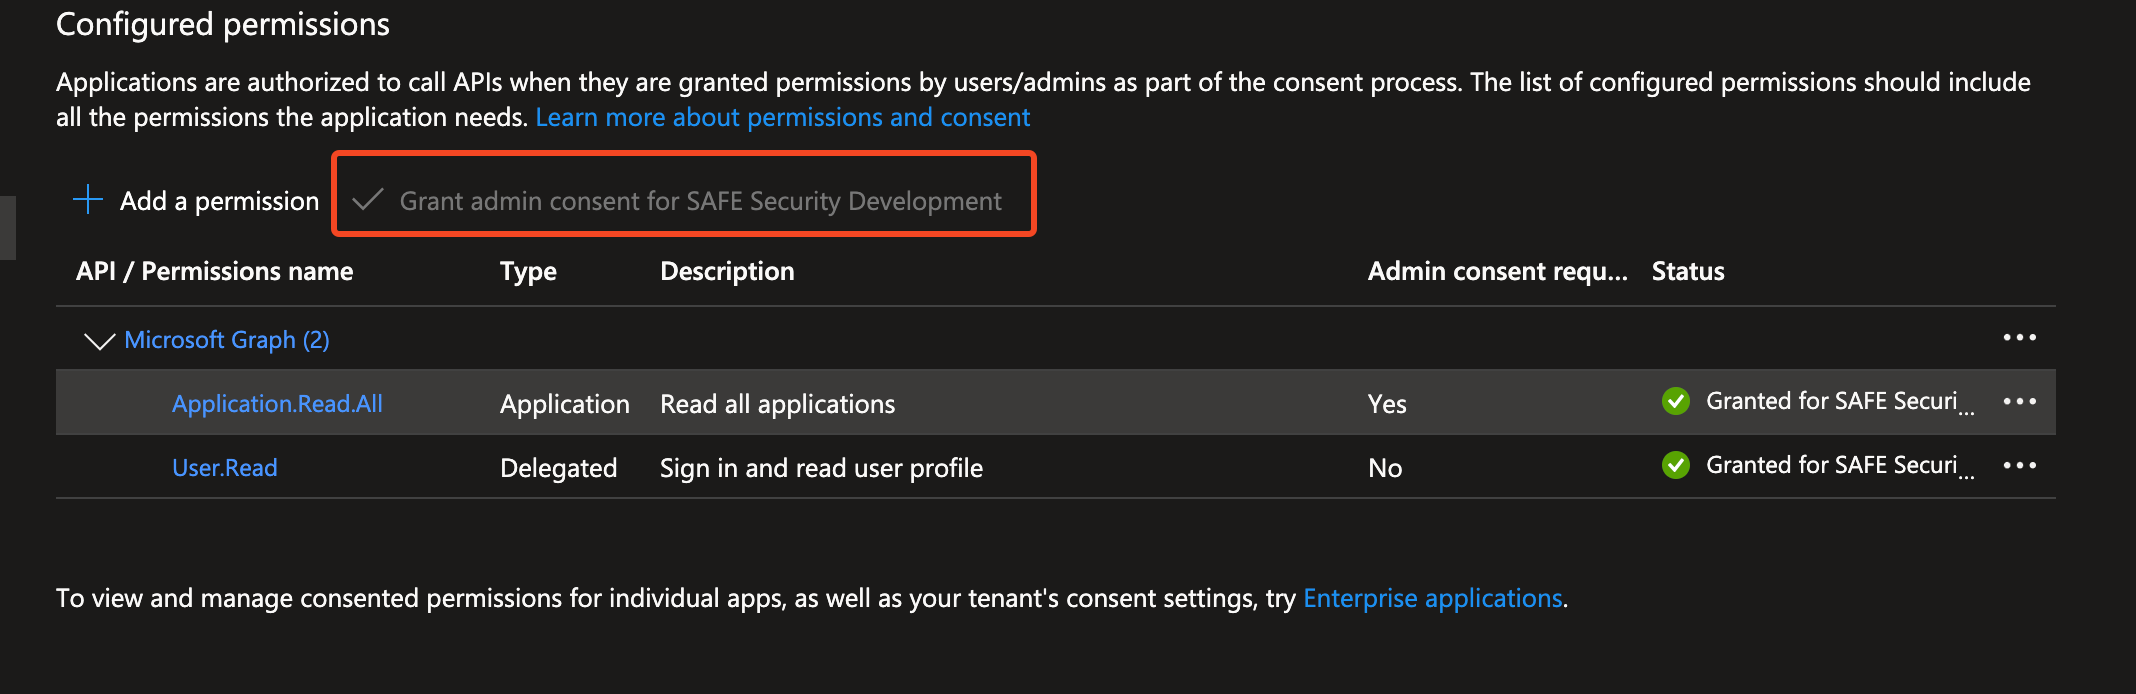
Configure API permissions on the Application
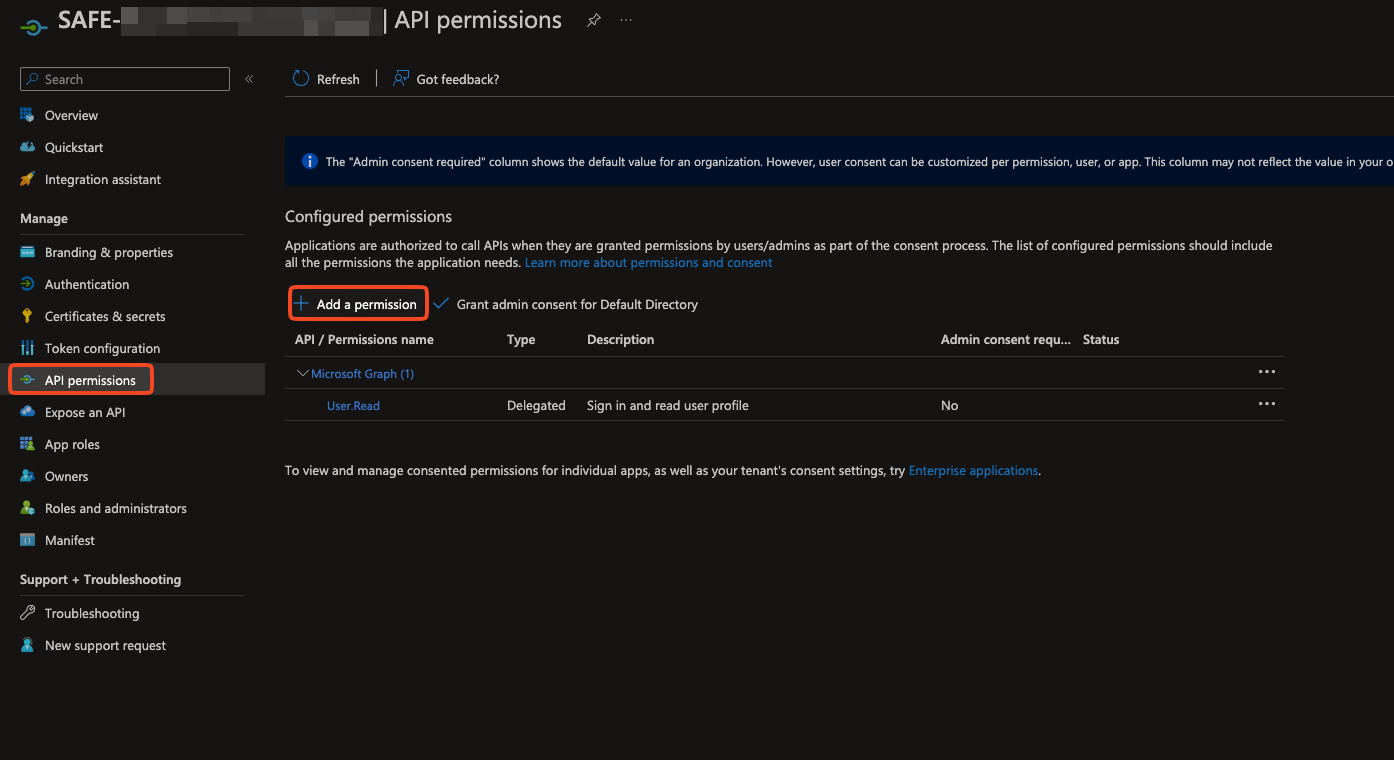
Open the app and navigate to API permissions.
Select +Add a permission.
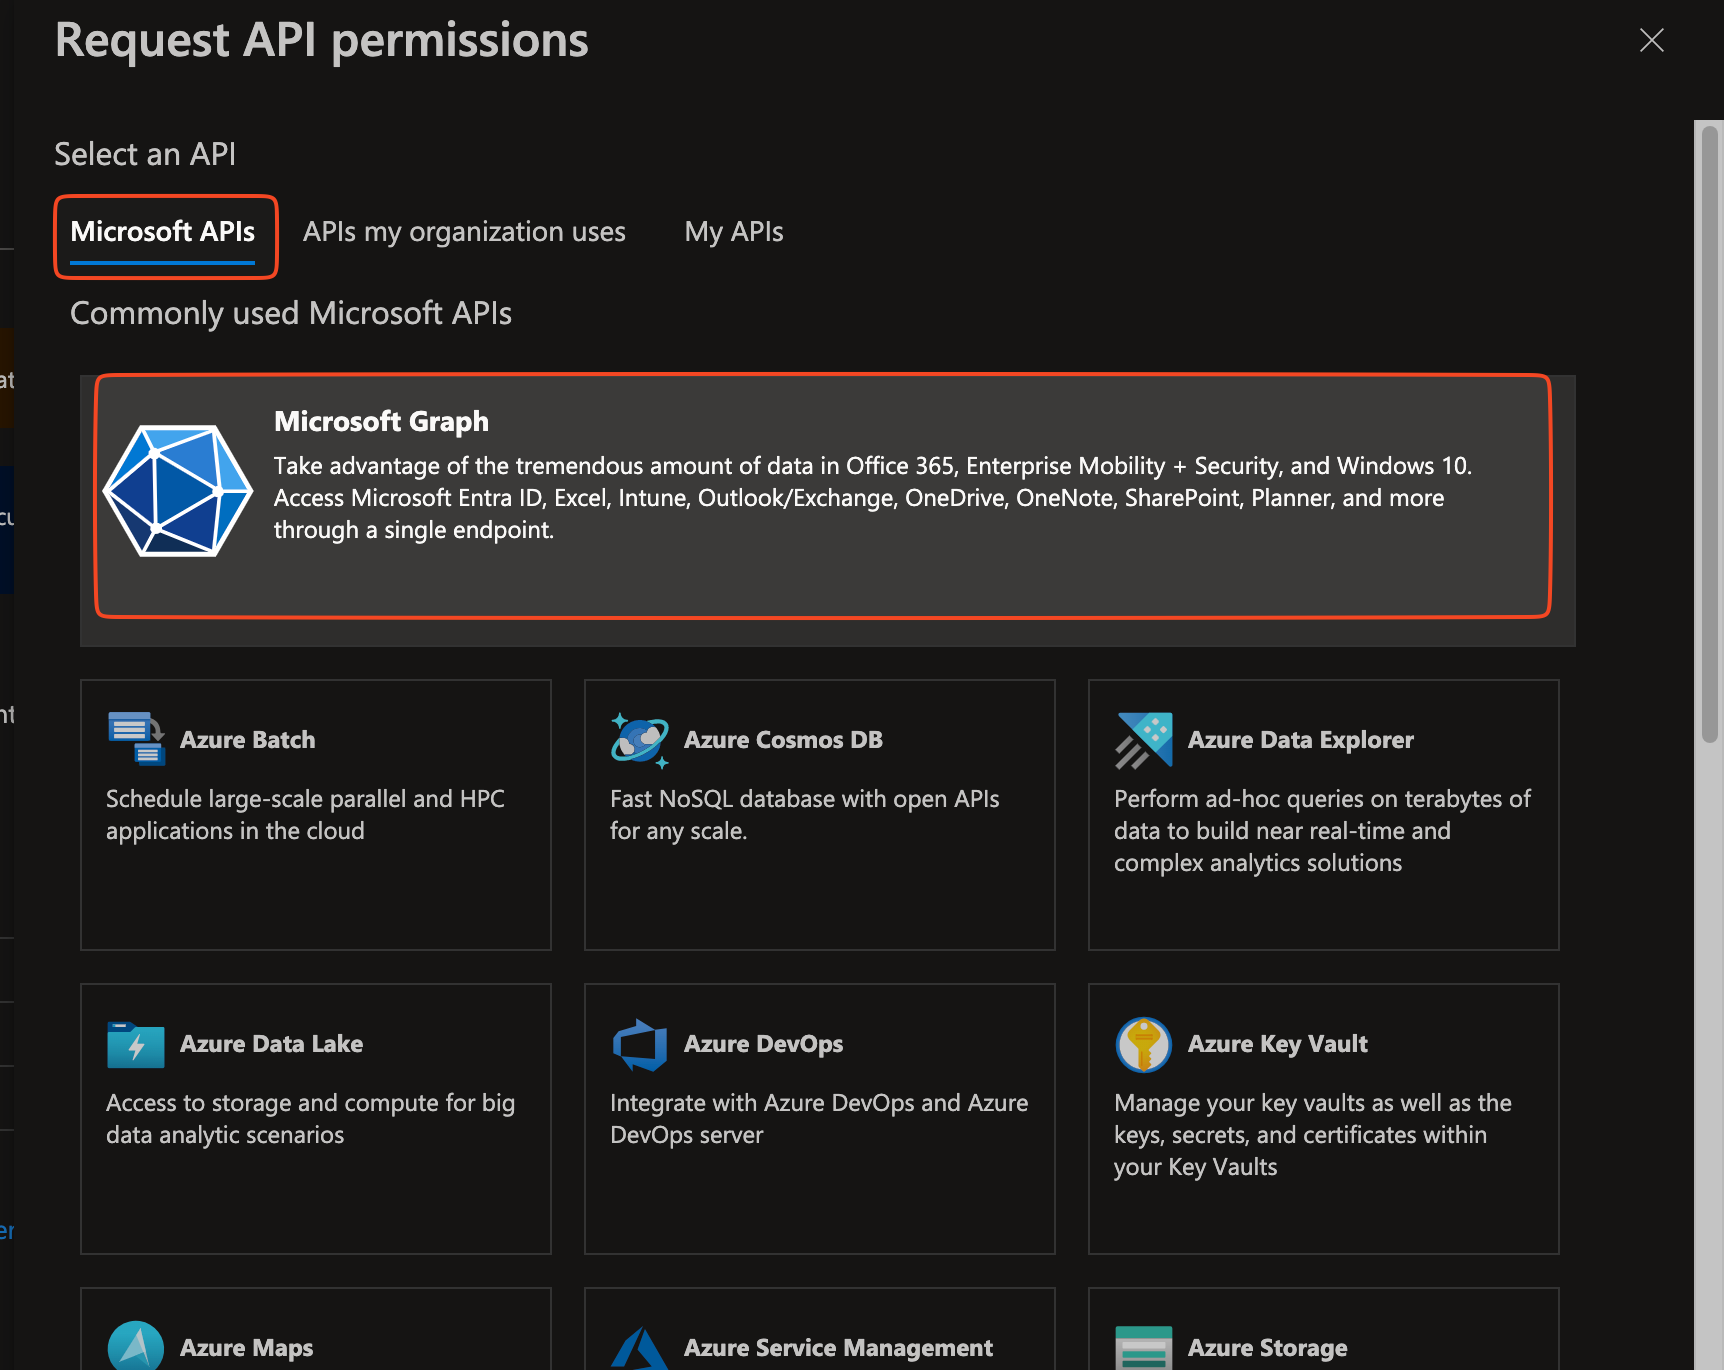
Under Microsoft APIs click the Microsoft Graph.
Select Application permissions, In the search bar, search Application and select Application.Read.All, and then click Add Permissions.
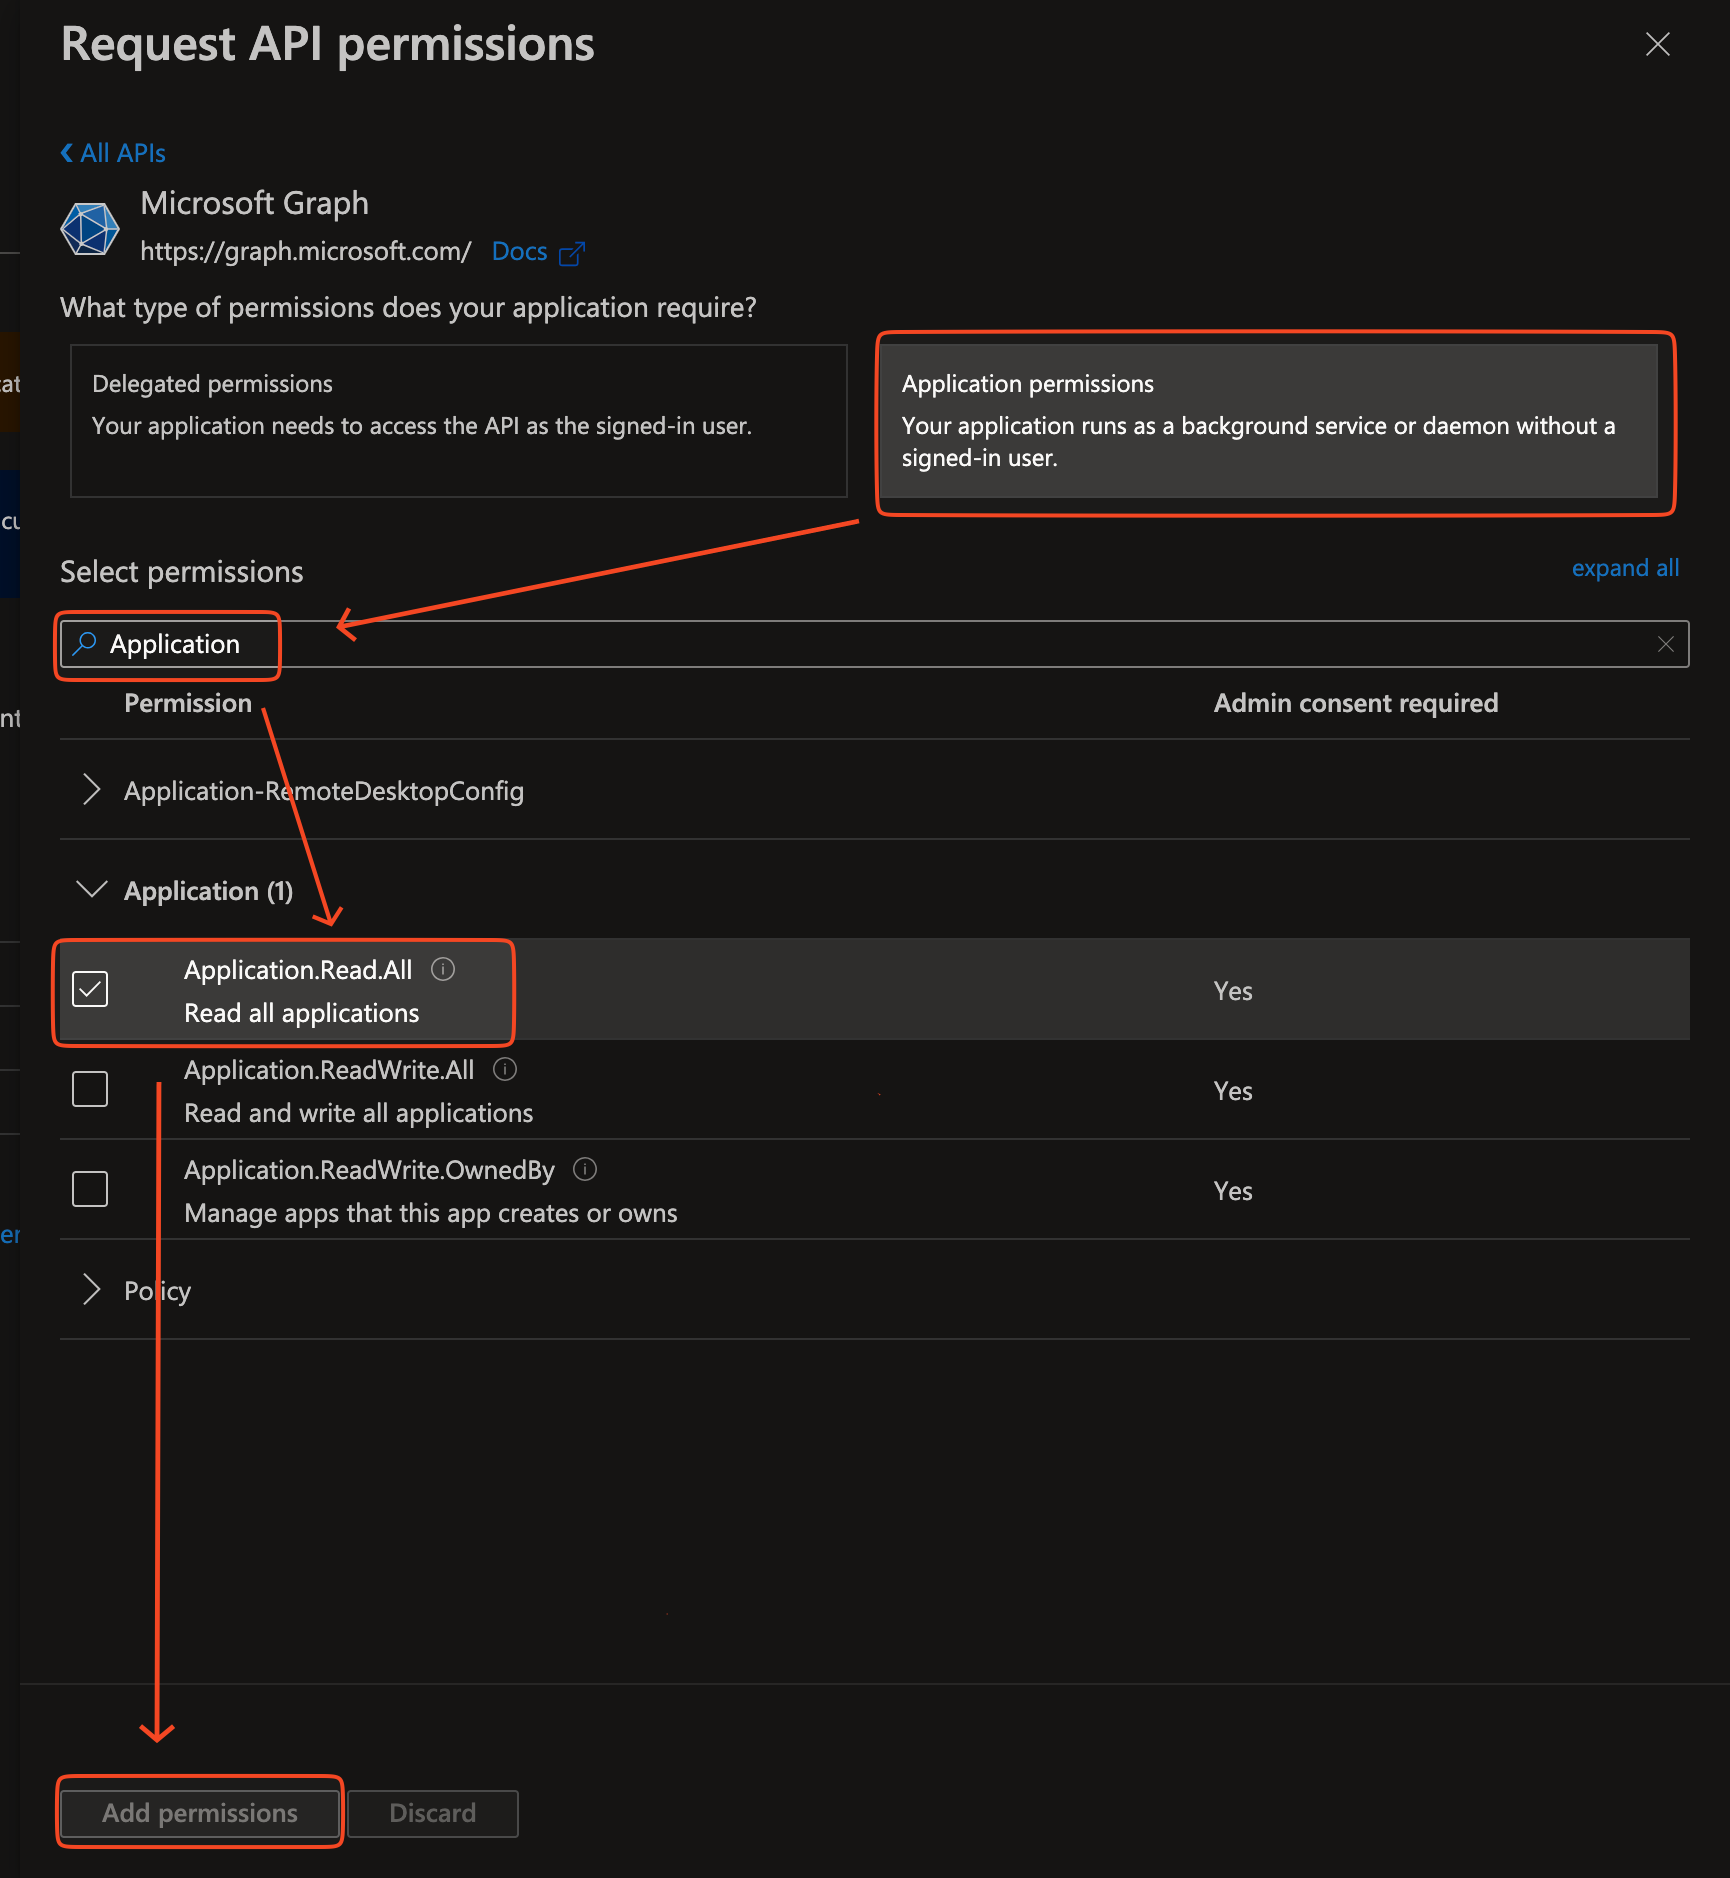
After assigning permissions, grant the admin consent by clicking on check mark.
Configure Third-party discovery via Microsoft Entra ID in SAFE
Follow the below steps to configure Azure in SAFE:
Go to the Integrations and click the Third-party discovery via Microsoft Entra ID card.
On the Configure page, enter the TenantID, ClientID, and Client Secret generated above
Click the Test Connection button.
Once the connection is validated, click the Save button.
Once the configuration is saved, click the Sync Now button to trigger the on-demand sync outside the scheduled auto sync.

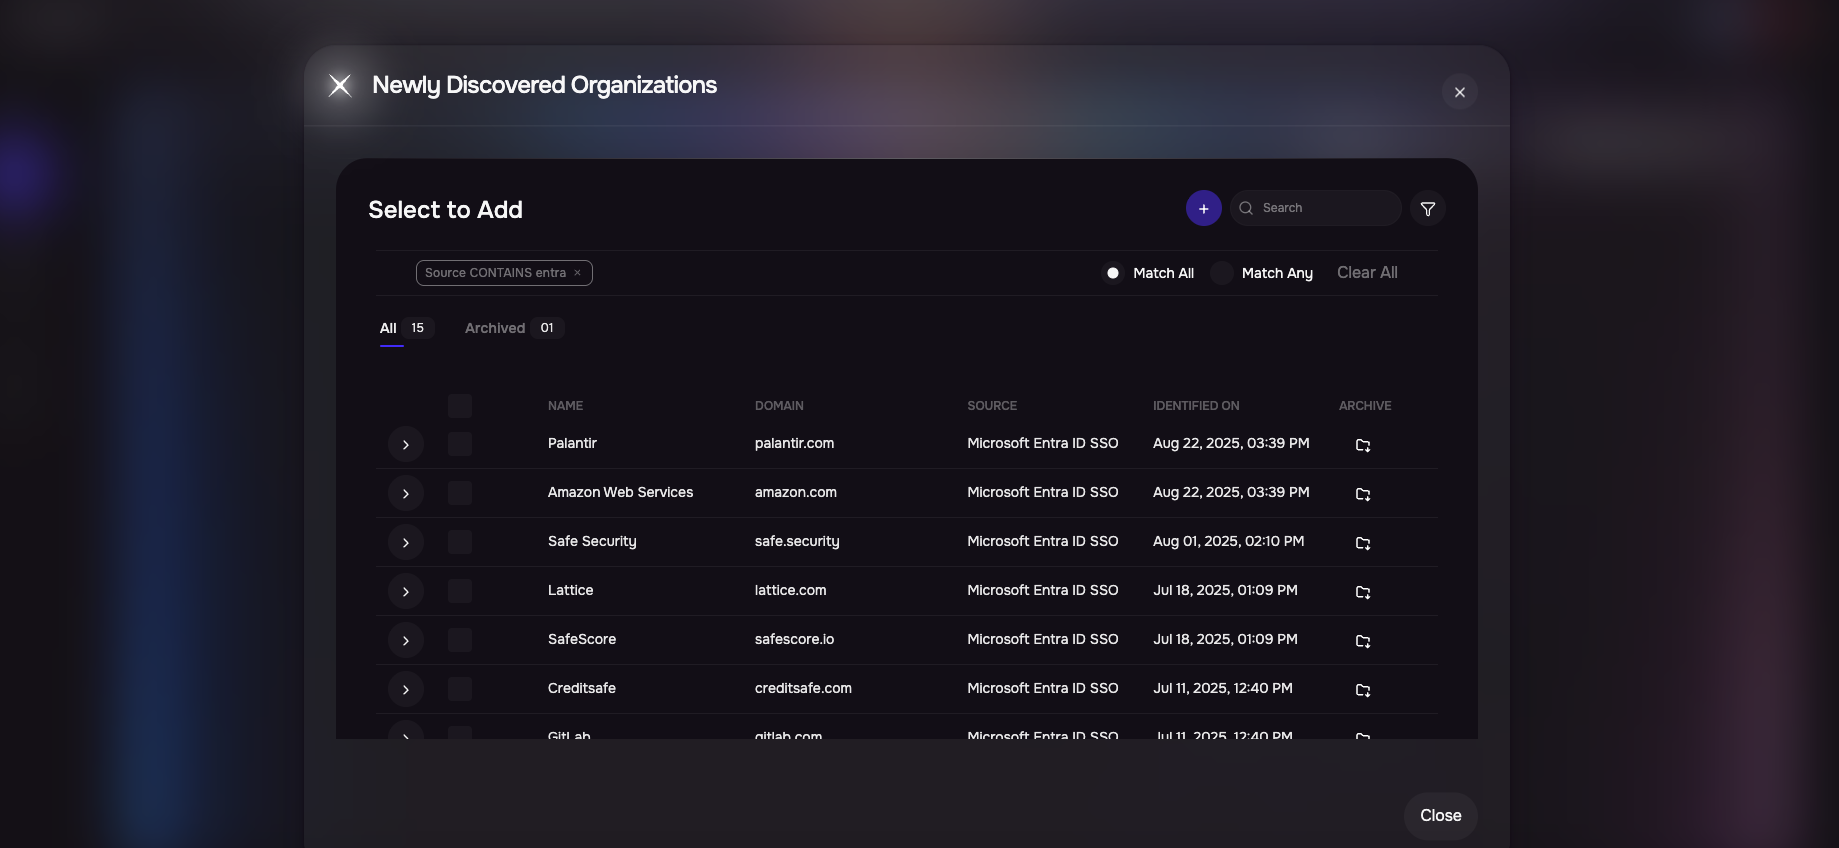
View results
Click Third-Parties from the left navigation.
Click the Newly Discovered button available at the top-right corner of the search page.
Here you will see the list of discovered third parties from this integration. You can select and add them into SAFE from here.
FAQs
How are third parties discovered?
SAFE queries the enterprise application in Microsoft Entra ID to discover the third parties.
Why am I seeing some incorrect results in the list of third parties detected?
As this is an automatic discovery, there might be some cases where the third parties might be wrongly detected. These entries can be ignored as it's up to you to add the third parties in SAFE.