User Management
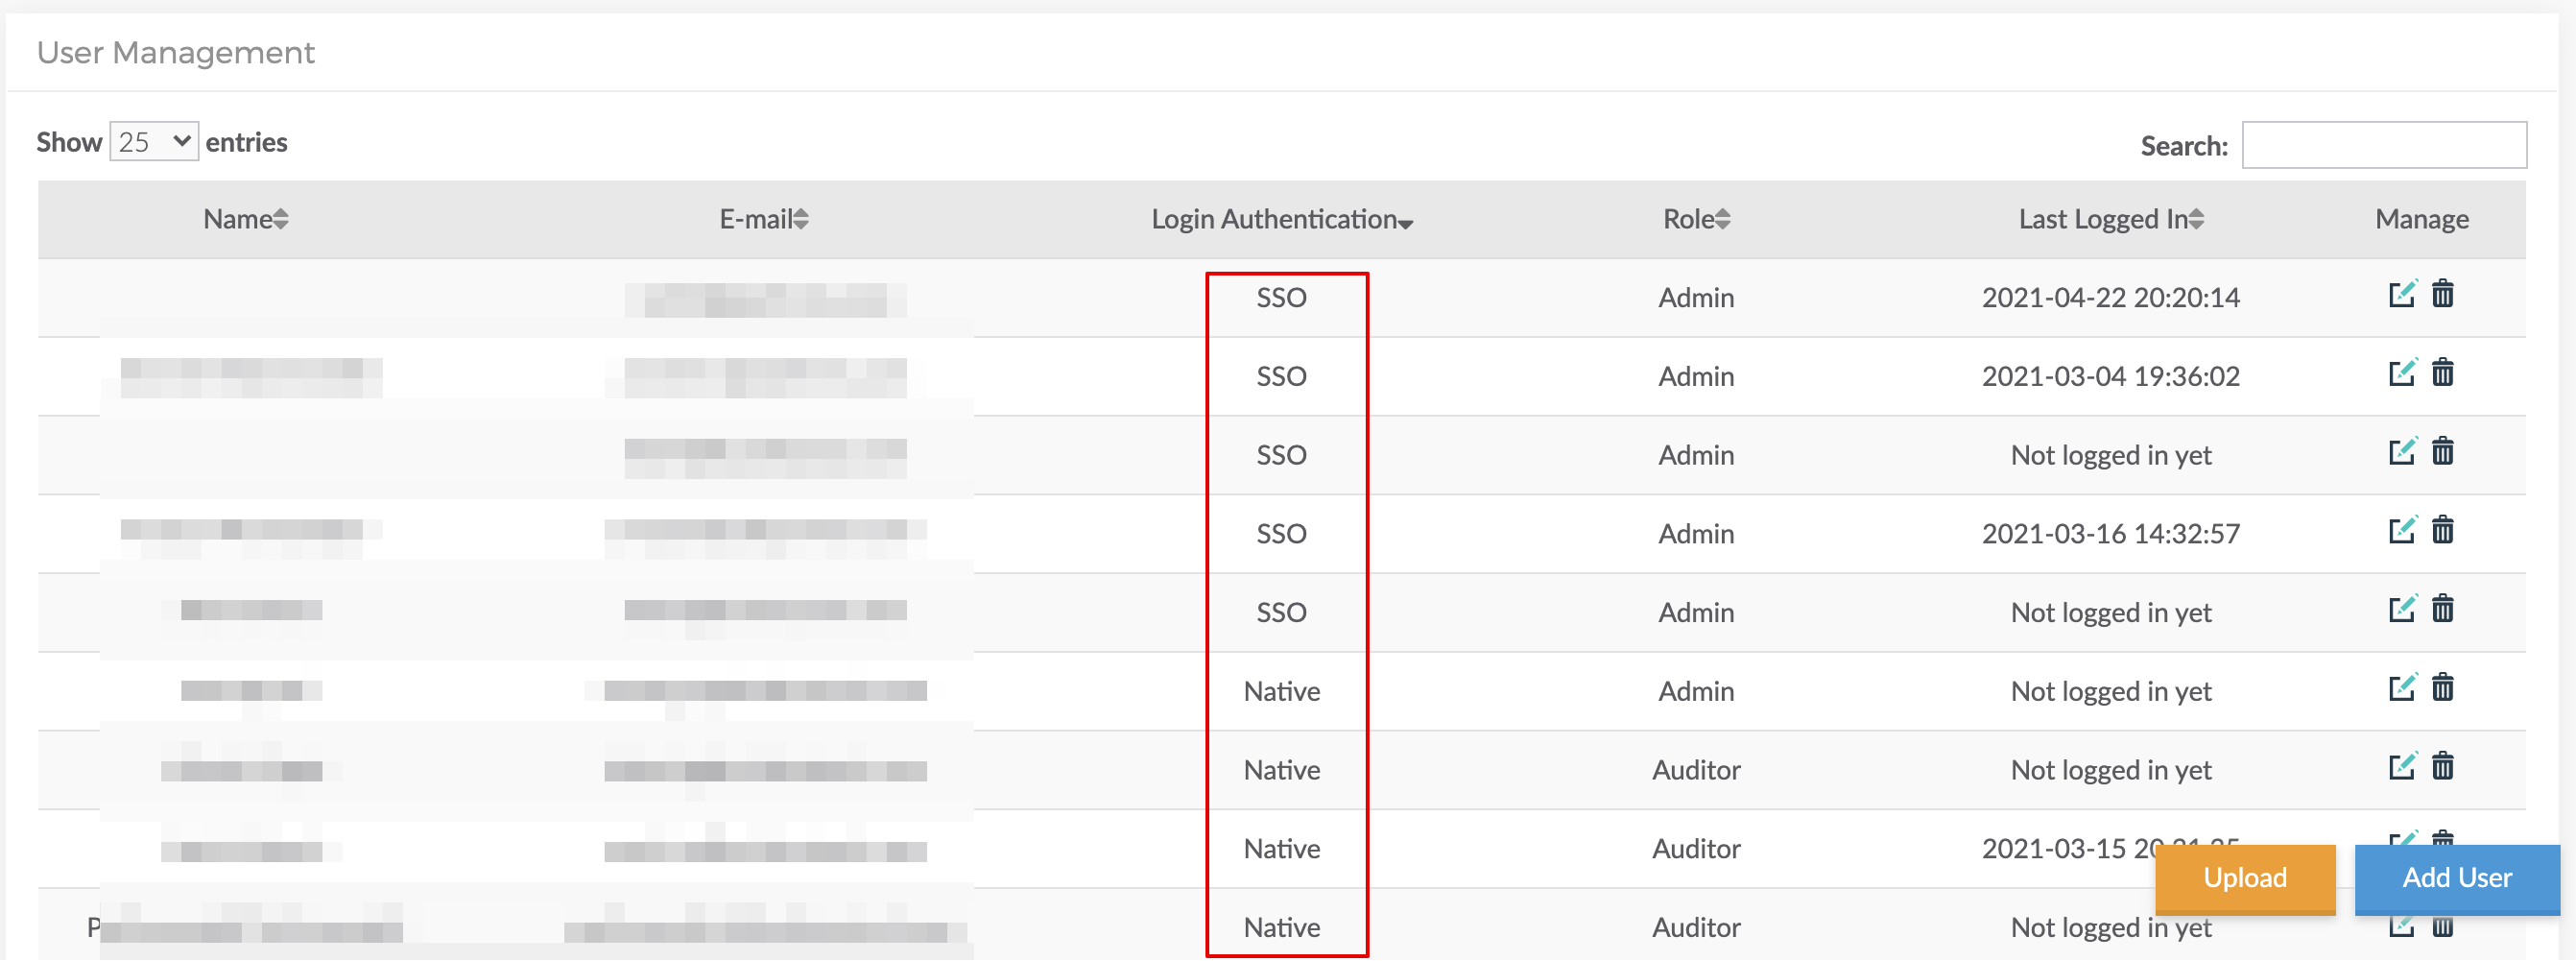
Users Management screen displays the list of all SAFE users and allows SAFE Admins to add, upload, and manage users.
If Single Sign-On (SSO) is enabled the Users Management screen displays the list of all SAFE users (SSO + Native). The Login Authentication column displays the nature of login authentication as SSO or Native user.

Add Users
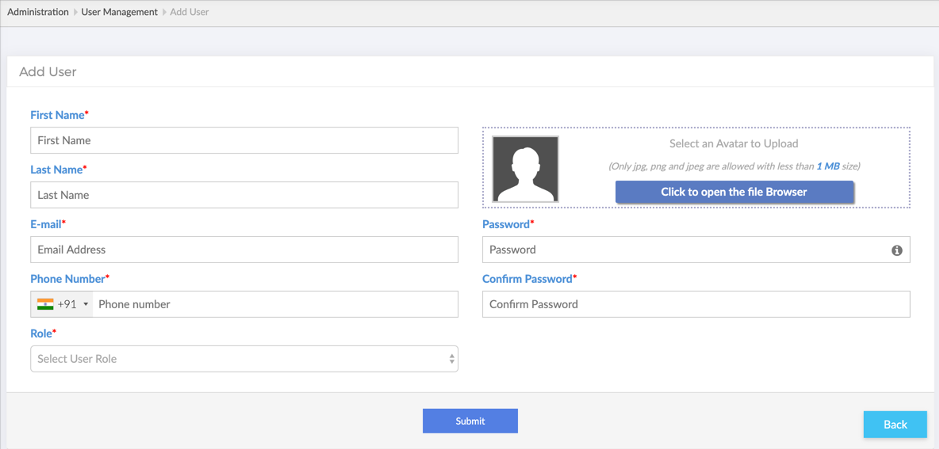
SAFE Admins can add users to SAFE from the User Management screen. Follow the below procedure to add a new user to SAFE:
- Navigate to Administration > User Management
- Click the Add User button.
- Enter the user details such as First Name, Last Name, Email, Phone Number, User Role, and Password.
- Click the Submit button.

While adding SSO users, the Password field will be greyed out. The system identifies the SSO users with their email domains. The added user can Sign In to SAFE using their SSO credentials.
Upload User
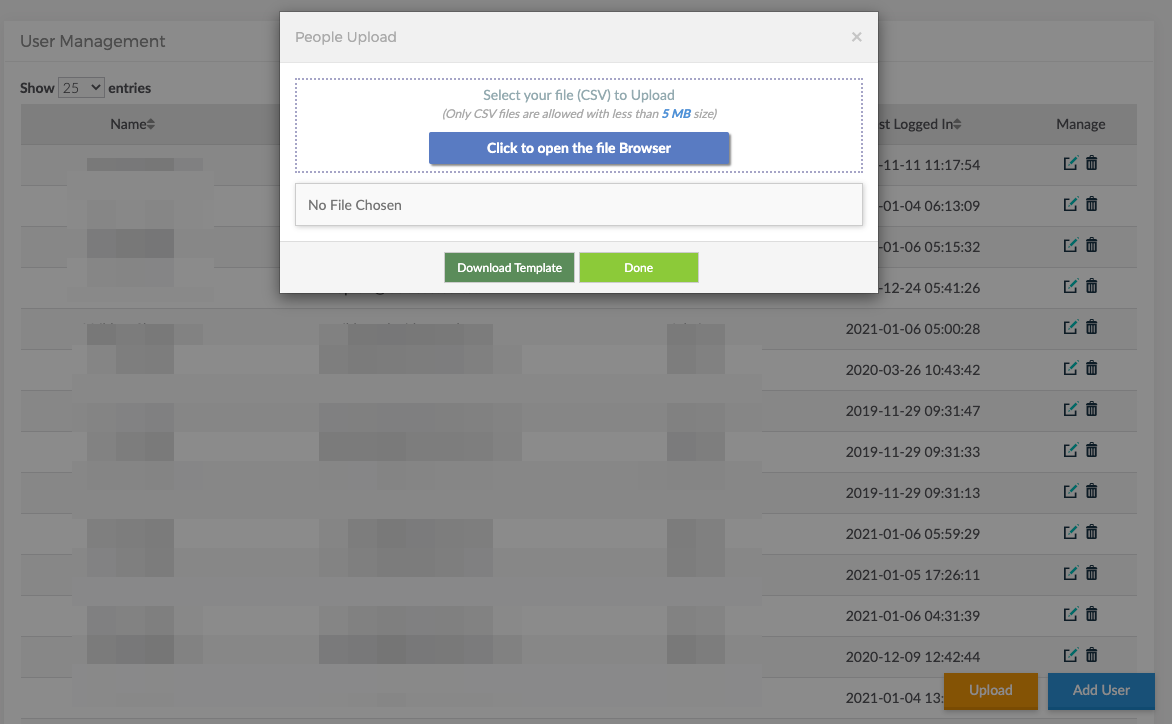
SAFE Admins can upload users to the SAFE application. To upload users:
- Navigate to Manage Onboarding > People Management > User Management
- Click the Upload button.
- If you do not have the user upload the CSV template, click the Download Template button.
- Fill in the user’s details in the CSV file.
- Browse and Upload the CSV file.
- Click Done. The users will be uploaded to SAFE.
While uploading SSO users, do not enter passwords in the template.

Manage Users
SAFE Admin can edit users’ details or delete users from SAFE.
Click on the Edit icon to update and the Delete icon to delete the user. The options are available in the manage column for each of the users.

User Role is a non-editable field. To change the role for a user, you must delete the user first and then create a new user with the desired role.