VA Report Upload
- 5 Minutes to read
- Print
- PDF
VA Report Upload
- 5 Minutes to read
- Print
- PDF
Article summary
Did you find this summary helpful?
Thank you for your feedback
About this document
This document provides step-by-step instructions to upload a VA report in SAFE.
Introduction
SAFE allows users to upload reports from any VA tool via the VA report upload functionality. The vulnerabilities report can be downloaded from the source VA tool, converted into a format that SAFE supports, and upload to SAFE.
Important
SAFE supports the CVSS version 2.0 only.
Supported Asset Verticals
- Cloud - SaaS Applications
- End Points
- Mobile Applications
- Network & Security Nodes
- Server
- Storage
- Thick Client Applications
- Web Applications
VA Report Template
Download VA Report Template
You can download the VA Report Template CSV file from SAFE.
- Go to SAFE Hooks.
- Click the VA Report Upload card.
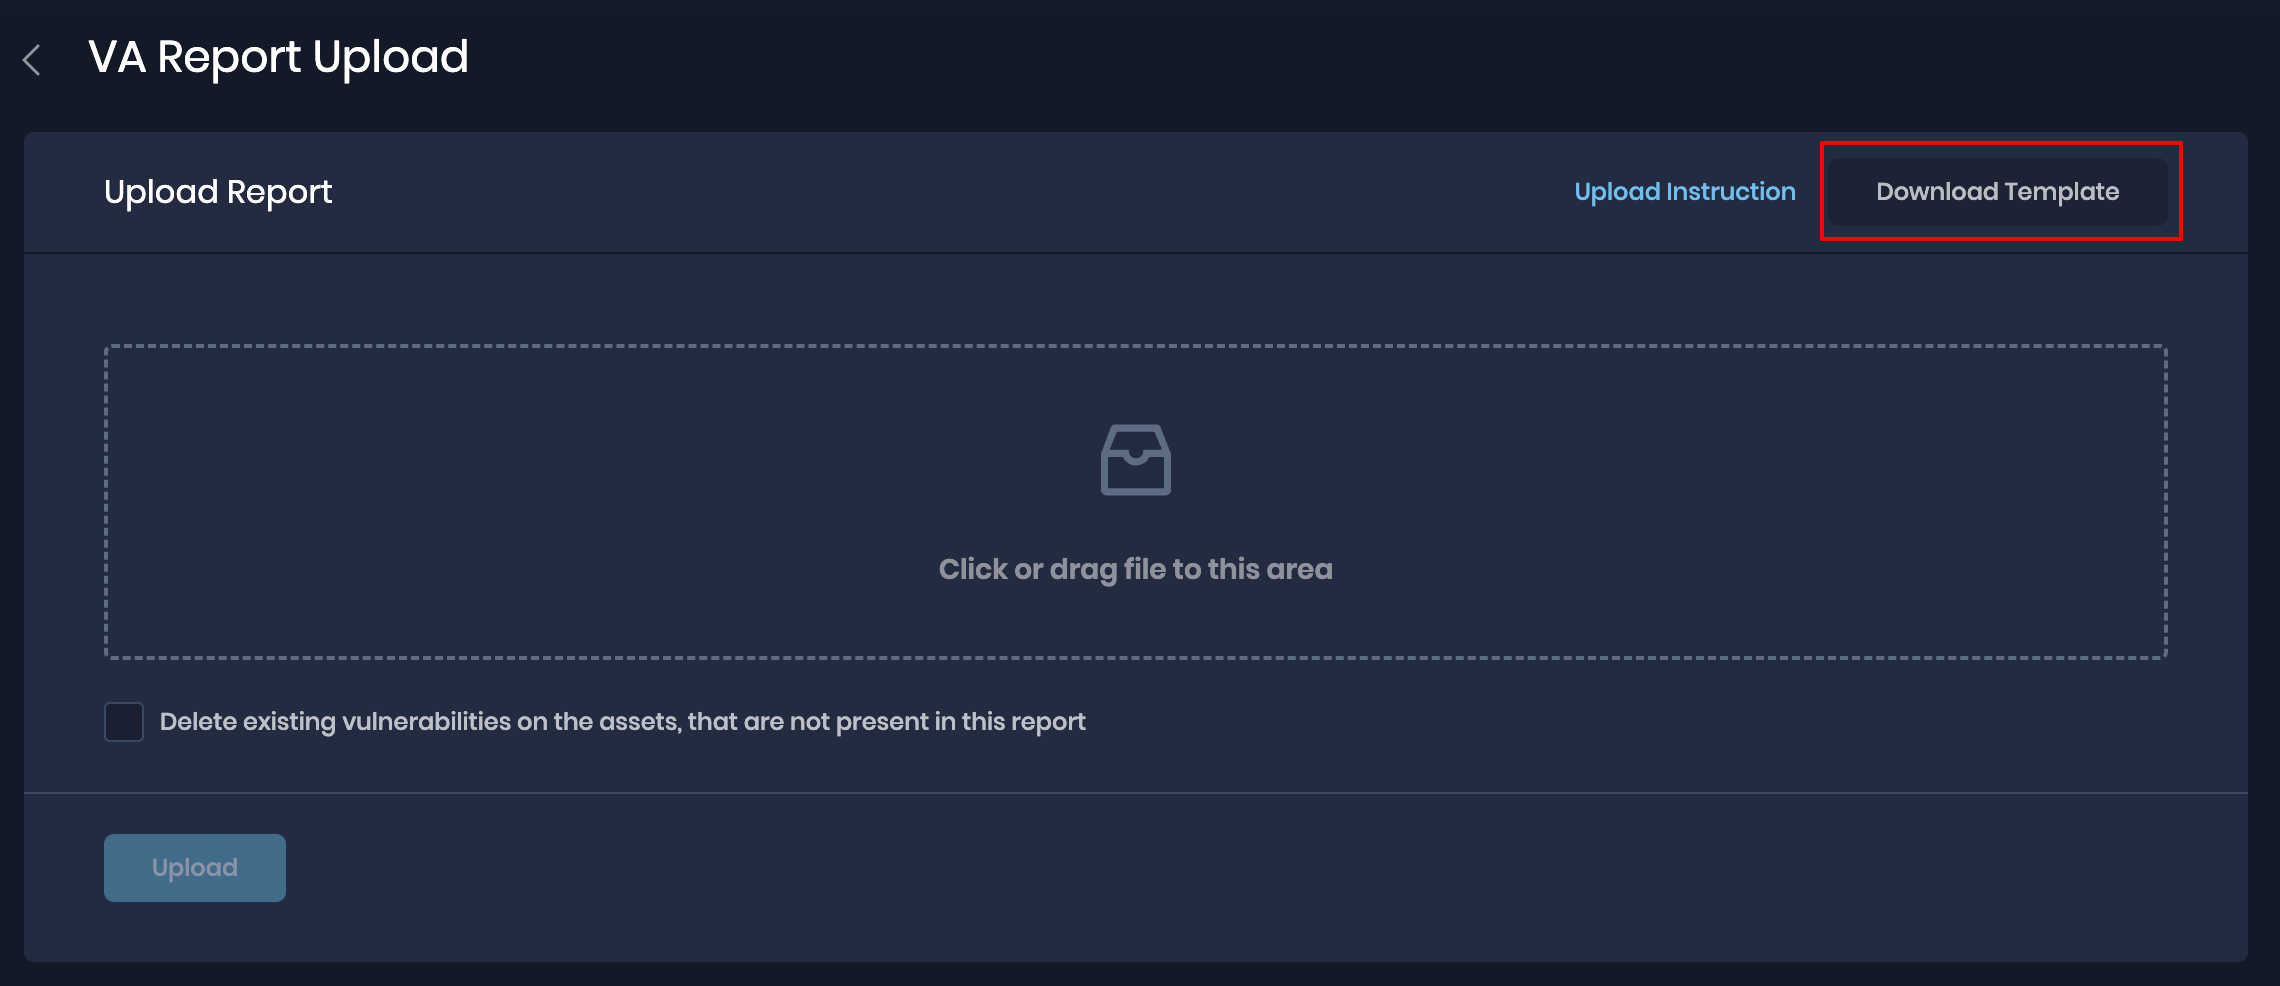
- On the upload report page, click the Download Template button available at the top-right corner of the page.
- The system downloads a CSV template file on your system.
Instructions to fill the VA report template
- Only CSV files in the provided format of up to 10 MB in size are allowed.
- The VA report can have up to 20,000 vulnerabilities across different assets.
- Each row denotes one instance of a vulnerability, if multiple rows with the same vulnerability and asset are found in the input file, they are treated as multiple instances of the same vulnerability for the asset.
Basic VA fields
The following fields are available in the VA report template. The default mandatory fields are marked by an asterisk(*).
- id *: Vulnerability Id from the source tool or any unique identifier for the vulnerability.
- name *: Name of the vulnerability.
- entity.name *: Name of the entity/asset for which the vulnerability is detected.If the entity or asset's name is unknown, please provide alternative identifiers such as the hostname, IP address, FQDN, or other unique identifiers for the new asset. For Web Applications, the asset name needs to be unique and can be the same as Asset URL.
- status *:Status of the vulnerability. Leaving the value blank will mark the vulnerability as ‘Not Assessed’ in SAFE. The following status values are allowed:
- Failed
- Qualified
- NA (Not Applicable)
- AF (Accepted Failed)
- description *: Description of the vulnerability.
- severity.score *: Overall severity score of the vulnerability on a scale of 1-10.
- cveIds: CVE IDs tagged for the specified vulnerability. To add multiple CVE IDs for one row, add a comma to separate them. Eg. CVE-123-1234,CVE-234-2345.
Optional VA fields
- cvss.baseScore: CVSS V2 base score of the vulnerability.
- cvss.temporalScore: CVSS V2 temporal score of the vulnerability.
- cvss.environmentalScore: CVSS V2 environmental score of the vulnerability.
- cvss.vector: CVSS V2 vector of the vulnerability.
- source.name: Name of the source tool, e.g., Tenable.io, Qualys, etc. If the source is not known or the tool is not supported, leave the value blank or provide ‘Others.’
- owaspIds: OWASP IDs tagged for the specified vulnerability. To add multiple OWASP IDs for one row, add a comma to separate them. E.g. A01:2021, A02:2021.
- cweIds: CWE IDs tagged for the specified vulnerability. To add multiple CWE IDs for one row, add a comma to separate them. E.g. CWE-22, CWE-23.
- techniqueIds: ATT&CK Technique IDs tagged for the specified vulnerability. Refer Techniques - Enterprise | MITRE ATT&CK®. To add multiple Technique IDs for one row, add a comma to separate them. E.g. T1234, T2345.
- port: Port for which the vulnerability was found.
- protocol: Protocol for which the vulnerability was found. Can be TCP or UDP or can be left blank.
- evidence.observationText: Observation about the vulnerability.
- remediation.description: Remediation descriptions or steps for the vulnerability.
- remediation.reference: Reference URL for the remediation.
- remediation.impact: Impact on the entity if the vulnerability is remediated.
- entity.type: SAFE-specific entity/asset type. To get the list of supported asset types, use the GET /asset-types API. E.g., Ubuntu 20.x. Providing this value will help onboard the asset in the right asset type in SAFE.
- entity.fqdn: Fully Qualified Domain Name of the entity.
- entity.criticality: Criticality of the entity. Can be one Critical, High, or Medium-Low.
- entity.confidentialityRequirement: Confidentiality Requirement of the entity. Can be one of High, Medium, or Low.
- entity.integrityRequirement: Integrity Requirement of the entity. Can be one of High, Medium, or Low.
- entity.availabilityRequirement: Availability Requirement of the entity. Can be one of High, Medium, or Low.
- entity.ipv4: IPV4 address of the entity.
- entity.region: Region in which the entity is deployed.
- entity.accessibility: Defines the accessibility of an entity from an end-user perspective. It can take the values - “External” or “Internal” based on whether the entity is internal or external network-facing for an end-user.
- entity.version: Version of the entity.
- entity.url: URL of the entity in case the entity.type belongs to Web Applications. E.g., http://safe.security
- firstSeen: Timestamp when the vulnerability was first observed in ISO string format. Eg. 2018-12-05T05:21:04.000Z
- expiryDate: Timestamp when the vulnerability should expire for the corresponding asset in ISO string format. Eg. 2018-12-05T05:21:04.000Z
Upload VA report
Once you have the report prepared, perform the following steps to upload the report:
- Navigate to the Safe Hooks page.
- Click on the VA Report Upload card.
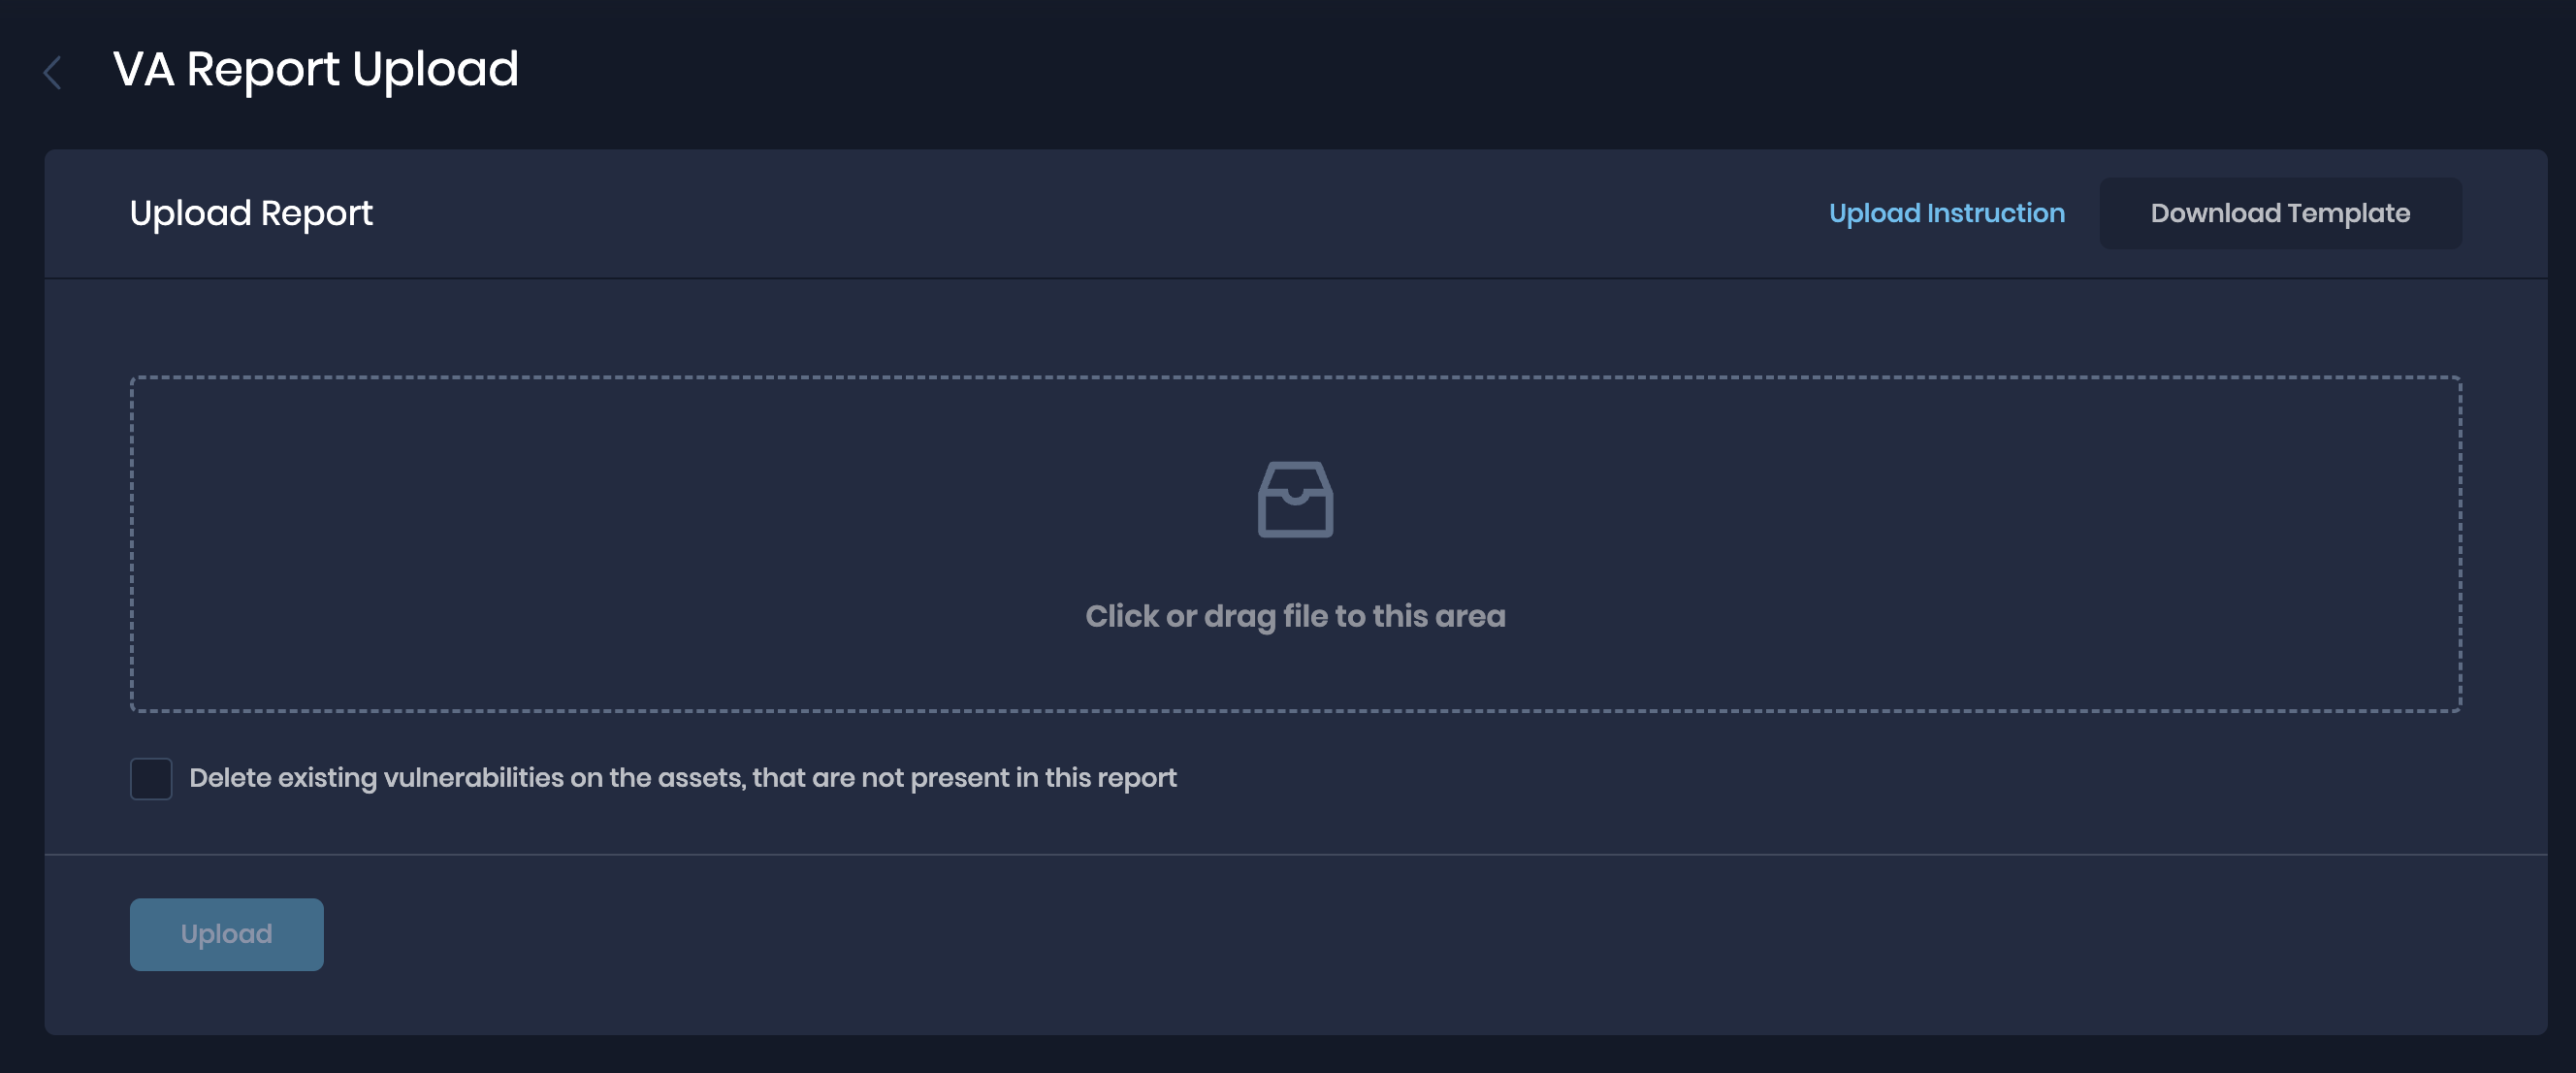
- On the VA Report Upload page, drag the report CSV file directly or browse and upload the file.
- If you want to delete existing vulnerabilities for the assets in the report being uploaded, mark the checkbox for the same.
- Click the Upload button.
- Once the report is uploaded, the system displays the report in the Upload History table.
Check Upload History
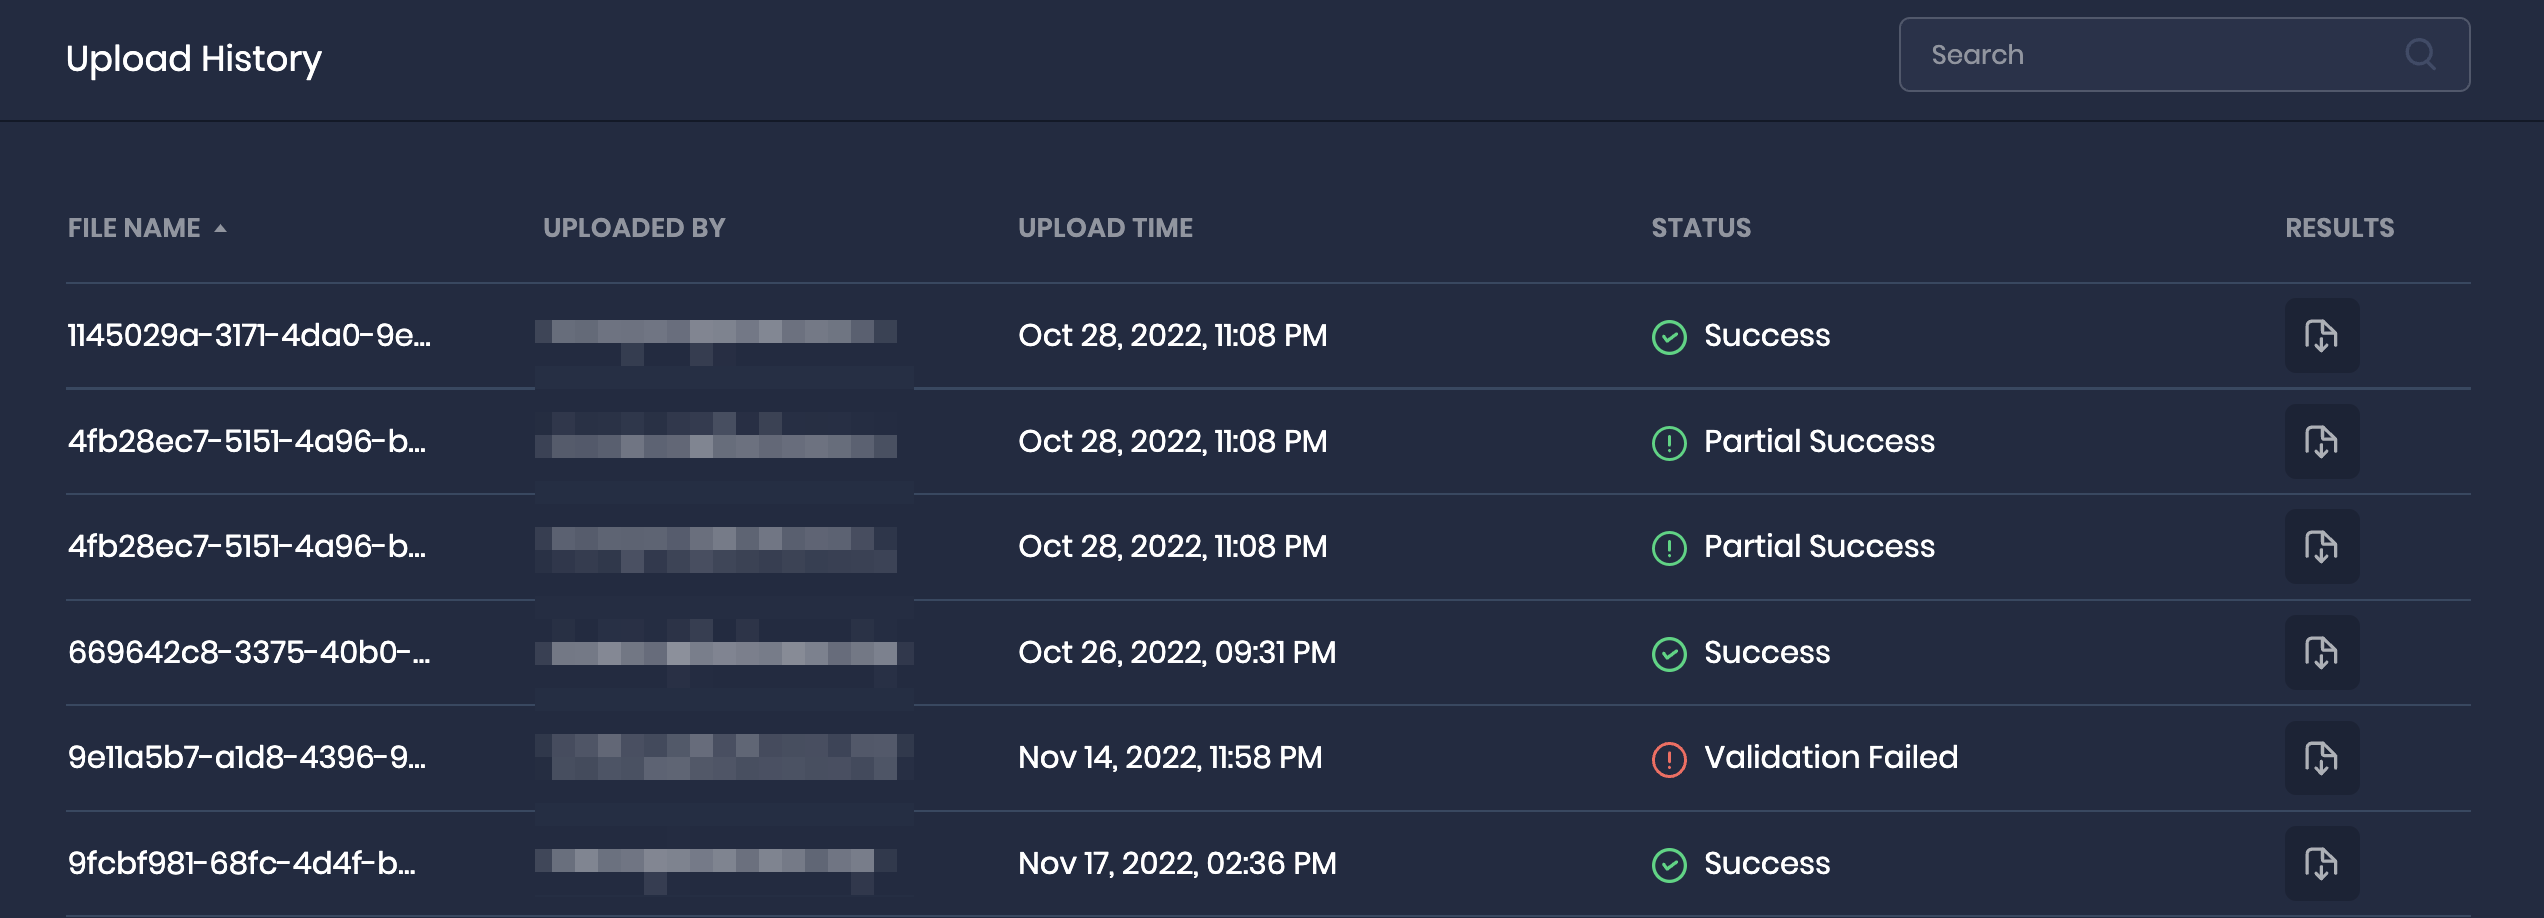
- The Upload History table provides information about the report uploads, including their file name, the user who uploaded the report, the timestamp when the report was uploaded, and the current processing status of the report.
- Once the report processing is complete, the status of the report will be updated to either Success, Failed, Partial Success or Validation Failed.
- In case the report ends up with a failure status, the system provides the user an option to download the processed CSV file with per-row outcomes. This can help in understanding the reasons why the report was not processed successfully.
Processing Status
While uploading a VA report, you can come across the below processing statuses:
In Progress: If the report has been accepted by the system for processing and the processing has started, then the report status will be In Progress.
Validation Failed: During the report processing if the system encounters any row which does not qualify the data validation checks, the report is moved to Validation Failed status. In this scenario, the user can download the result CSV and remediate the validation issues given in the error column for each row, and re-upload the CSV. No rows will be processed in the system till all validation failures in the CSV are fixed.
Failed: During the report processing, if the report data is valid, but the system fails to do the vulnerability assessment for any assets provided in the report, then the report ends up in a Failed state. In this scenario, one can check the API response or result from CSV for additional details.
Partial Success: During the report processing, if the report data is valid, but the system fails to process vulnerability assessment for some of the assets, and others get processed, then the report ends up in a Partial Success state. In this scenario, one can check the result CSV for the assets which failed in processing and possible reasons.
Success: If all assets and their VA data provided in the CSV report are successfully processed, the report ends up in a SUCCESS state.
Was this article helpful?