Install SAFE Agent on macOS using Jamf Pro
- 1 Minute to read
- Print
- PDF
Install SAFE Agent on macOS using Jamf Pro
- 1 Minute to read
- Print
- PDF
Article summary
Did you find this summary helpful?
Thank you for your feedback
About this document
This document provides the step-by-step procedure to install the SAFE agent on macOS using Jamf Pro
Pre-Installation
Refer to the Installing SAFE Agent - macOS
Install SAFE Agent on macOS using Jamf Pro
This is the most common way to install the SAFE package onto a macOS using a policy.
Follow the below step-by-step procedure to install the SAFE agent:
- Login to your Jamf Pro account.
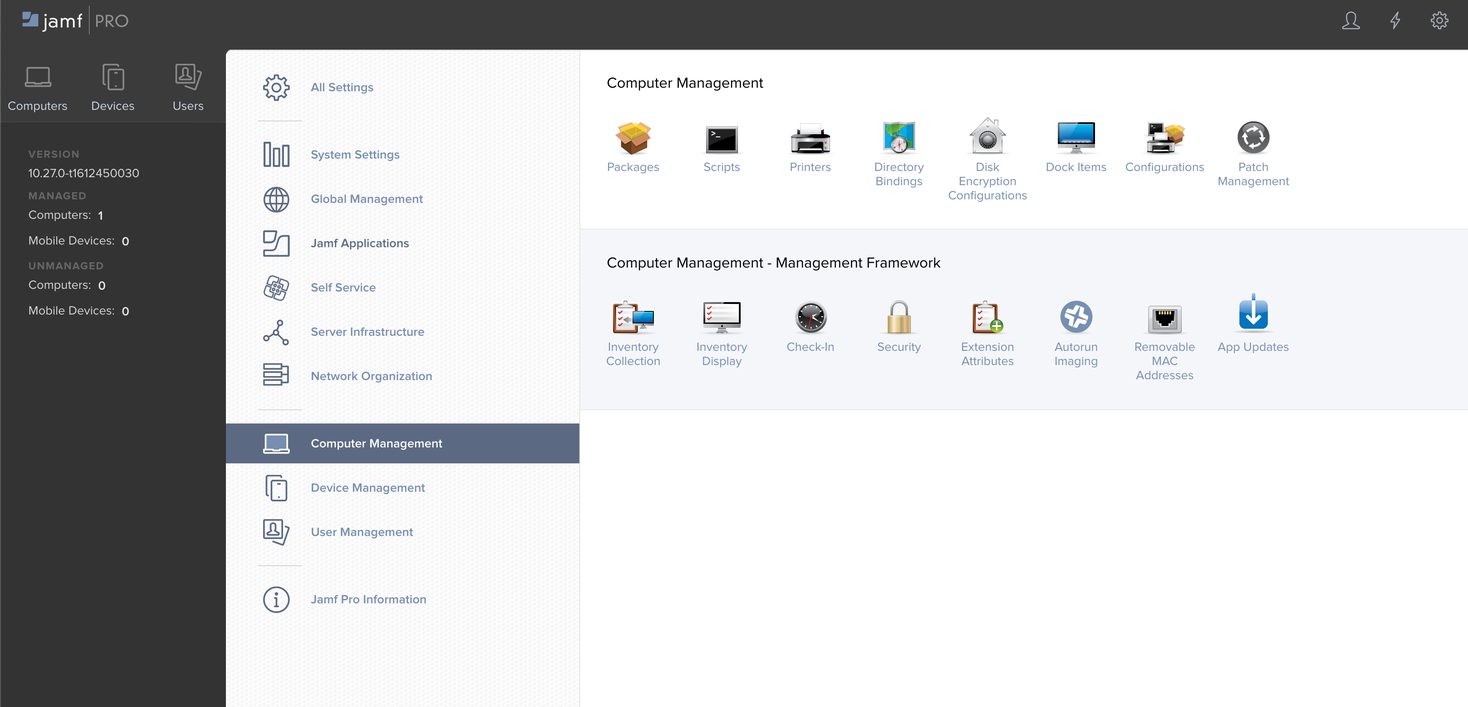
- Navigate to the Management Settings > Computer Management.
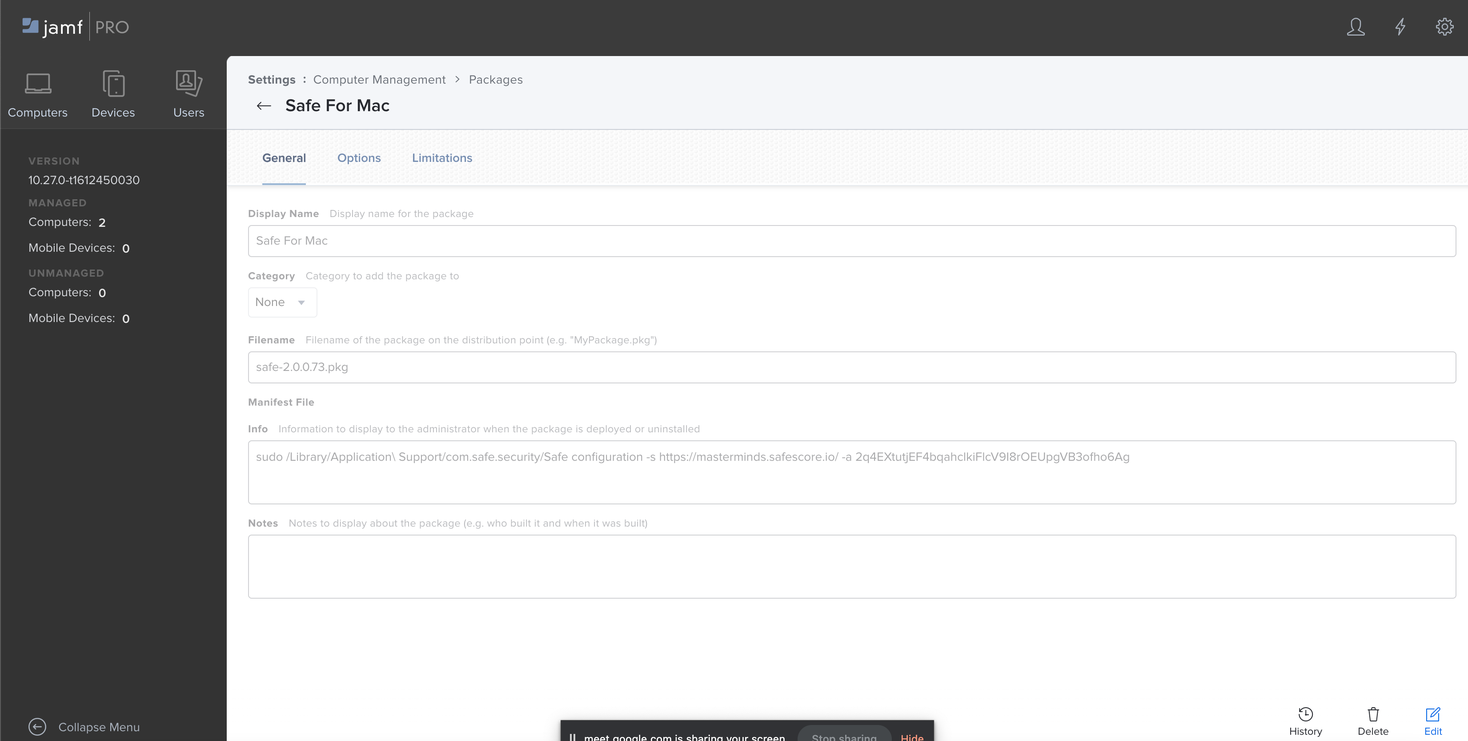
- Click the Package option and upload the package.
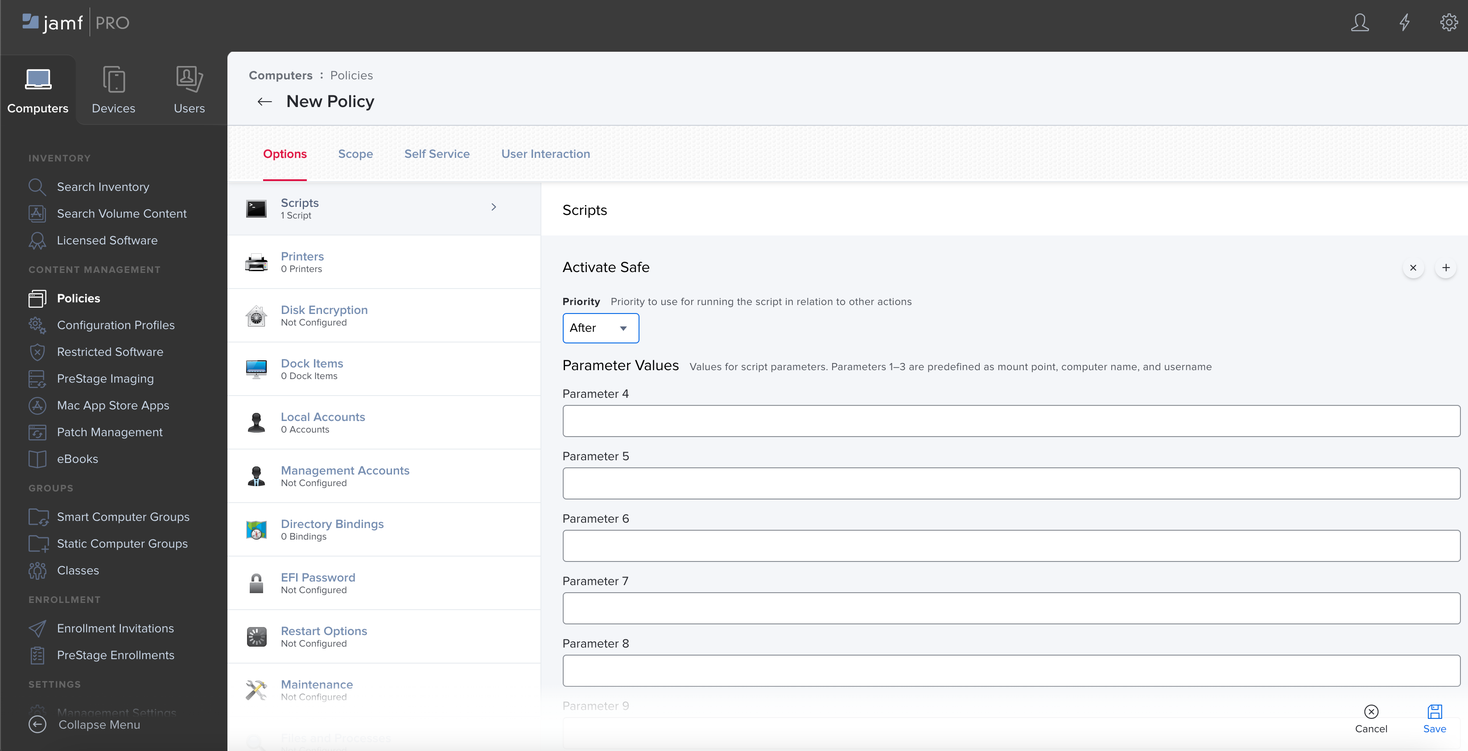
- Click the Script option and upload the script to pass the activation key and site URL.
sudo /Library/Application\ Support/com.safe.security/Safe configuration --activation-key <ACIVATION_KEY_HERE> --safe-url <SAFE_URL>
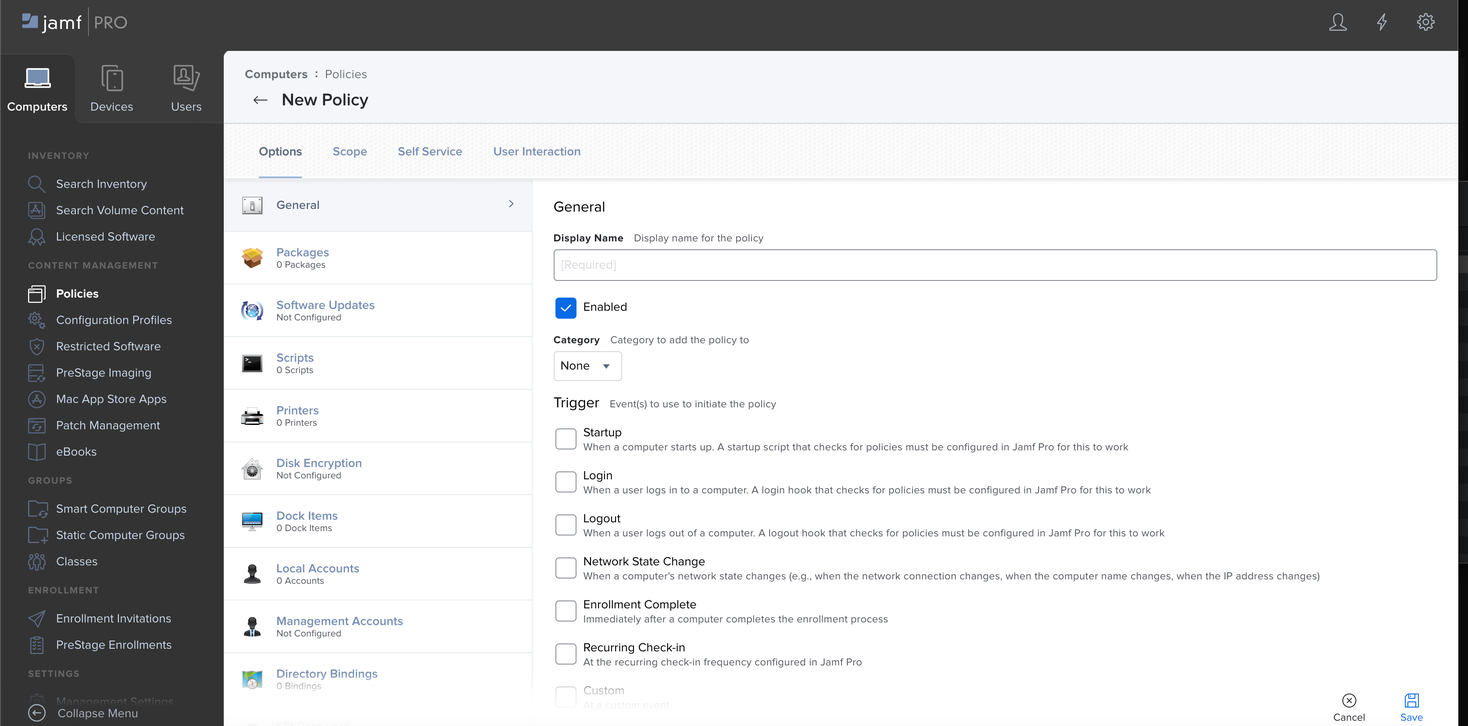
- To create a policy to install the SAFE Package, click the Computer available on the top-left corner of the left navigation.
- Click the Policy and New button.
- On the General Option, enter Display Name and add other settings.
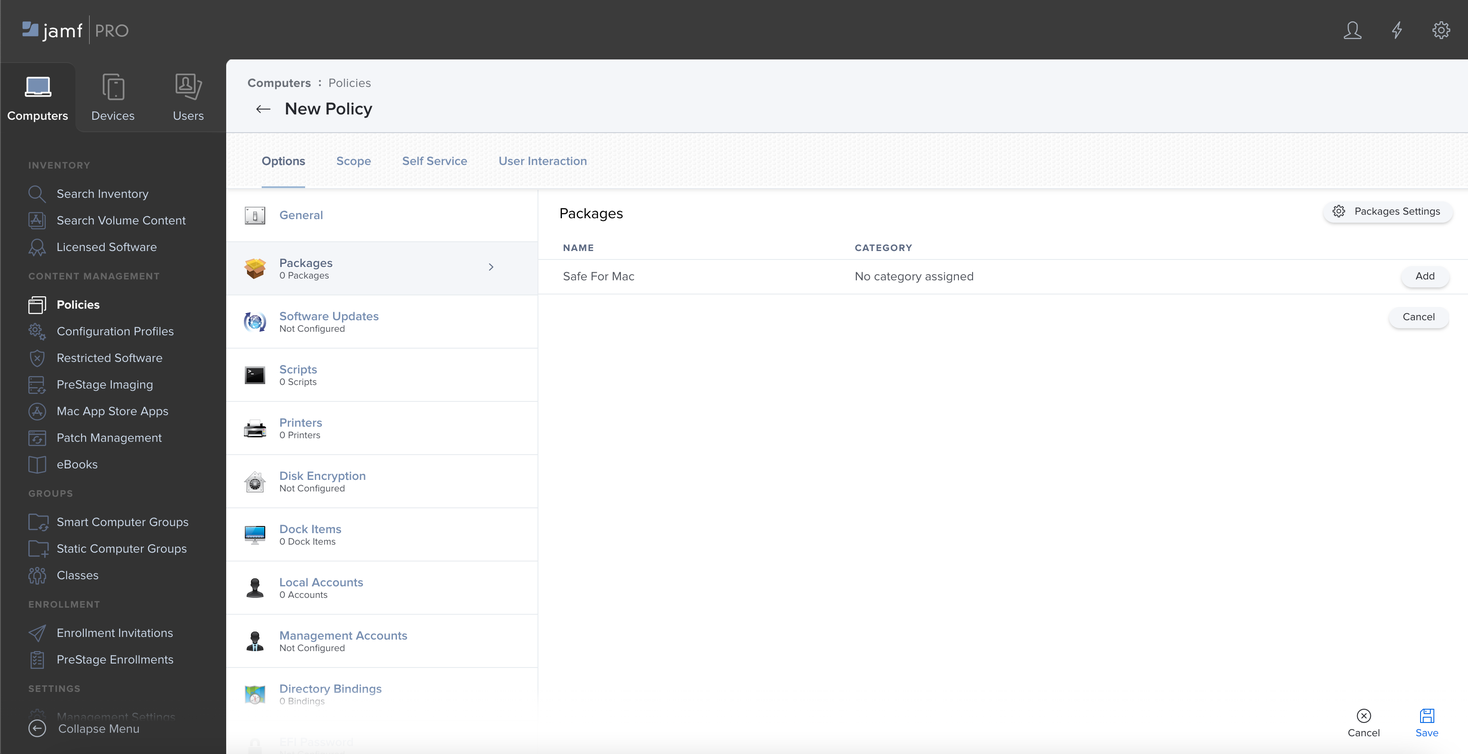
- On the Packages Option, Click the Configure button.

- Click the Add button and select a package to install.

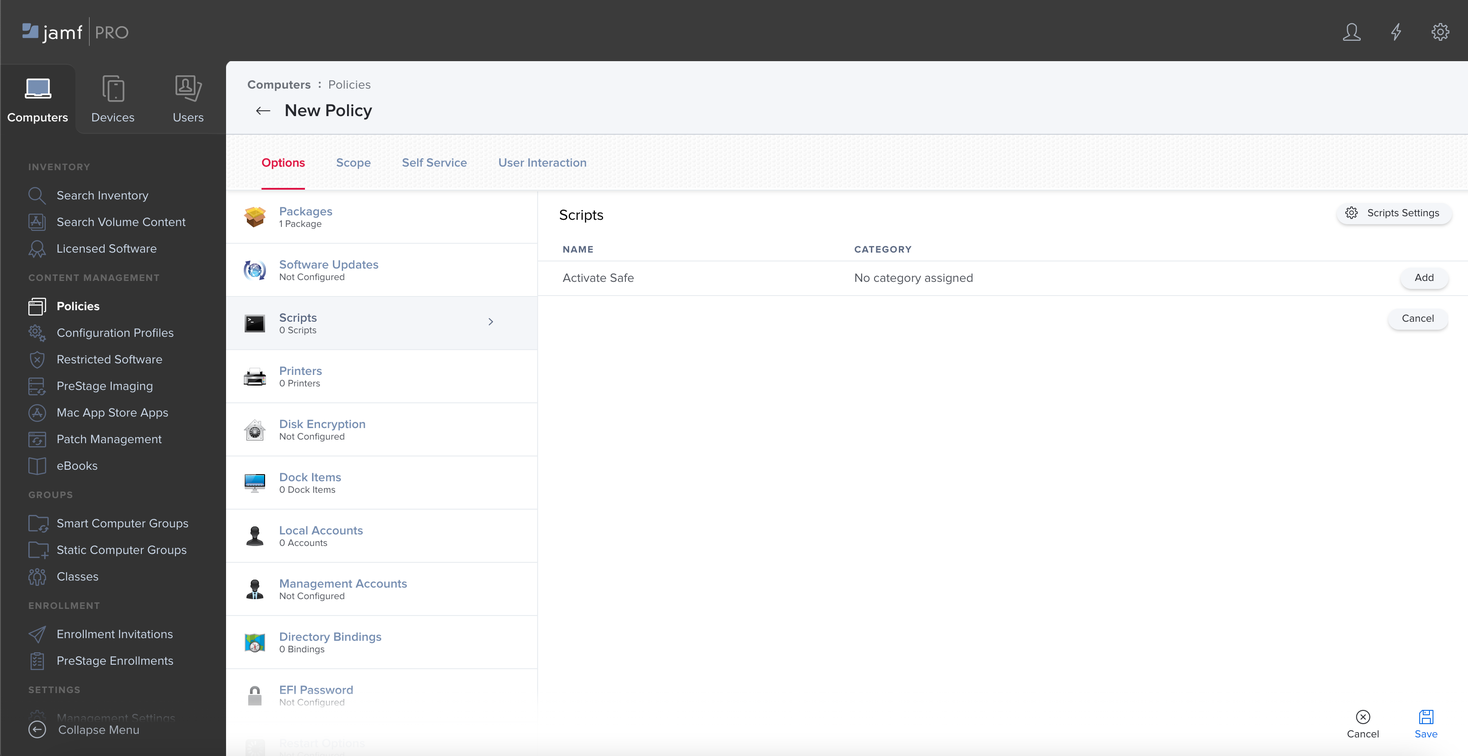
- On the Scripts Option, Click the Configure button.

- Click the Add button and select script to activate. (Pass activation key and Safe URL)
- Configure the Scope and Self-service as per your requirement.
- Click the Save button available at the bottom-right of the screen. The package will be installed on the machine in scope on the next check.


Was this article helpful?