- 6 Minutes to read
- Print
- PDF
Agent and Site Management
- 6 Minutes to read
- Print
- PDF
Agent and Site Management allows you to manage the Site Coordinator and Activation Keys.
Site Coordinator
Agentless assessment of assets, including the ones that are in disconnected sites, is supported through SAFE Cloud via Site Coordinators. The Site Coordinators register themselves on SAFE using activation keys, both of which can be managed from SAFE.
Activation Keys
Activation Keys are used at the time of agent installation for authentication. With these activation keys, only authenticated agents will be allowed to register themselves, and thereby communicate with SAFE. Users can manage the Activation Keys, including their revocation in case of a compromise, from SAFE itself. This feature is available under Administration > Asset Management > Asset & Site Management
Generate Activation Keys
To generate an activation key:
- Navigate to Administration > Asset Management > Agent & Site Management
- Click the Generate Activation Key button.
- Enter the Name
- Enable Relay (if you want to allow agents to communicate with SAFE via Relay)
- Click the Set Limit checkbox and enter the Installation Limit and Expiry Date of Activation Key, if needed. Else let the checkbox be unselected if no limits are needed.
- Click the Generate button. The system generates and displays the Activation Key.
- Copy the Activation Key and save it for future usages.
The system displays the Activation Key only one time. Please copy and save it for using it for Agent and Site Coordinator installations.
.png)
- Users can disable an Activation Key by toggling the button available for each of the Activation Keys under the Status column.
- Users can also delete an Activation Key by clicking on the Delete icon.
.png)
Using Site Coordinator
The Site Coordinator is responsible for carrying out all the agentless assessments in the entire SAFE system and also enables the assessment of on-prem agents with SAFE Cloud. All existing assessments will work seamlessly in the system through the Site Coordinator deployed on your SAFE Server (known as the Default Site Coordinator). With the concept of Site Coordinator, this now enables the assessment of disconnected assets in different locations (referred to as sites).
Installing a new Site Coordinator on a Remote Machine
Please refer to the following instructions to install a new Site Coordinator on a disconnected site to support assessments within the disconnected network.
Minimum Requirement
- Software Requirements
- Ubuntu 16 / CentOS 7 or greater
- Docker CE 18.03.0 or greater
- Docker Compose 1.24.1 or greater
- A non-root user to manage docker
- Hardware Requirements
- 4 GB RAM
- 2 core CPU
- 50 GB disk storage
Recommended Requirements
While the minimum requirements suffice an average load and number of assets, for optimal performance, we recommend the following configuration:
- Software Requirements
- CentOS 7
- Docker CE 19.03.11
- Docker Compose 1.24.1 or greater
- A non-root user to manage docker
- Hardware Requirements
- 8 GB RAM
- 4 core CPU
- 100 GB disk storage
Install Site Coordinator
Follow the below step-by-step procedure to install a Site Coordinator and start assessing your assets on remote disconnected sites.
- Navigate to Administration > Asset Management > Agent & Site Management
- Click the Install Site Coordinator button, which will open up a dialogue box showing the command to install a Site Coordinator on a remote site.

Modify the Friendly Name of the Site Coordinator
The Friendly Name defaults to the Hostname of the machine on which the site coordinator is installed. You can modify it to a better-suited name at your convenience.
- Click on the Edit icon under the Actions column for the Site Coordinator, you want to edit.
- Enter the Friendly Name.
- Click on Submit to save the new Friendly Name. This will update the value and reflect the new one in the list.

The Friendly name must be a minimum of 1 character and a maximum of 50 characters long, containing only alphanumeric characters (hyphens and spaces allowed)
Map new or existing agentless assets to the Site Coordinator
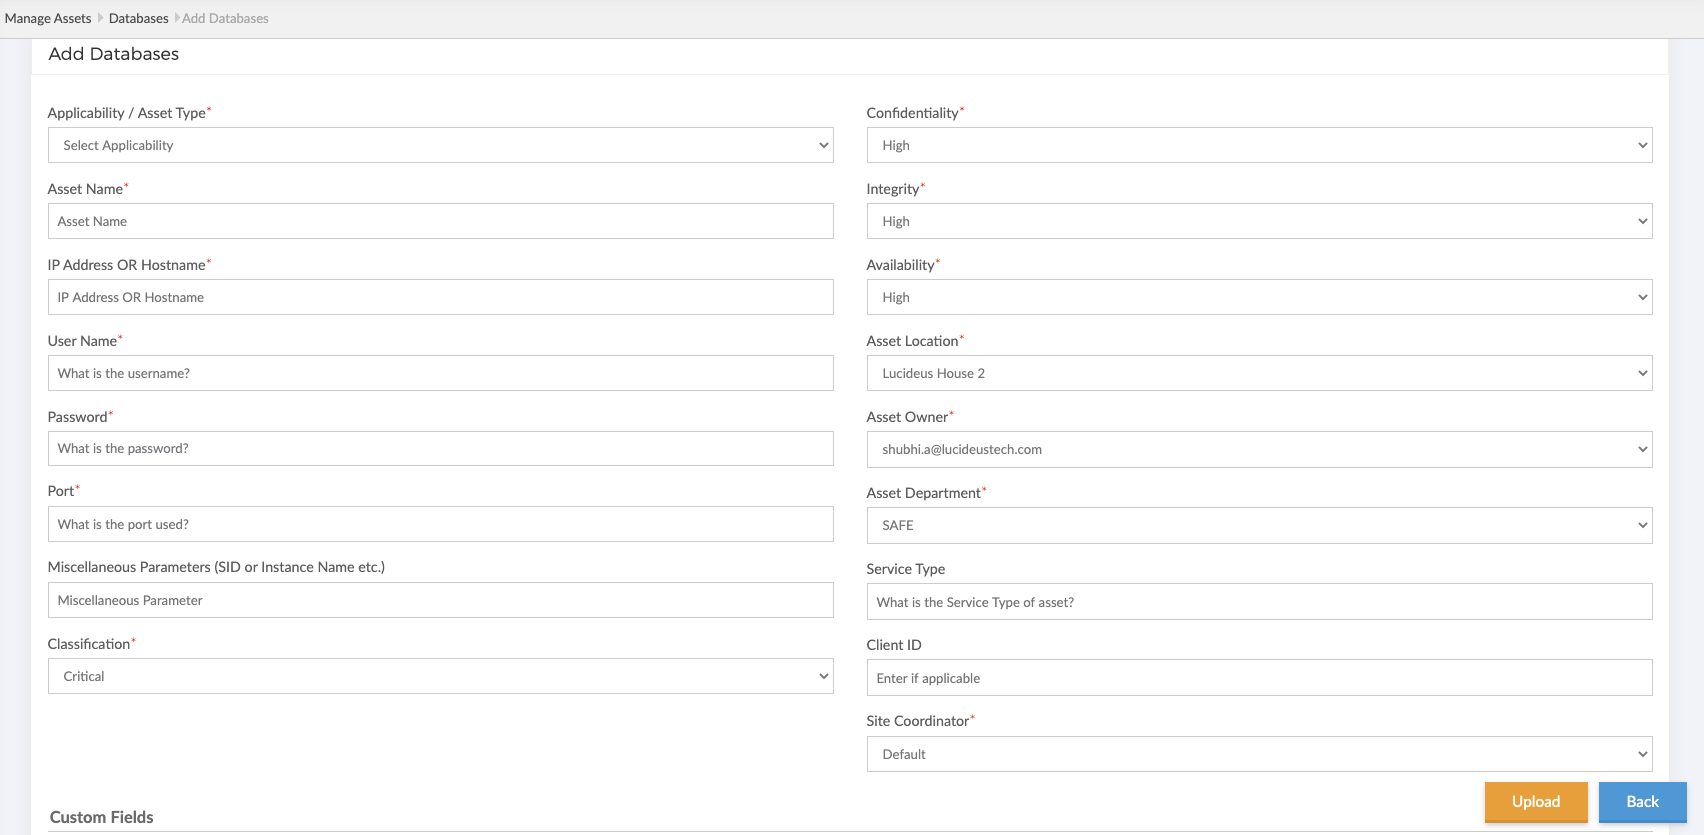
- Once you have a running site coordinator installed, you can go ahead and start mapping agentless assets to enable their assessments. For new agentless assets that you intend to add, there will be a dropdown menu now in the Asset add/edit form (as shown below). Select the appropriate Site Coordinator for this asset by referencing its Friendly Name.

- Now that the asset has been assigned to a Site Coordinator, you can go ahead and trigger or schedule the asset's assessment like earlier using the Scan Now or the Set Scan time buttons, respectively.
.png)
While scheduling the assessment using the Set Scan Time button, the selected time will be added to the Site Coordinator's schedule and will run based on the timezone settings on the remote machine on which the Site Coordinator is installed.
Map new agentless assets to a Site Coordinator in bulk
If you intend to onboard multiple agentless assets at the same time, you can use the bulk uploading feature and map these assets to their respective site coordinators.
- Navigate to the Manage Assets from the Left-Navigation menu
- Click the Add Asset button for the appropriate technology.
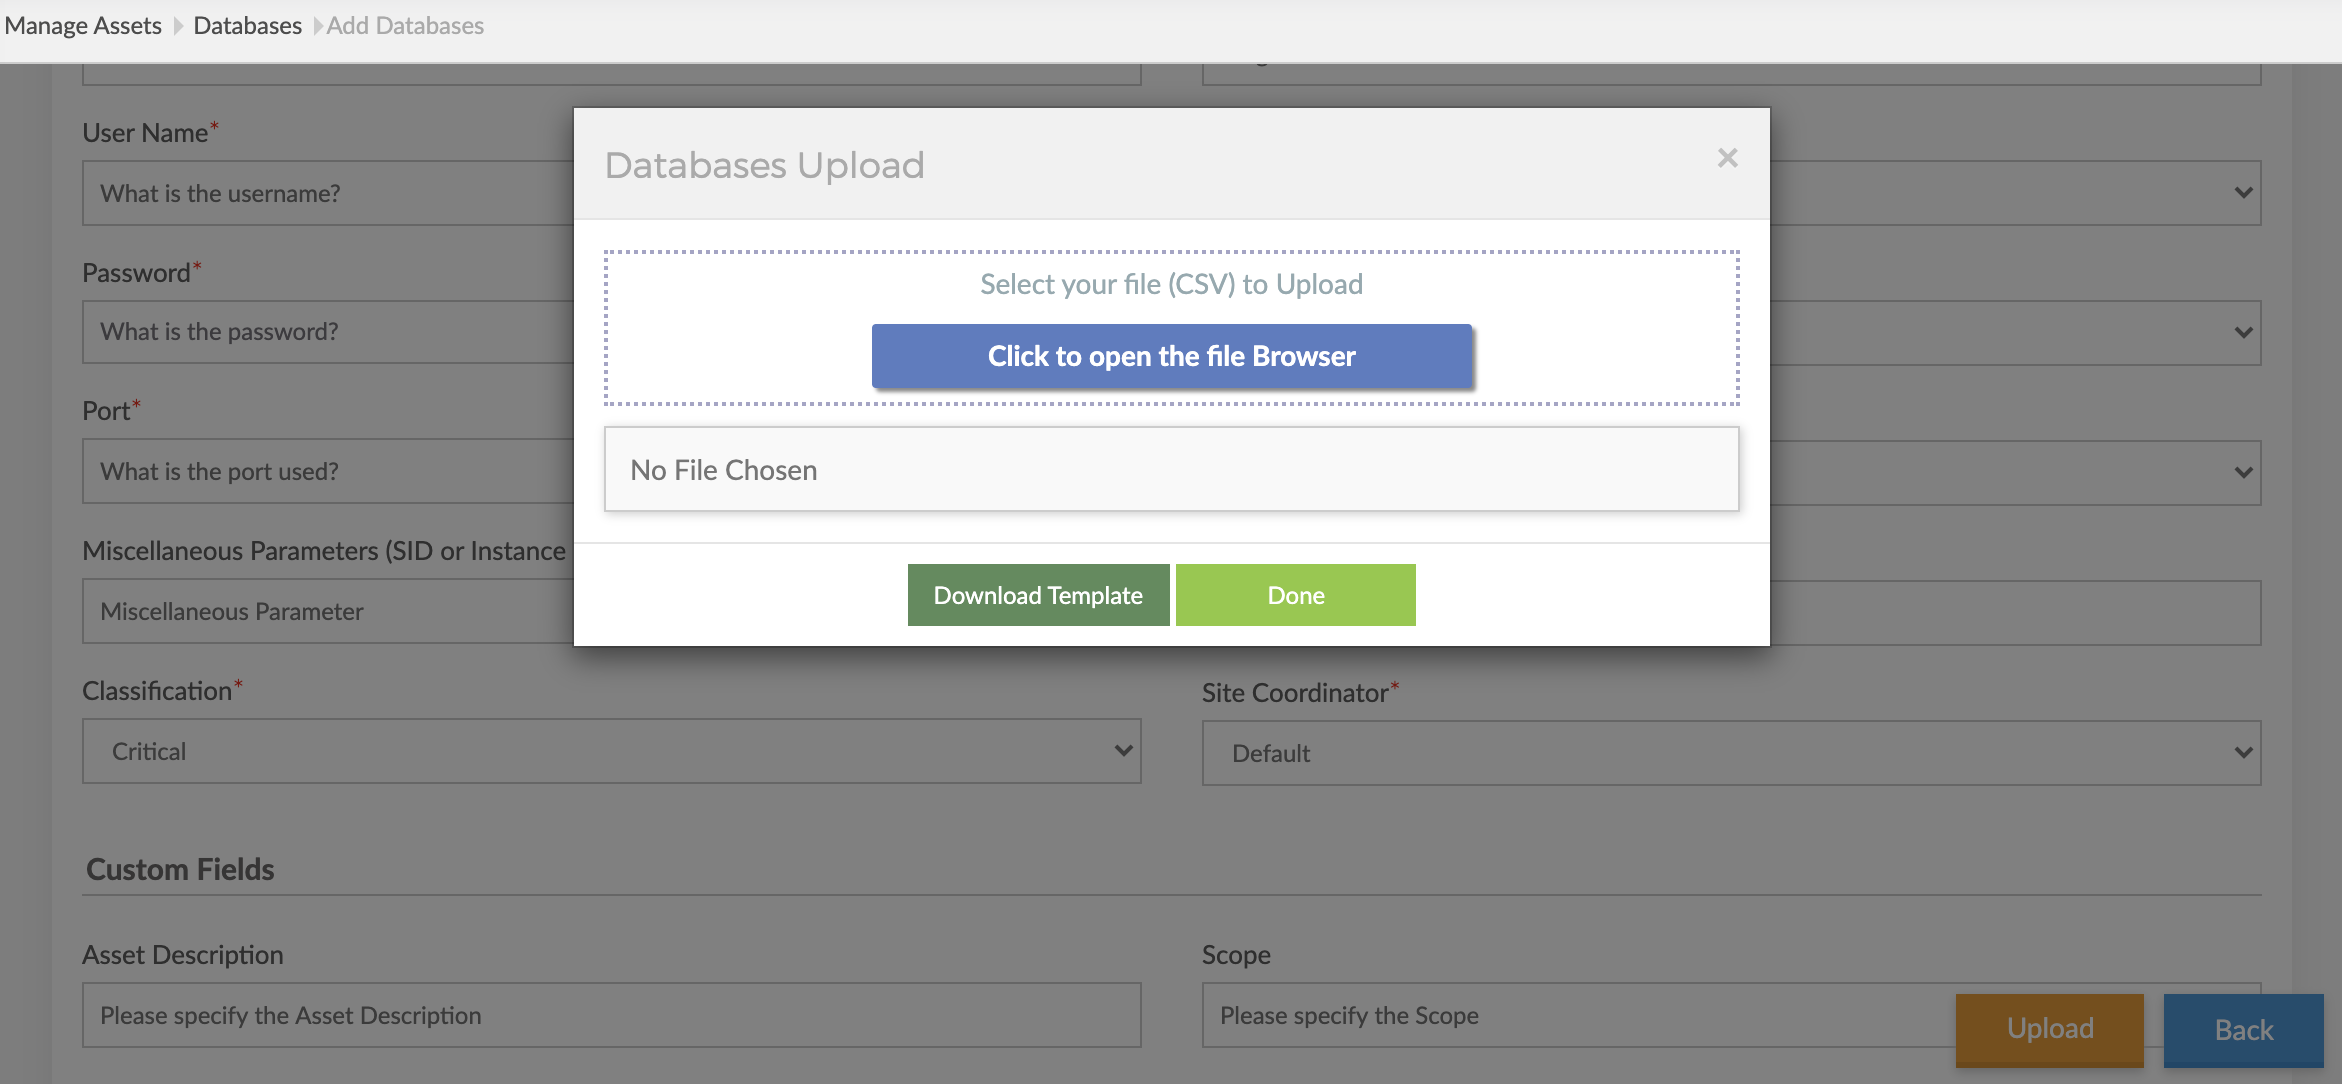
- Click on the Upload button available in the bottom-right corner.

- Download the new template to upload assets.
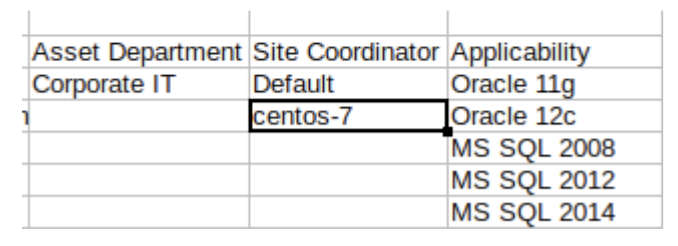
- The downloaded template contains a column, Site Coordinator. The allowed values will be part of the User Guide (present within the downloaded package). The list will contain the Friendly names of the installed site coordinators.

- Along with the asset details, enter a valid Site Coordinator friendly name to onboard multiple assets at once mapped to a different site coordinator and Upload
Edit assets in bulk to assign a different Site Coordinator
You can map multiple existing assets at once to a different site coordinator by editing them in bulk.
- Navigate to the Manage Assets page from the Left-Navigation and select either a specific technology under which you want to modify the assets OR select the View All Assets to list down all assets across all technologies.
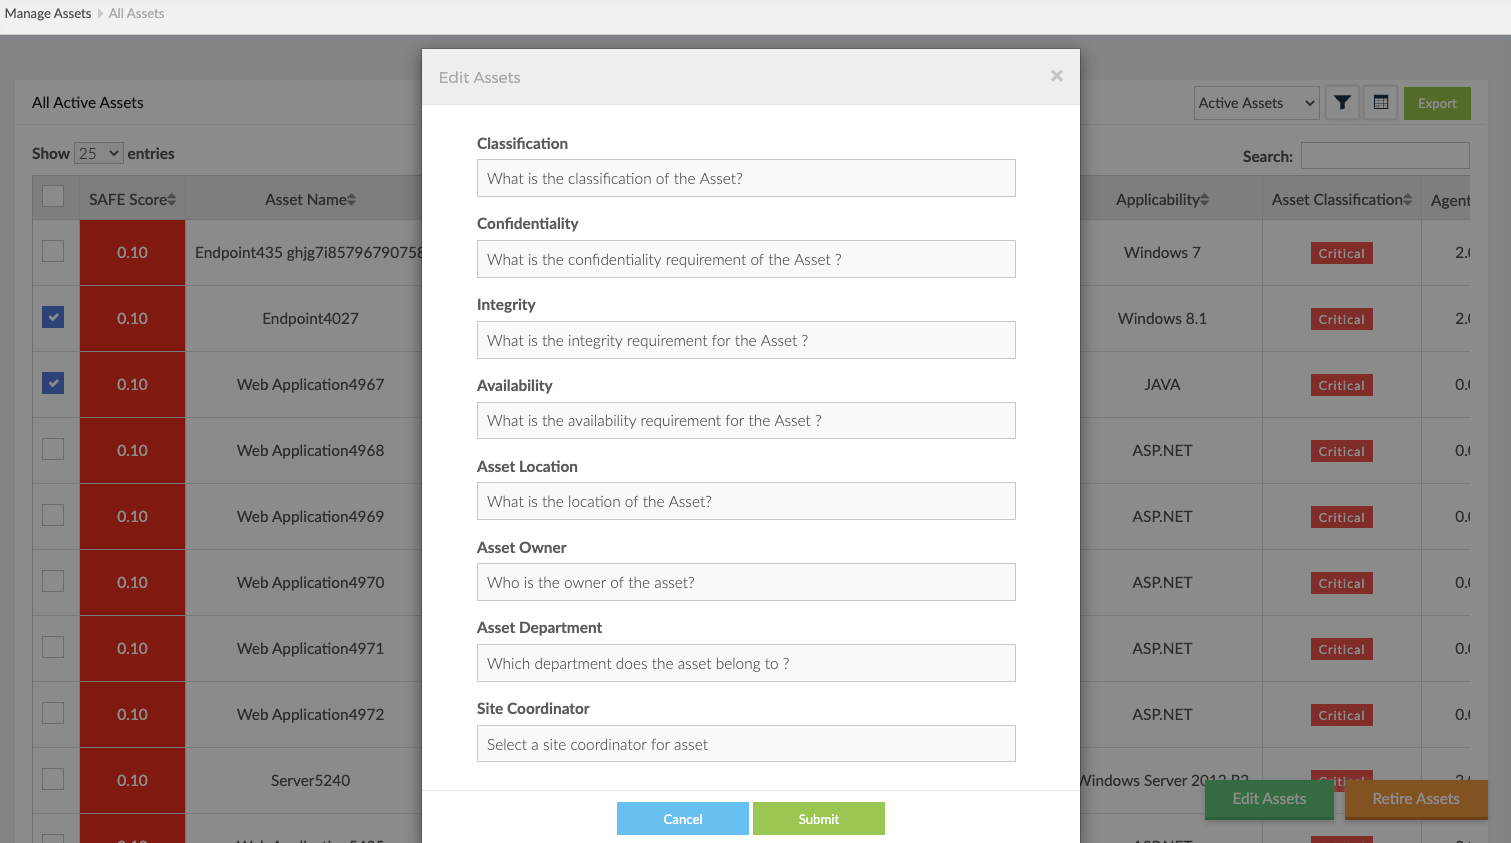
- Check the assets using the checkbox that you want to modify and click on the Edit Assets button in the bottom right.
.png)
- In the opened dialog box, a new dropdown will appear for the Site Coordinator, select an appropriate site coordinator (referenced by its friendly name).
- Click on Submit once you select the correct Site Coordinator for the checked assets. All the selected assets will now be mapped to the Site-Coordinator.

If the assets already have some scheduled time set for their assessments, the same schedule will be migrated to the new Site Coordinator and removed from the old one.
Filter Assets based on Site Coordinators
To identify what assets have been mapped to which site coordinators, you can filter these on the Manage Asset page.
- Navigate to the Manage Assets from the Left Navigation and select the appropriate technology or to view all assets across all verticals, click on the View All Assets button.
- Select the filter icon and select the Site Coordinator option. This will list all the available site coordinators in the system. Click on one or multiple options to filter the results based on the selected site coordinators.
.png)
Delete a Site Coordinator
To delete a Site coordinator and uninstall it completely from the remote machine:
- Navigate to the Agent & Site Management page from Administration > Asset Management > Agent & Site Management.
- Click the Delete icon available in the Action column of the Site Coordinator list.
.png)
- Click on the Delete button to confirm the deletion.
- Once the Site Coordinator is removed, uninstallation steps will be shown in a dialogue box to run it on the machine where the site coordinator is installed.
- Copy the given command and run it on the remote machine where the Site Coordinator is installed to completely remove it from the remote machine.

This is a non-recoverable activity. Once a Site Coordinator has been deleted, it cannot be recovered.


.png)


.png)
