About this document
This document provides step-by-step instructions to upload a VA report in SAFE.
Introduction
SAFE allows users to upload reports from any VA tool via the VA report upload functionality. The vulnerabilities report can be downloaded from the source VA tool, converted into a format SAFE supports, and uploaded to SAFE.
The VA Report Upload functionality in SAFE has the following capabilities:
It can handle files of sizes up to 1 GB and 1 Million rows of data.
It supports CVSS version 2.0 and CVSS version 3.x.
During the uploading process, a progress bar is displayed, providing real-time tracking of the file upload progress.
You can simultaneously upload multiple files even while other file uploads are still in progress.
Error reports generated during the VA report upload process highlight the failure details, along with the corresponding row numbers.
VA Report Template
Download the VA Report Template
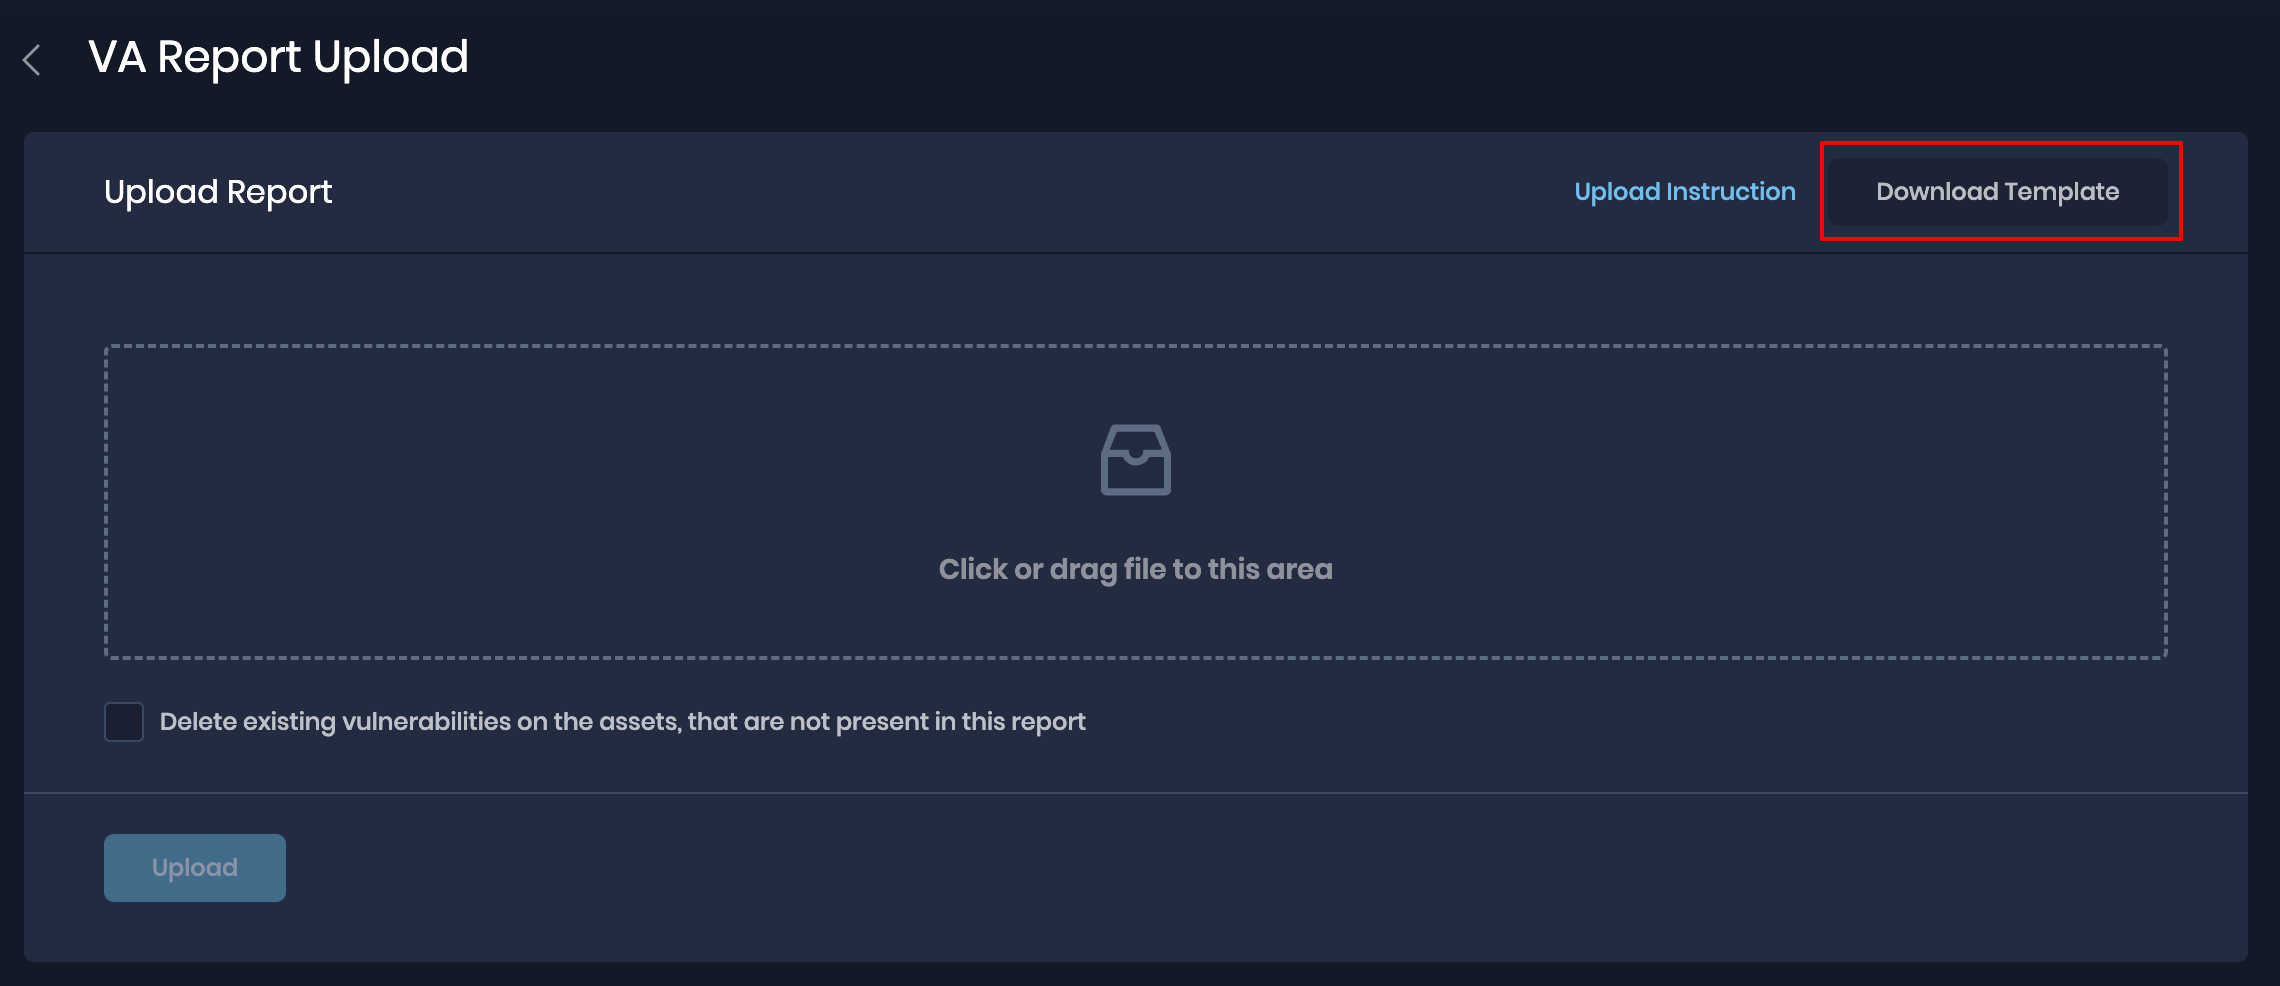
You can download the VA Report Template CSV file from SAFE.
Go to Integrations, on the left navigation.
Click the VA Report Upload card.
Click Download Template.
The system downloads a CSV template file on your system.
Instructions to fill the VA report template
Only CSV files in the provided format, up to 1 GB in size and containing up to 1 million rows, are allowed.
Each row denotes one instance of a vulnerability; if multiple rows with the same vulnerability and asset are found in the input file, they are treated as multiple instances of the same vulnerability for the asset.
The input Vulnerability Assessment (VA) report should contain a comprehensive list of all vulnerabilities associated with an asset in a single CSV. In the case of partial VA data, if the user has chosen to 'Qualify' existing vulnerabilities (i.e. if the 'Delete existing vulnerabilities on the assets that are not present in this report' checkbox is not selected on the SAFE UI), then the vulnerability data for that asset in SAFE may not accurately reflect the current status of existing vulnerabilities.
Basic VA fields
The following fields are available in the VA report template. The default mandatory fields are marked by an asterisk(*).
name*: Name of the vulnerability.
entity.name*: Name of the entity/asset for which the vulnerability is detected. In case the name of the entity is not known, hostname, IP address, fqdn, etc. can be provided.
severity.score*: Overall severity score of the vulnerability on a scale of 1-10.
cveIds*: CVE IDs tagged for the specified vulnerability. To add multiple CVE IDs for one row, add a comma to separate them. Eg. CVE-123-1234,CVE-234-2345.
Optional VA fields
status - Status of the vulnerability. Leaving the value blank will mark the vulnerability as "Failed" in SAFE.
Following status values are allowedFailed/Negative/Open/Reopened
Qualified/Positive/Fixed/Mitigated
AF (Accepted Failed)
description - Description of the vulnerability.
cvss3.baseScore: CVSS V3 base score of the vulnerability.
cvss3.temporalScore: CVSS V3 temporal score of the vulnerability.
cvss3.environmentalScore: CVSS V3 environmental score of the vulnerability.
cvss3.vector: CVSS V3 vector of the vulnerability.
cvss.baseScore: CVSS V2 base score of the vulnerability.
cvss.temporalScore: CVSS V2 temporal score of the vulnerability.
cvss.environmentalScore: CVSS V2 environmental score of the vulnerability.
cvss.vector: CVSS V2 vector of the vulnerability.
severity.level: Severity Level of the vulnerability. The following severity levels are allowed -
Critical
High
Medium
Low
Notes
If both "severity.score" and "cvss.baseScore" are present, the severity level is determined by the following order of precedence:
"severity.score"
"cvss.baseScore"
"severity.level"
In this prioritization, "severity.score" takes precedence over "cvss.baseScore," and both of them take precedence over the "severity.level" field.
source.name: Name of the source tool, e.g., Tenable.io , Qualys, etc. If the source is not known or the tool is not supported, leave the value blank or provide ‘Others.’
techniqueIds: ATT&CK Technique IDs tagged for the specified vulnerability. Refer Techniques - Enterprise | MITRE ATT&CK®. To add multiple Technique IDs for one row, add a comma to separate them. E.g. T1234, T2345.
owaspIds: OWASP IDs tagged for the specified vulnerability. To add multiple OWASP IDs for one row, add a comma to separate them. E.g. A01:2021, A02:2021.
cweIds: CWE IDs tagged for the specified vulnerability. To add multiple CWE IDs for one row, add a comma to separate them. E.g. CWE-22, CWE-23.
port: Port for which the vulnerability was found.
protocol: Protocol for which the vulnerability was found. Can be TCP or UDP or can be left blank.
evidence.observationText: Observation about the vulnerability.remediation.description: Remediation descriptions or steps for the vulnerability.
remediation.reference: Reference URL for the remediation. remediation.impact: Impact on the entity if the vulnerability is remediated.entity.type: Providing this value will help onboard the asset in the right asset type in SAFE.
entity.fqdn: Fully Qualified Domain Name of the entity.
entity.criticality: Criticality of the entity. Can be one Critical, High, Medium or Low.
entity.confidentialityRequirement: Confidentiality Requirement of the entity. Can be one of High, Medium, or Low.
entity.integrityRequirement: Integrity Requirement of the entity. Can be one of High, Medium, or Low.
entity.availabilityRequirement: Availability Requirement of the entity. Can be one of High, Medium, or Low.entity.ipv4: IPV4 address of the entity.
entity.region: Region in which the entity is deployed.entity.accessibility: Defines the accessibility of an entity from an end-user perspective. It can take the values - “External” or “Internal” based on whether the entity is internal or external network- facing for an end-user.
entity.version: Version of the entity.
entity.url: URL of the entity in case the entity.type belongs to Web Applications. E.g., http://safe.security
firstSeen: Timestamp when the vulnerability was first observed in ISO string format. Eg. 2018-12- 05T05:21:04.000Z
expiryDate: Timestamp when the vulnerability should expire for the corresponding asset in ISO string format. Eg. 2018-12-05T05:21:04.000Z
Upload VA report
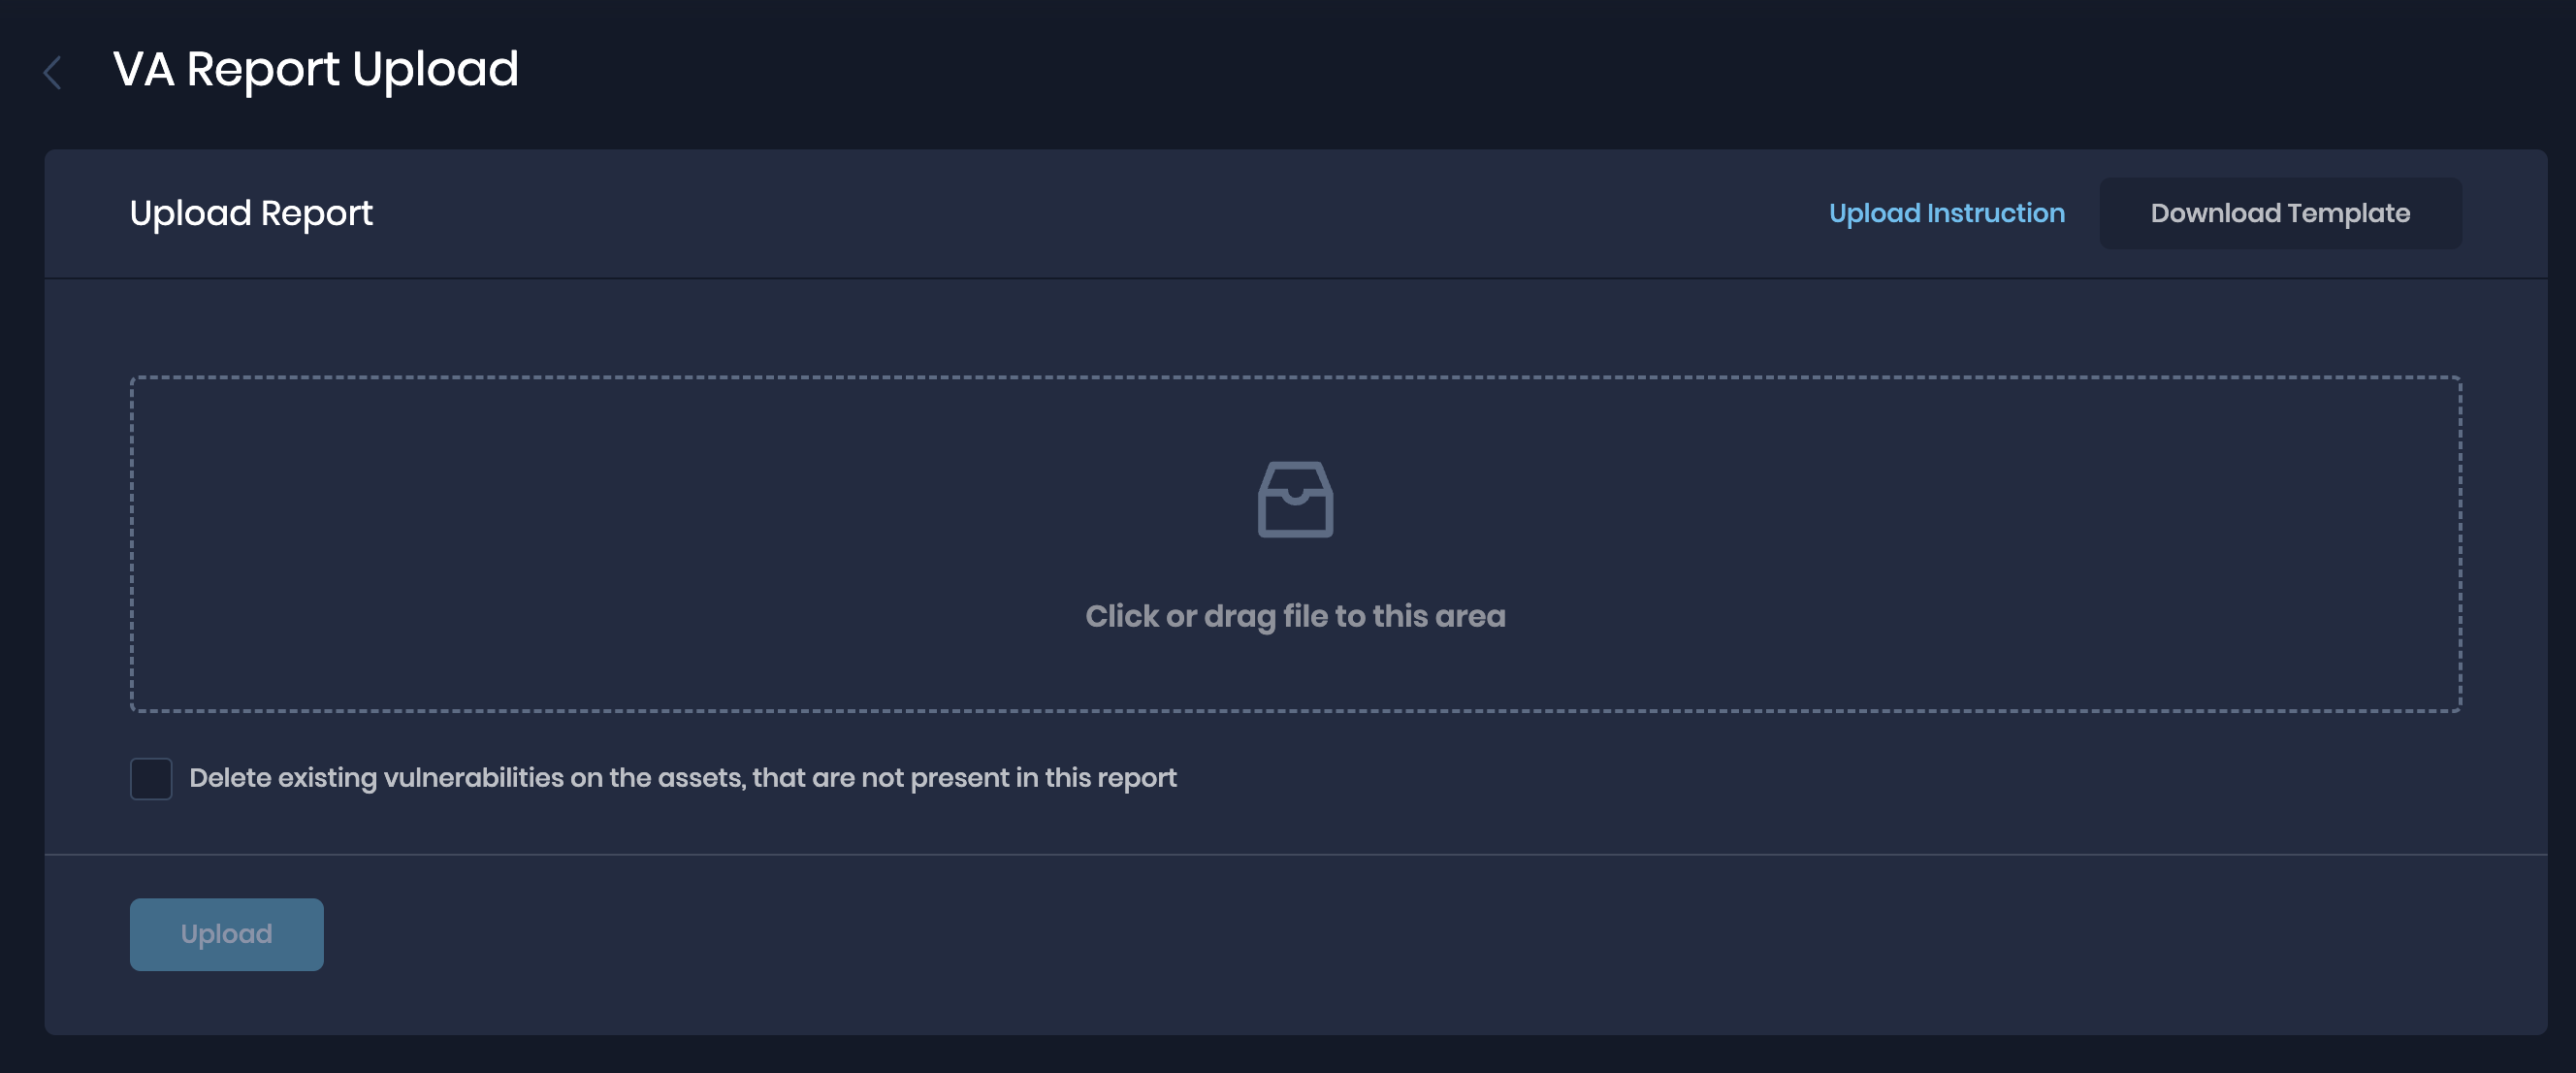
Once you have the report prepared, perform the following steps to upload the report:
Navigate to the Integrations page.
Click the VA Report Upload card.
On the VA Report Upload page, drag the report CSV file directly or browse and upload the file.
If you want to delete existing vulnerabilities for the assets in the report being uploaded, mark the checkbox for the same.
Click the Upload button.
Once the report is uploaded, the system displays the report in the Upload History table.
Upload VA report from any source
Many Vulnerability Assessment (VA) tools offer the functionality to export reports, providing various templates for presenting vulnerability data. In our system, users possess the flexibility to include an additional template CSV file, allowing them to map source fields to SAFE-standardized fields. This, in conjunction with the original VA report CSV from the source tool, facilitates the seamless ingestion of data from the source tool into SAFE.
Create a template CSV named mapping_template.csv for mapping columns of source tool VA Report CSV to SAFE standardized template columns.
Source Column | Safe Column |
|---|---|
vulnerability.id | name |
dns | entity.name |
source | source.name |
ip_address | entity.ipv4 |
dns | entity.fqdn |
vulnerability.summary | description |
port | port |
risk_rating | severity.score |
vulnerability.ref_sn_vul_third_party_entry.cves_list | cveIds |
state | status |
Your title goes here
The headers in the mapping_template.csv file, specifically the "source column" and "safe column" are case-sensitive. It is crucial to maintain these headers in all lowercase formats.
Compress the mapping_template.csv along with the source tool VA Report CSV into a zip file.
Once you have the zip prepared, perform the following steps to upload the report:
Navigate to Integrations.
Click on the VA Report Upload card.
On the VA Report Upload page, drag the compressed zip file directly or browse and upload the file.
If you want to delete existing vulnerabilities for the assets in the report being uploaded, mark the checkbox for the same.
Click the Upload button.
Once the report is uploaded, the system displays the report in the Upload History table.
Check Upload History
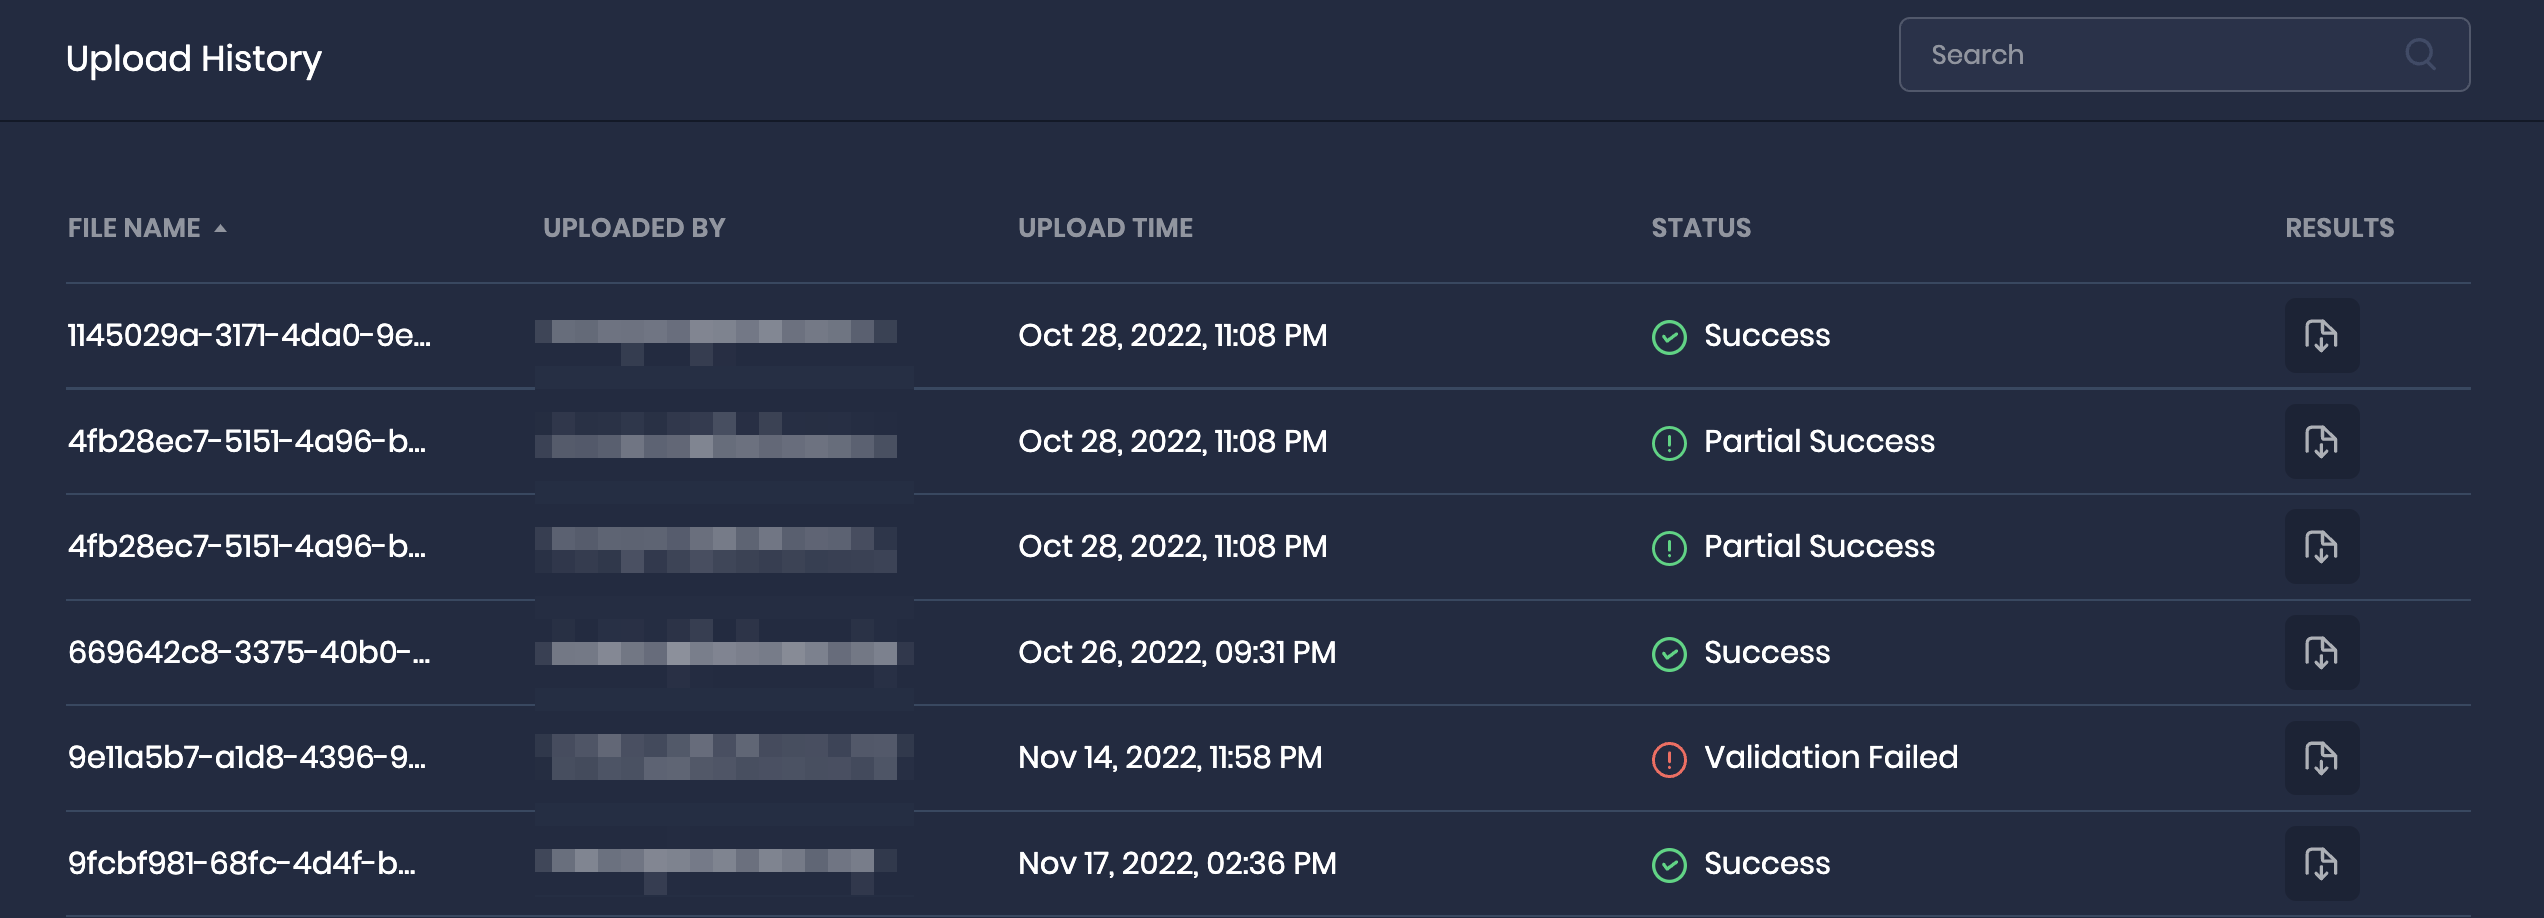
The Upload History table provides information about the report uploads, including their file name, the user who uploaded the report, the timestamp when the report was uploaded, and the current processing status of the report.
Once the report processing is complete, the status of the report will be updated to either Success, Failed, Partial Success, or Validation Failed.
In case the report ends up with a failure status, the system provides the user an option to download the processed CSV file with per-row outcomes. This can help in understanding the reasons why the report was not processed successfully.
Processing Status
While uploading a VA report, you can come across the below processing statuses:
In Progress: If the report has been accepted by the system for processing and the processing has started, then the report status will be In Progress.
Validation Failed: During the report processing if the system encounters any row that does not qualify for the data validation checks, the report is moved to Validation Failed status. In this scenario, the user can download the result CSV remediate the validation issues given in the error column for each row, and re-upload the CSV.
Your title goes here
If the number of rows with validation error is more than 10000, then the processing will stop. Only the assets with 0 validation errors will get processed from the report.
Failed: During the report processing, if the report data is valid, but the system fails to do the vulnerability assessment for any assets provided in the report, then the report ends up in a Failed state.
Partial Success: During the report processing, if the report data is valid, but the system fails to process vulnerability assessment for some of the assets, and others get processed, then the report ends up in a Partial Success state. In this scenario, one can check the result CSV for the assets that failed in processing and possible reasons.
Success: If all assets and their VA data provided in the CSV report are successfully processed, the report ends up in a SUCCESS state. In this scenario, one can check the result CSV for the summary of the assessment. The summary will contain “Processed Assets“, “Failed Assets“, “Skipped Assets“ and “Total Vulnerabilities“.
FAQs
How many reports can be processed in parallel?
SAFE can process up to 5000 reports simultaneously. You can continue uploading reports even if the previous report is still in progress.
When are Technique IDs in CSV ignored in SAFE?
SAFE has the capability to correlate CVE, CWE, and OWASP IDs to ATT&CK technique IDs. If the provided CSV file contains any of these identifiers (CVE, CWE, or OWASP Ids), SAFE will give higher priority to its own intelligence and use the corresponding ATT&CK technique IDs associated with those identifiers. However, if the CSV file does not contain any of the mentioned identifiers (CVE, CWE, or OWASP IDs), only then will the technique IDs provided in the CSV file be taken into consideration.
How are CVSS (Common Vulnerability Scoring System) and CVSS3 metrics handled in the CSV data?
In cases where both CVSS and CVSS3 metrics are present within the CSV data, a priority hierarchy is established to ensure accurate assessment:
CVSS3 Takes Priority: If both CVSS and CVSS3 metrics are available, the system gives precedence to CVSS3. The CVSS3 metric will be considered the primary reference for scoring and analysis.
This approach ensures that the most recent and comprehensive vulnerability metrics, represented by CVSS3, are utilized for assessing vulnerabilities within the CSV data.
What Determines the Scoring Priority for a Vulnerability in SAFE?
The scoring priority for a vulnerability in SAFE follows a specific hierarchy based on the presence of severity and CVSS (Common Vulnerability Scoring System) metrics. Here is how the priority is established:
If both severity.score and cvss.baseScore are provided, the system will consider severity.score as the final score for the vulnerability.
If severity.score is not provided but cvss3.baseScore or cvss.baseScore is present, the system will consider cvss3.baseScore. or cvss.baseScore as the final score.
In cases where neither severity.score nor cvss.baseScore is provided, the system will assign a final score of "0" to the vulnerability.
This prioritization framework ensures that vulnerabilities are scored accurately and consistently within the SAFE platform.
How is the onboarding source determined within the system?
The onboarding source configuration is managed based on the presence of the source.name field:
Custom Onboarding Source: When the source.name field is provided in the data, the system will use this value as the designated onboarding source. This allows for flexibility in specifying a distinct onboarding source tailored to the specific context.
Default Onboarding Source: In scenarios where the source.name field is not provided, the system will automatically assign the default onboarding source as safe.security.vareport. This ensures a standardized and consistent onboarding approach.
This configuration mechanism enables effective management of onboarding sources, catering to both customised requirements and default settings within the system.
What actions can be taken when encountering a "Validation Failed" status?
When the status of a process indicates "Validation Failed," the following steps can be taken to address the issue:
Download Error Report CSV: In the results section under Upload History, you will have the option to download an error report CSV file. This file provides a comprehensive overview of the validation errors encountered during the process.
Detailed Error Analysis: Within the downloaded error report CSV, each row contains an "error" column that specifies the exact nature of the validation error for that particular entry. This detailed information facilitates a thorough understanding of the validation issues on a granular level.
By utilizing the error report CSV and examining the "error" column, you can gain insights into the specific validation errors that need to be addressed, enabling effective troubleshooting and resolution of issues.
How are validation errors affecting entity onboarding handled within SAFE?
In situations where a validation error is encountered against a specific entity in any given row of data, the following is applied to ensure data integrity and accuracy:
Comprehensive Entity Approach: When a validation error is identified for an entity in any row, the system employs a comprehensive approach. All rows associated with that particular entity, regardless of their individual correctness, will be disregarded.
No Partial Onboarding: The system ensures that partial onboarding is avoided for the affected entity. This approach guarantees that an entity is not partially onboarded if any validation error is detected within its data.
This stringent mechanism ensures that entities with validation errors are not onboarded onto the SAFE platform, promoting consistency and data quality across the system.
How to do entity-only onboarding in SAFE?
In scenarios where the "name" column is left empty in the CSV data, while the "entity.name" field contains valid information, the entity specified in the "entity.name" field will still be onboarded onto SAFE having zero vulnerabilities.
Under what circumstances does an entity get skipped during processing?
Entities are skipped during processing when they exceed a predefined vulnerability count threshold, specifically surpassing 5000 vulnerabilities.