1. About this document
This document provides step-by-step instructions to configure Microsoft 365 Defender in SAFE.
Note:
This integration only supports the standard policies or templates in the source product for use in Risk Scenario calculations in SAFE based on their mapping to FAIR CAM controls
2. Introduction
Note
Make a note that for misconfiguration availability, products or services need to be configured in Microsoft 365 Defender, and prerequisites must be met. Click the "Learn more" link adjacent to the product name for easy reference to check prerequisites and access step-by-step configuration instructions.
SAFE integrates with Microsoft 365 Defender to fetch the configuration assessment of the following Microsoft products:
Microsoft Teams (Enabled by Default)
Microsoft 365 Exchange Online (Enabled by Default)
Microsoft SharePoint Online (Enabled by Default)
Microsoft Azure AD (Enabled by Default)
Microsoft 365 (Enabled by Default)
Microsoft Defender for Endpoint (Learn more)
Microsoft Intune
Microsoft Information Protection
Microsoft Defender for Identity (Learn more)
Microsoft Defender for Cloud Apps (Learn more)
App governance (Learn more)
Citrix ShareFile (Learn more)
Docusign (Learn more)
Github (Learn more)
Okta (Learn more)
Salesforce (Learn more)
ServiceNow (Learn more)
Zoom (Learn more)
3. Prerequisites
Azure Active Directory Primary Domain.
Azure Active Directory application with SecurityEvents.Read.All permission.
Client ID and Client Secret associated with the above application.
SAFE admin access.
4. Generate Connection Details (Client ID and Client Secret)
Login to Microsoft 365 admin center.
From the left navigation menu, navigate to Azure Active Directory (This will open a new tab).
Click on the Overview from the left navigation.
Here, you can see the value for the Primary Domain. Copy and save this value to use while configuring Microsoft 365 Defender in SAFE in the next section.
Alternatively, you can open SAFE in a new tab, go to the Microsoft 365 Defender configuration page, and enter the Primary Domain in the respective field.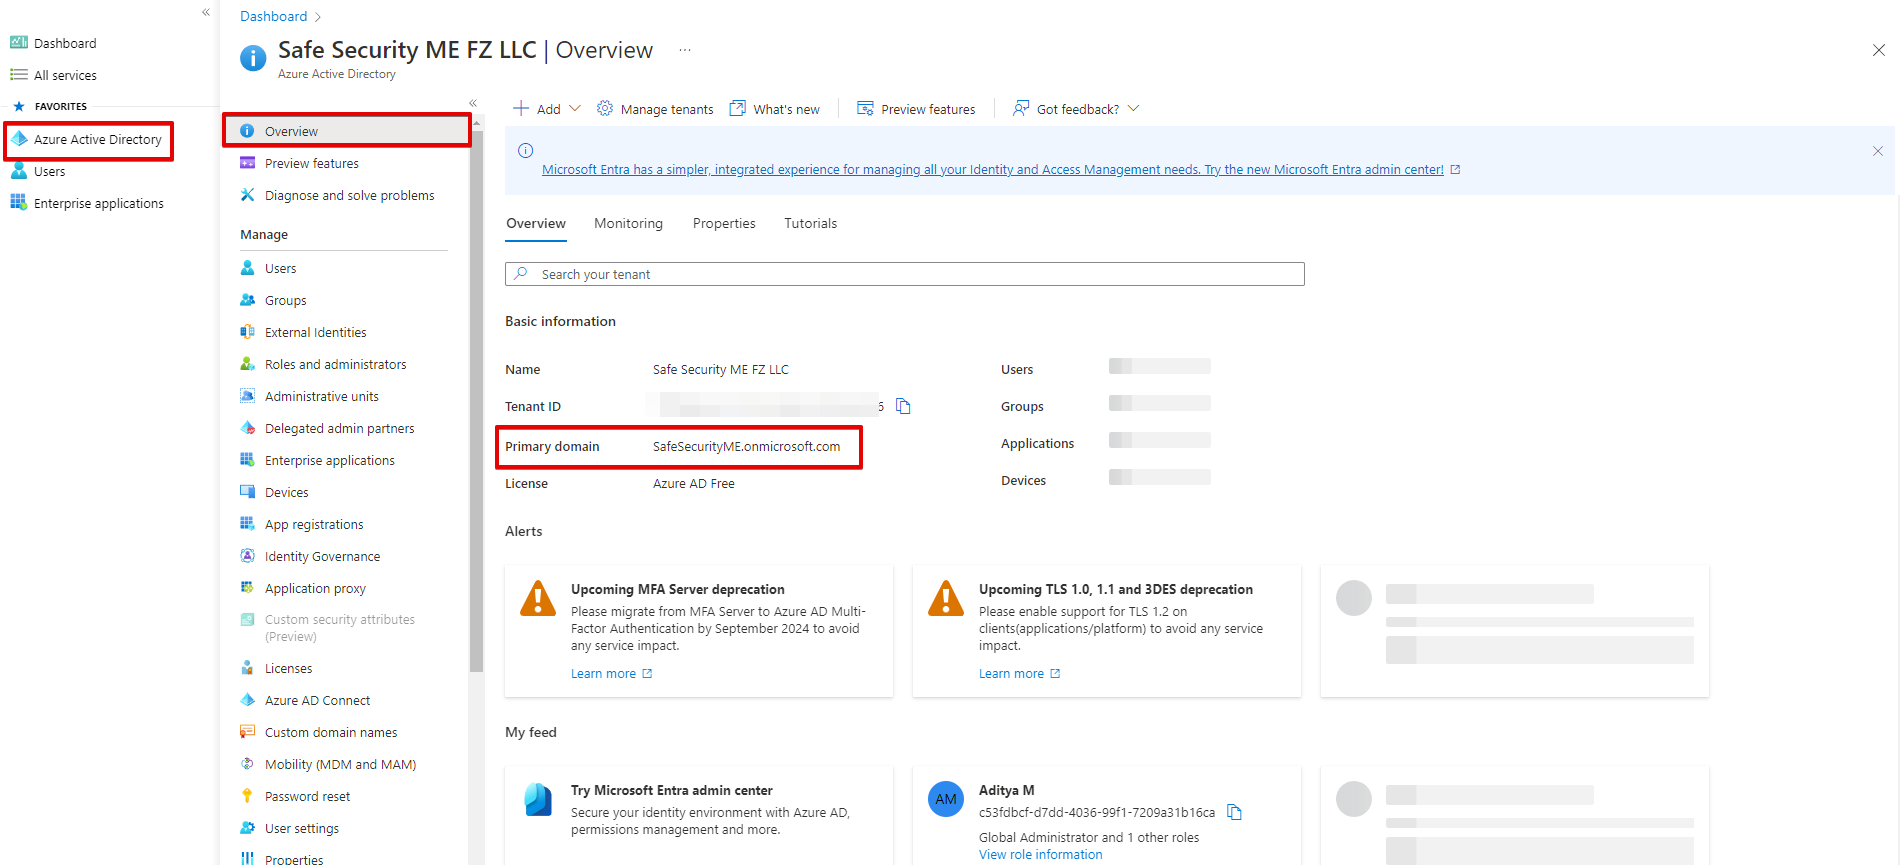
Expand Applications, then select the App registrations option from the left navigation.
At the top of the page, click New registration.
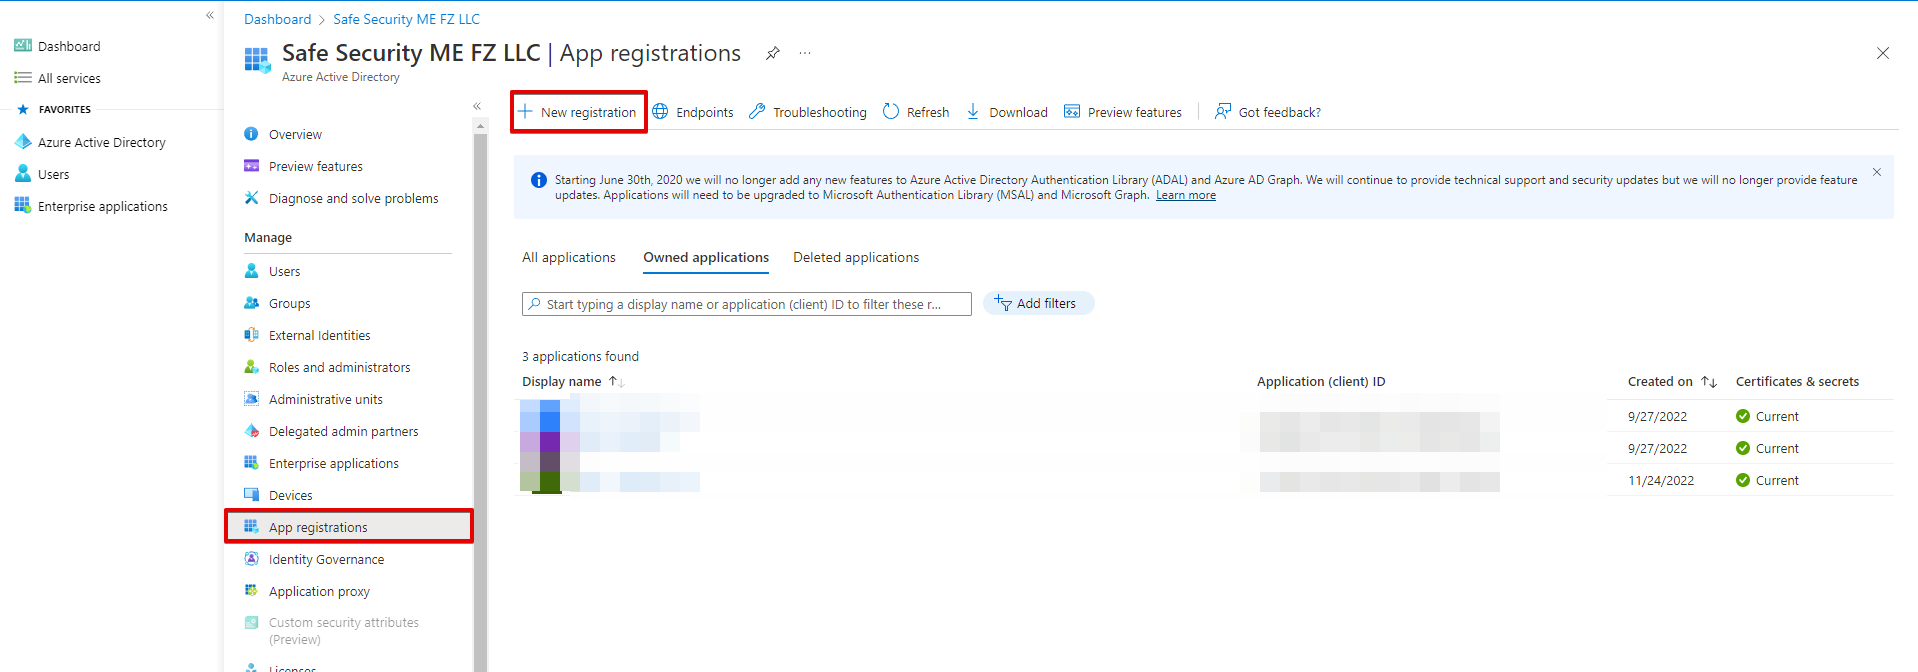
Enter a Name and click the Register button. All other settings can stay as default.

Copy and save the value for the Application (Client) ID to use while configuring Microsoft 365 Defender in SAFE in the next section.
Alternatively, you can paste the Client ID on the Microsoft 365 Defender configuration page in SAFE.
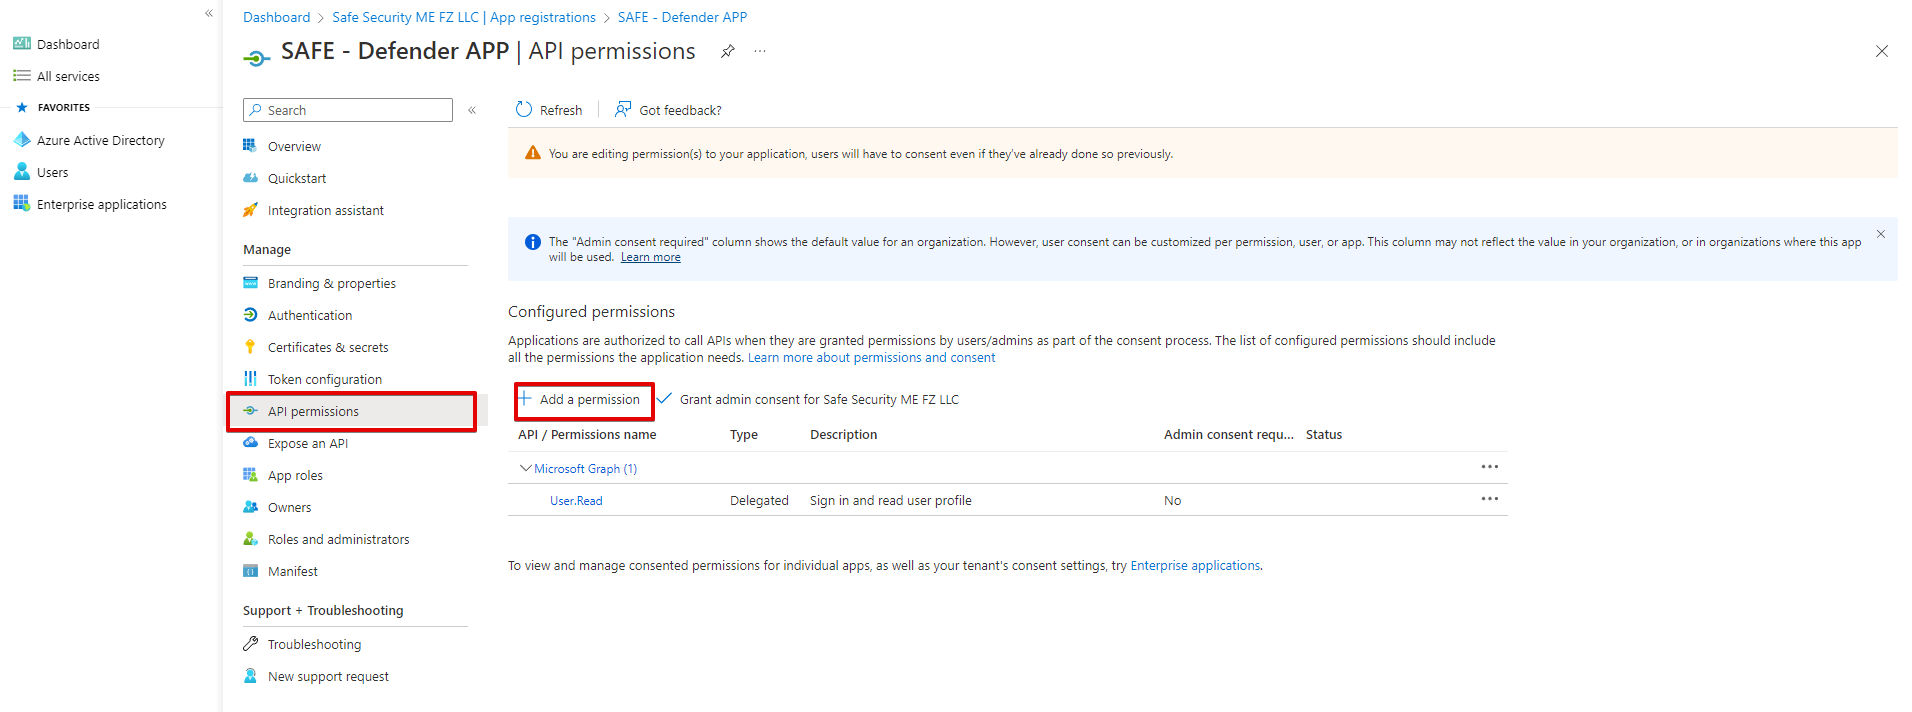
Next, click the API Permissions from the left navigation.
Click Add a permission option availabe in the center of the page.
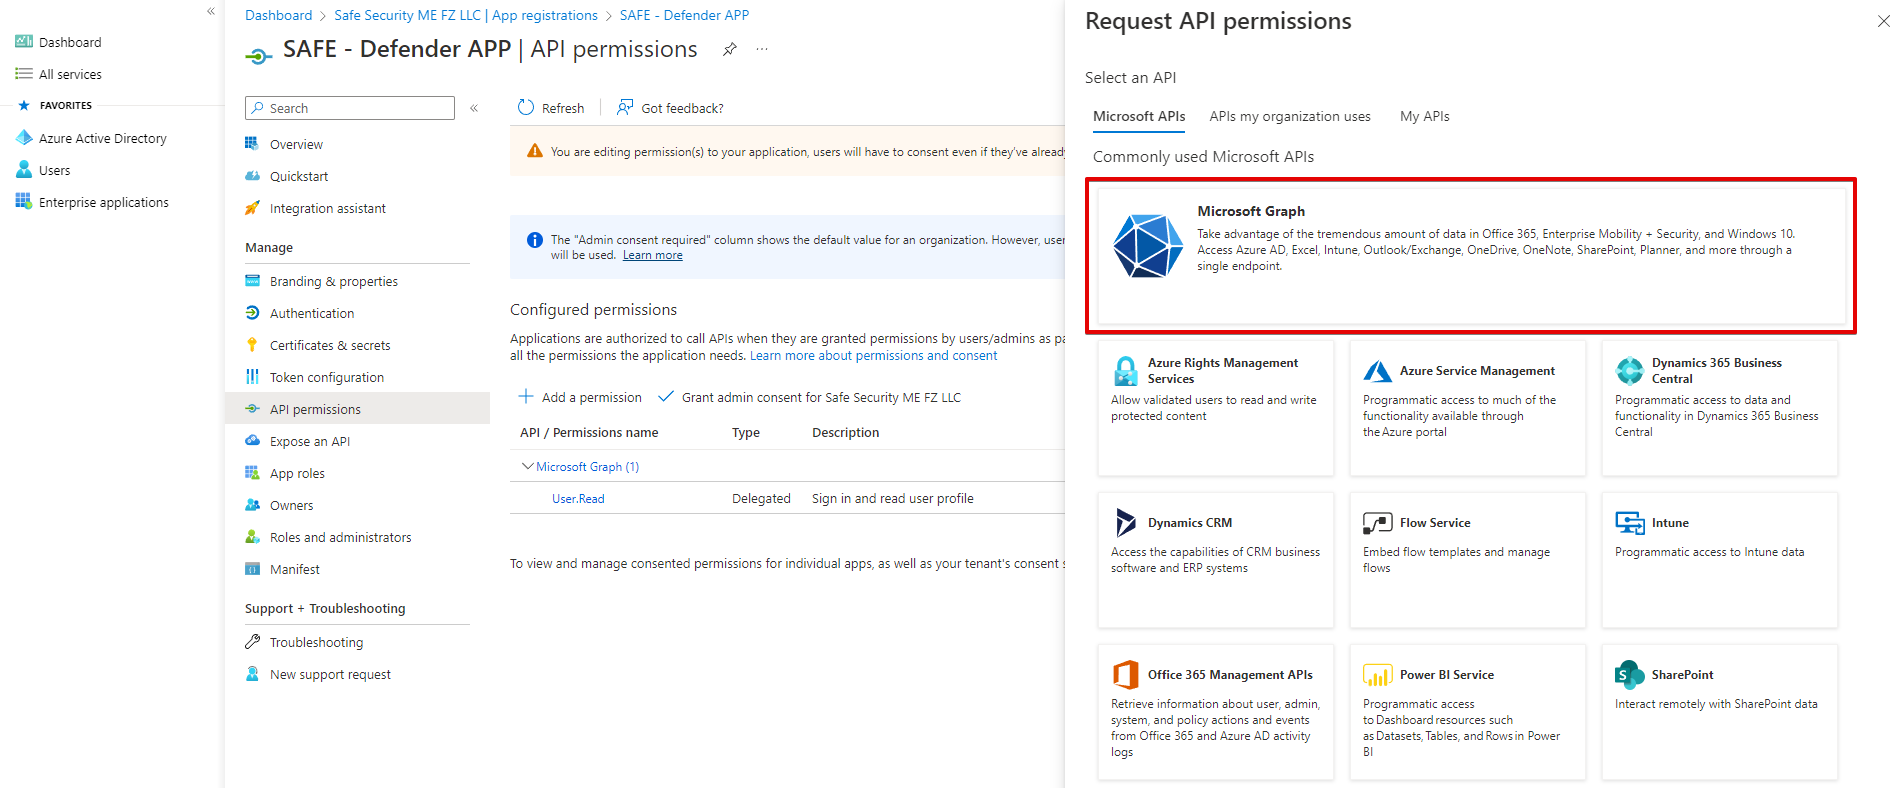
From the options, select Microsoft Graph.
Click on the Application permissions option.
Search for SecurityEvents.Read.All and tick the box to select it.
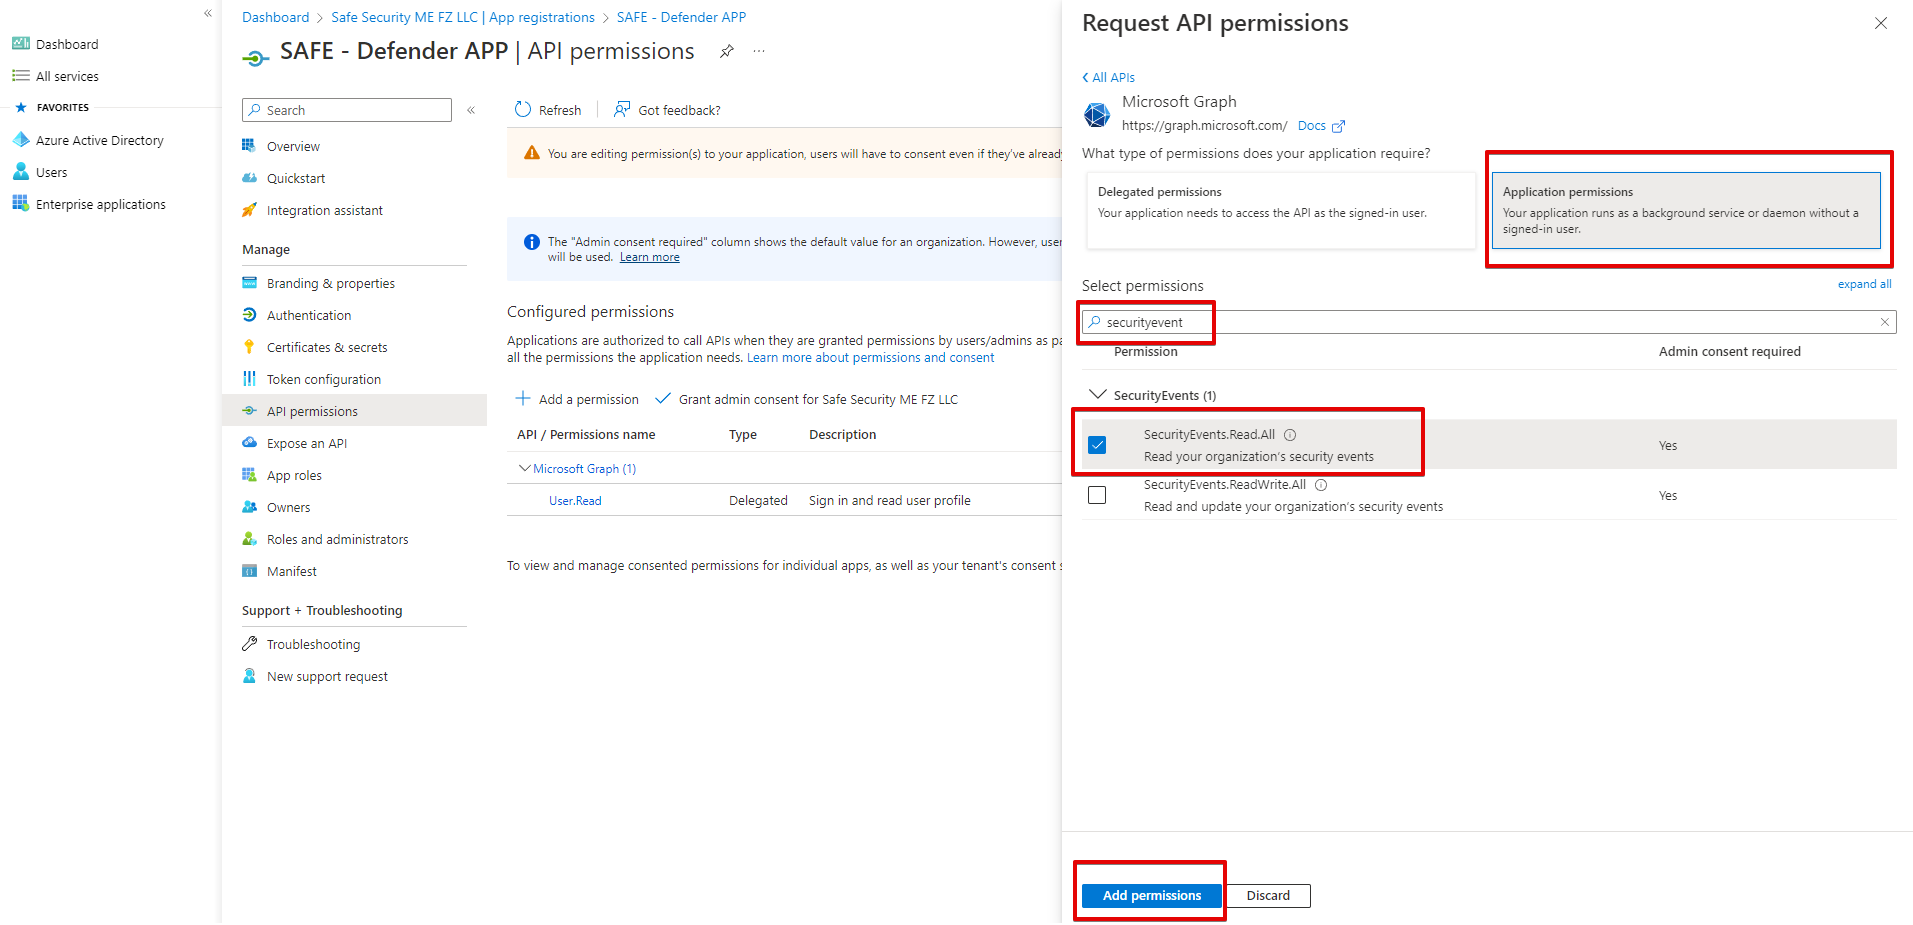
Click the Add permissions button.
Admin Consent
You will now need to grant admin consent to apply this permission. If you do not have the privileges to do this, reach out to your administrator to do this.
Select Certificates & secrets from the left navigation.
Click on the New client secret option available in the center of the page.
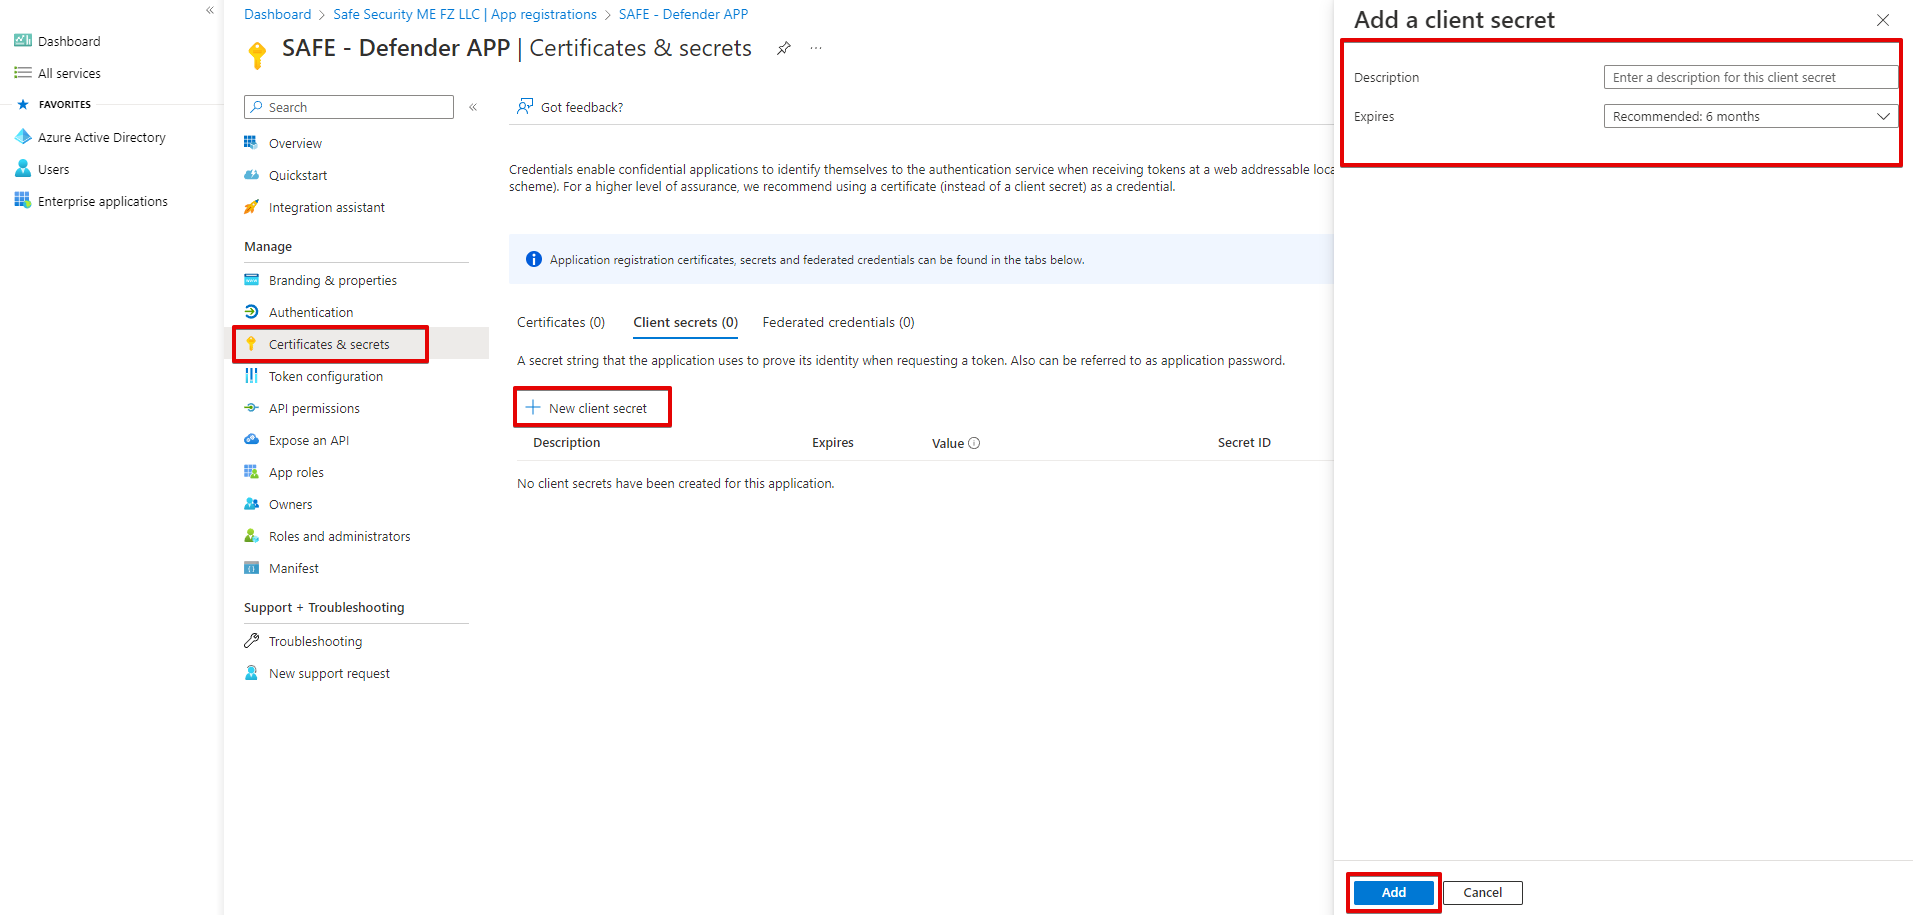
Enter a Description and select an option from the Expiry drop-down.
Click the Add button at the bottom of the page.
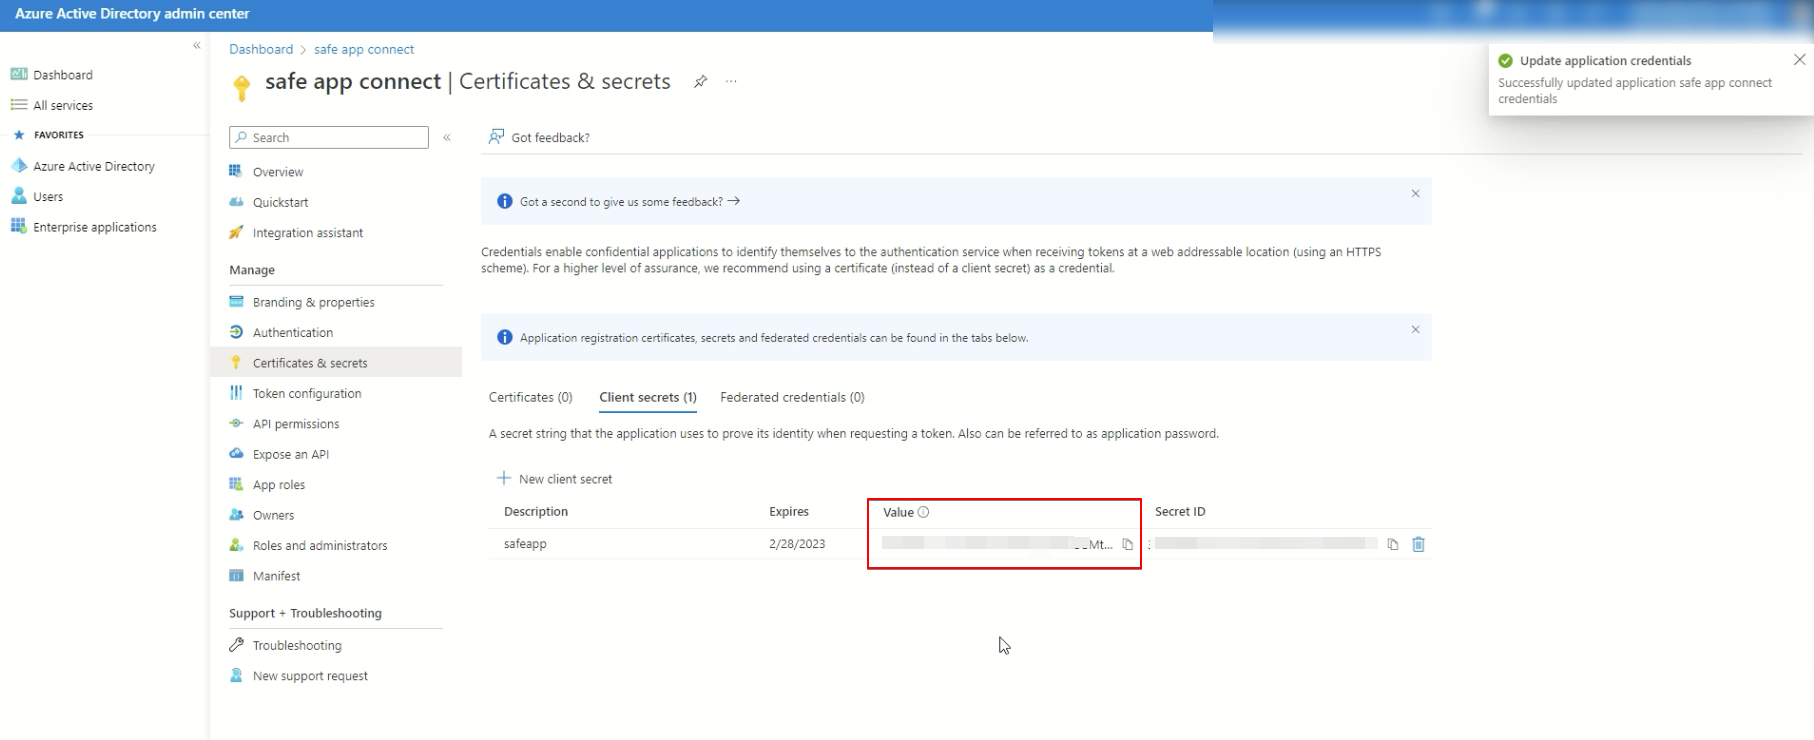
Client Secret value is availabe in the Value column. Copy and save this value to use while configuring Microsoft 365 Defender in SAFE in the next section.
Alternatively, you can paste the Client Secret on the Microsoft 365 Defender configuration page in SAFE.
5. Configure Microsoft 365 Defender in SAFE
Navigate to Integrations.
Click the Microsoft 365 Defender card.
Enter the Primary domain, Client ID, and Client Secret generated in section 4.
Select the Auto Sync frequency in a number of days.
In the Product Exclude List drop-down, select the products you do not want to fetch the assets and misconfiguration for in SAFE.
Click on the Test Connection button. A success message appears when the connection is successful.
Click the Save button.
Click the Sync Now button to trigger an on-demand sync.
Upon a successful sync, the system adds the Microsoft 365 Defender assets to SAFE, and their assessments and scores can be reviewed. You can track the status of the sync in the History table.
View results
Scroll down to the Finding View and Asset View on the configuration page.
Findings View: This tab displays all the findings details fetched from MS 365 Defender.
View Assets: This tab displays all the assets pulled from Microsoft 365 Defender.
6. History
Learn More about Integration History here.
8. SAFE's Outgoing IP Addresses
Click here to find the outgoing IP addresses of SAFE. All traffic to any integrations in SAFE will see one IP address as the source IP of the incoming connection.
9. FAQs
Q. How does the Control Status get calculated?
Using a field named "scoreInPercentage" from the Defender API, which is equivalent to points achieved in the UI (but the UI shows it in points, while the API provides it in %), to determine if the configuration is done properly or not.
Examples
In the UI, the “Points Achieved“ is shown as 1/1, then the API response corresponding to that will be 100%, and the status will be "Completed." If the Status in the UI is "Completed," then in SAFE UI, the Control Status will be Qualified because the configuration is done properly.
In the UI, the "Points Achieved" is shown as 0/10, then the API response corresponding to that will be 0%, and the status will be "To address." If the Status in UI is “To address," then in SAFE UI, the Control Status will be Failed because the configuration is not done properly and needs to be remediated.
In the UI, the "Points Achieved" is shown as 0.89/9, then the API response corresponding to that will be 11%, and the status will be "To address." If the Status on UI is "To address," then in SAFE UI, the Control Status will be Failed because the configuration is not done properly and needs to be remediated.
Note
If the "Points Achieved" shown in the UI is 1/1, 2/2, or M/N (Where M and N are always equal), then the status will be "Completed," and "scoreInPercentage" will always be 100%. But if the "Points Achieved" shown on the UI is 0/1, 1/2, or M/N (Where M is Less than N), then the Status will be “To address" and “scoreInPercentage" will always be less than 100%.
.png)